Chapter 1: Connections and Setup
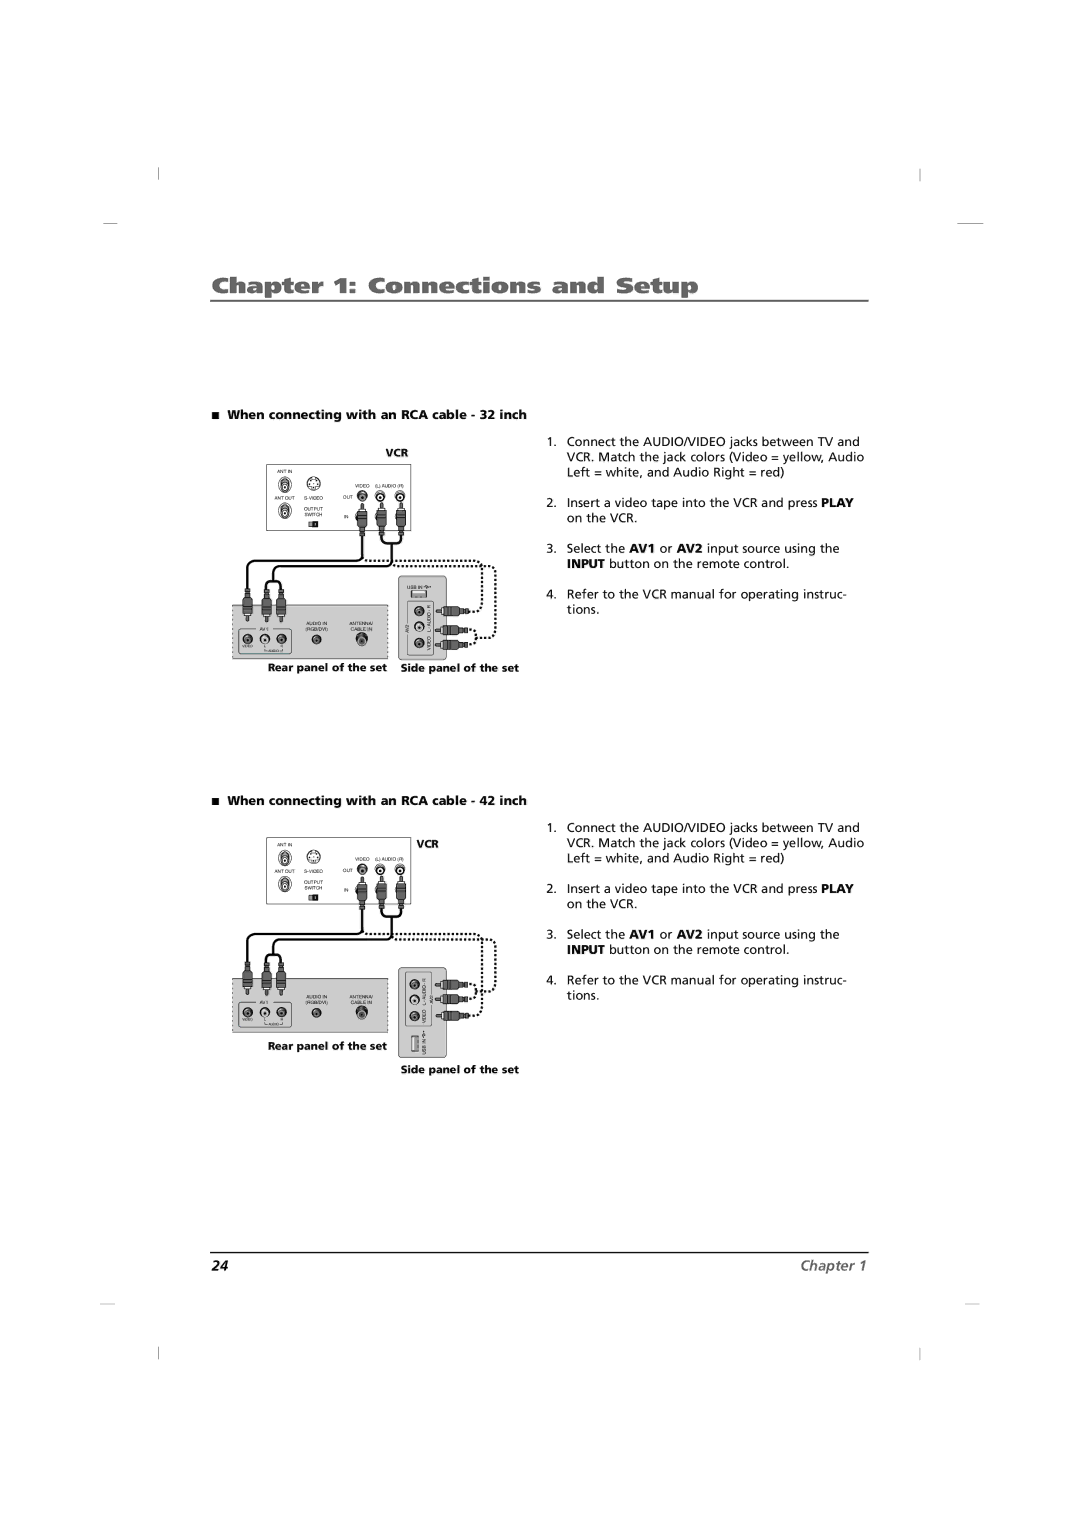
AWhen connecting with an RCA cable - 32 inch
|
|
| VCR |
ANT IN |
|
|
|
|
| VIDEO | (L) AUDIO (R) |
ANT OUT | OUT |
| |
| OUTPUT |
|
|
| SWITCH | IN |
|
|
|
|
|
|
| USB IN |
|
|
|
|
| - R |
AV1 | (RGB/DVI) | CABLE IN | AV2 | |
| AUDIO IN | ANTENNA/ |
|
|
VIDEO L | R |
|
| VIDEO |
| AUDIO |
|
|
|
Rear panel of the set | Side panel of the set | |||
AWhen connecting with an RCA cable - 42 inch
ANT IN |
|
| VCR |
|
|
| |
|
| VIDEO | (L) AUDIO (R) |
ANT OUT | OUT |
| |
| OUTPUT |
|
|
| SWITCH | IN |
|
|
|
| - R |
|
AV1 | (RGB/DVI) | CABLE IN | AV2 | |
| AUDIO IN | ANTENNA/ |
|
|
VIDEO L | R |
| VIDEO |
|
| AUDIO |
|
|
|
Rear panel of the set | IN |
| ||
USB |
| |||
Side panel of the set
1.Connect the AUDIO/VIDEO jacks between TV and VCR. Match the jack colors (Video = yellow, Audio Left = white, and Audio Right = red)
2.Insert a video tape into the VCR and press PLAY on the VCR.
3.Select the AV1 or AV2 input source using the INPUT button on the remote control.
4.Refer to the VCR manual for operating instruc- tions.
24 | Chapter 1 |