Menu Language
English |
Français |
Español |
TV Location
Retail |
Home |
Energy Star compliant
Complete the Initial Setup
The menu system in your TV allows all of the TV’s features to work properly. The first time you turn on your TV, the language screen appears.
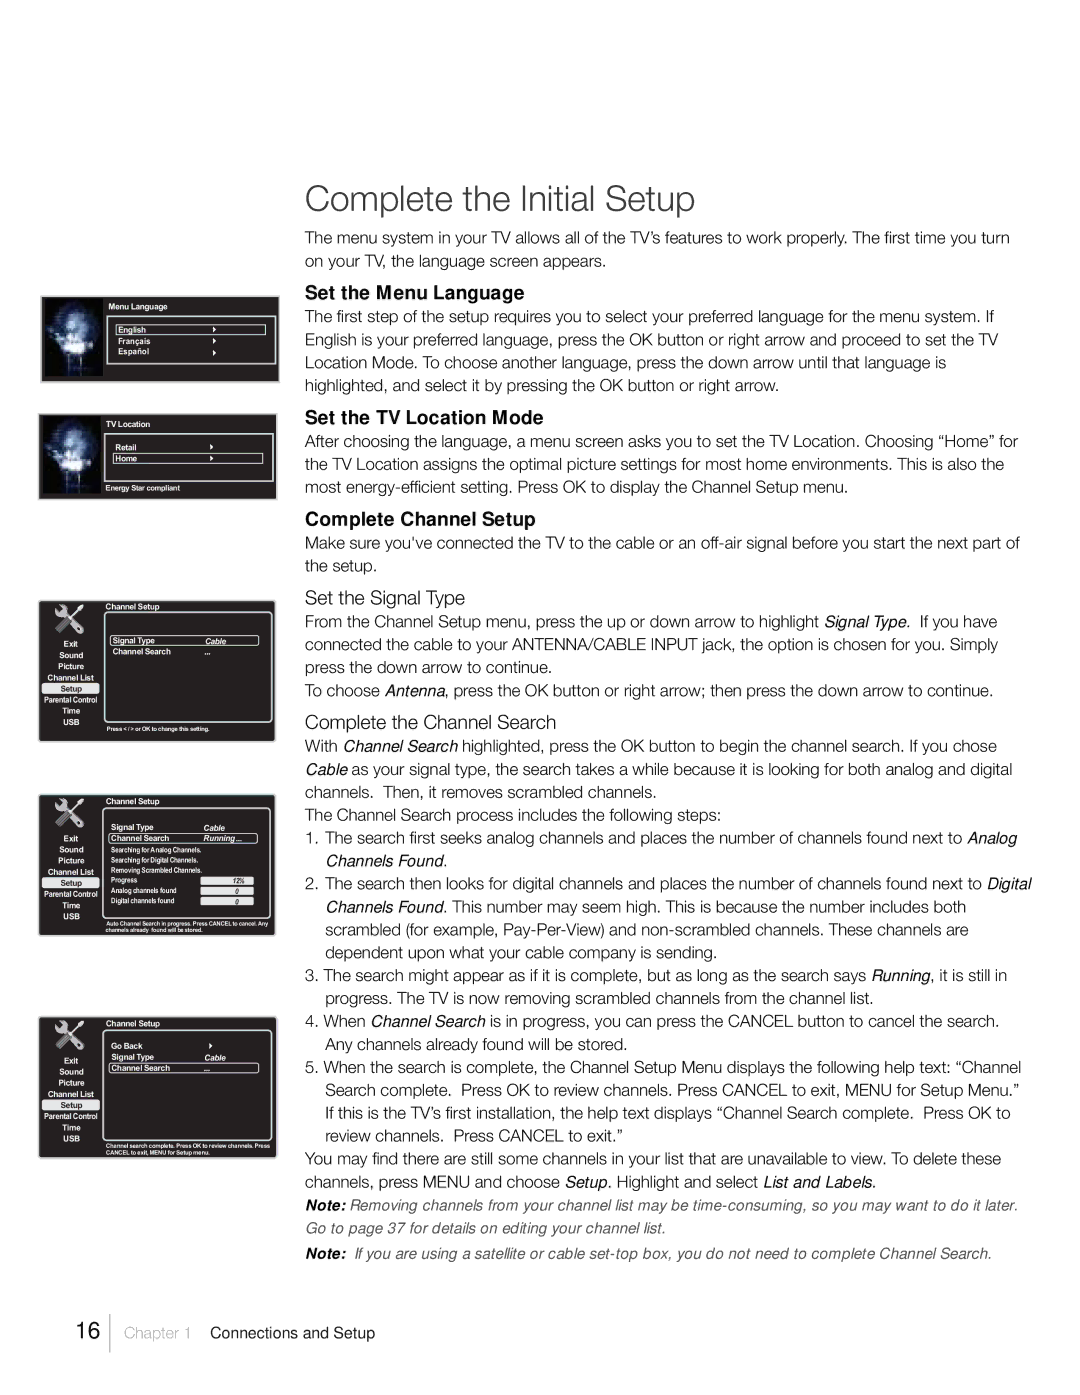
Set the Menu Language
The first step of the setup requires you to select your preferred language for the menu system. If English is your preferred language, press the OK button or right arrow and proceed to set the TV Location Mode. To choose another language, press the down arrow until that language is highlighted, and select it by pressing the OK button or right arrow.
Set the TV Location Mode
After choosing the language, a menu screen asks you to set the TV Location. Choosing “Home” for the TV Location assigns the optimal picture settings for most home environments. This is also the most
Complete Channel Setup
Make sure you've connected the TV to the cable or an
Exit
Sound
Picture
Channel List
Setup
Parental Control
Time
USB
Exit
Sound
Picture
Channel List
Setup
Parental Control
Time
USB
Channel Setup |
|
Signal Type | Cable |
Channel Search |
|
Press < / > or OK to change this setting. | |
Channel Setup |
|
Signal Type | Cable |
Channel Search | Running |
Searching for Analog Channels. |
|
Searching for Digital Channels. |
|
Removing Scrambled Channels. |
|
Progress | 12% |
Analog channels found | 0 |
Digital channels found | 0 |
Auto Channel Search in progress. Press CANCEL to cancel. Any channels already found will be stored.
Set the Signal Type
From the Channel Setup menu, press the up or down arrow to highlight Signal Type. If you have connected the cable to your ANTENNA/CABLE INPUT jack, the option is chosen for you. Simply press the down arrow to continue.
To choose Antenna, press the OK button or right arrow; then press the down arrow to continue.
Complete the Channel Search
With Channel Search highlighted, press the OK button to begin the channel search. If you chose Cable as your signal type, the search takes a while because it is looking for both analog and digital channels. Then, it removes scrambled channels.
The Channel Search process includes the following steps:
1. | The search first seeks analog channels and places the number of channels found next to Analog |
| Channels Found. |
2. | The search then looks for digital channels and places the number of channels found next to Digital |
| Channels Found. This number may seem high. This is because the number includes both |
| scrambled (for example, |
| dependent upon what your cable company is sending. |
3. The search might appear as if it is complete, but as long as the search says Running, it is still in | |
| progress. The TV is now removing scrambled channels from the channel list. |
| Channel Setup |
|
| Go Back |
|
Exit | Signal Type | Cable |
Channel Search |
| |
Sound |
| |
|
| |
Picture |
|
|
Channel List |
|
|
Setup |
|
|
Parental Control |
|
|
Time |
|
|
USB |
|
|
Channel search complete. Press OK to review channels. Press
CANCEL to exit, MENU for Setup menu.
4. | When Channel Search is in progress, you can press the CANCEL button to cancel the search. |
| Any channels already found will be stored. |
5. | When the search is complete, the Channel Setup Menu displays the following help text: “Channel |
| Search complete. Press OK to review channels. Press CANCEL to exit, MENU for Setup Menu.” |
If this is the TV’s first installation, the help text displays “Channel Search complete. Press OK to review channels. Press CANCEL to exit.”
You may find there are still some channels in your list that are unavailable to view. To delete these channels, press MENU and choose Setup. Highlight and select List and Labels.
Note: Removing channels from your channel list may be
Note: If you are using a satellite or cable
16
Chapter 1 Connections and Setup