Tool Assembly (Cont.)
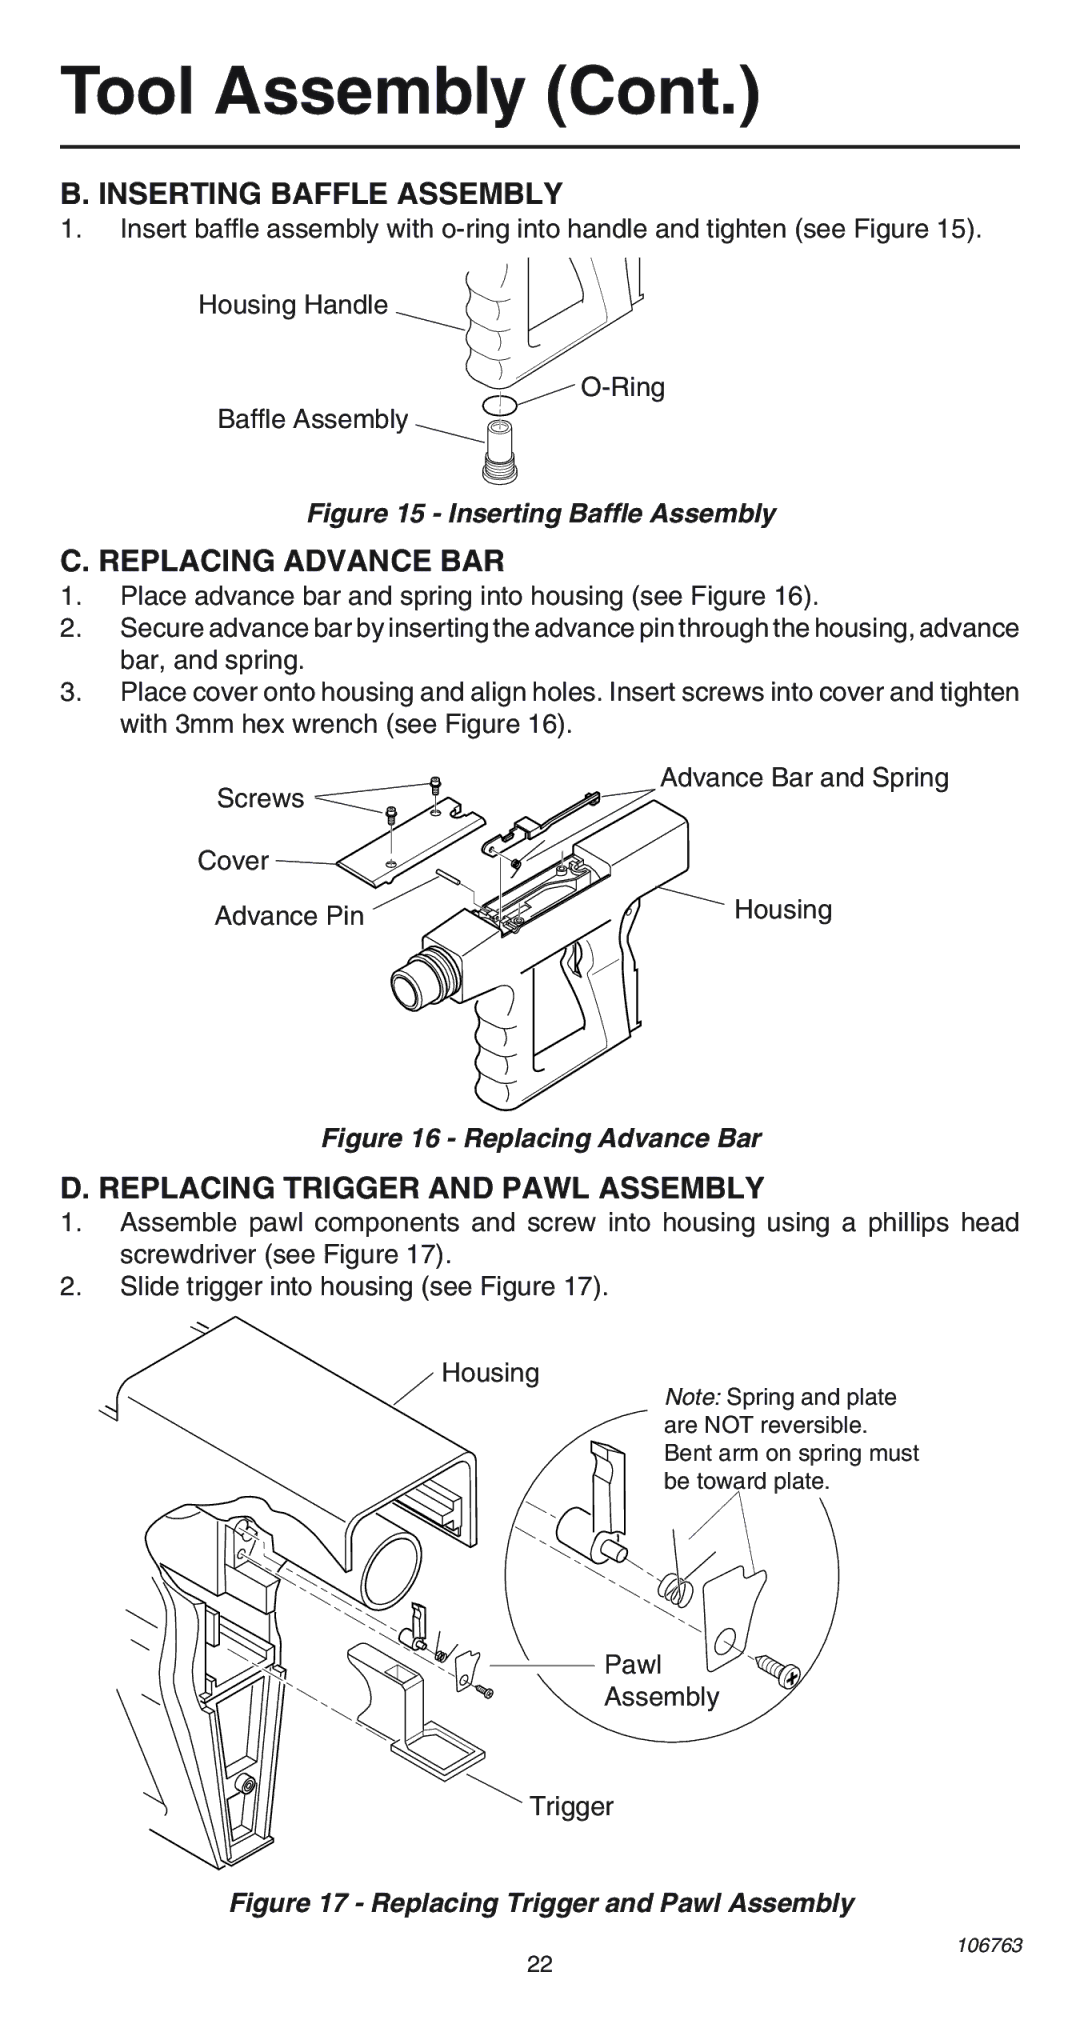
B. INSERTING BAFFLE ASSEMBLY
1.Insert baffle assembly with
Housing Handle
![]()
Baffle Assembly
Figure 15 - Inserting Baffle Assembly
C. REPLACING ADVANCE BAR
1.Place advance bar and spring into housing (see Figure 16).
2.Secure advance bar by inserting the advance pin through the housing, advance bar, and spring.
3.Place cover onto housing and align holes. Insert screws into cover and tighten with 3mm hex wrench (see Figure 16).
Screws ![]()
![]()
Cover
Advance Pin
Advance Bar and Spring
Housing
Figure 16 - Replacing Advance Bar
D. REPLACING TRIGGER AND PAWL ASSEMBLY
1.Assemble pawl components and screw into housing using a phillips head screwdriver (see Figure 17).
2.Slide trigger into housing (see Figure 17).
Housing
Note: Spring and plate are NOT reversible. Bent arm on spring must be toward plate.
Pawl
Assembly
Trigger
Figure 17 - Replacing Trigger and Pawl Assembly
106763
22