Tool Assembly (Cont.)
G. ATTACHING REAR PAD ASSEMBLY
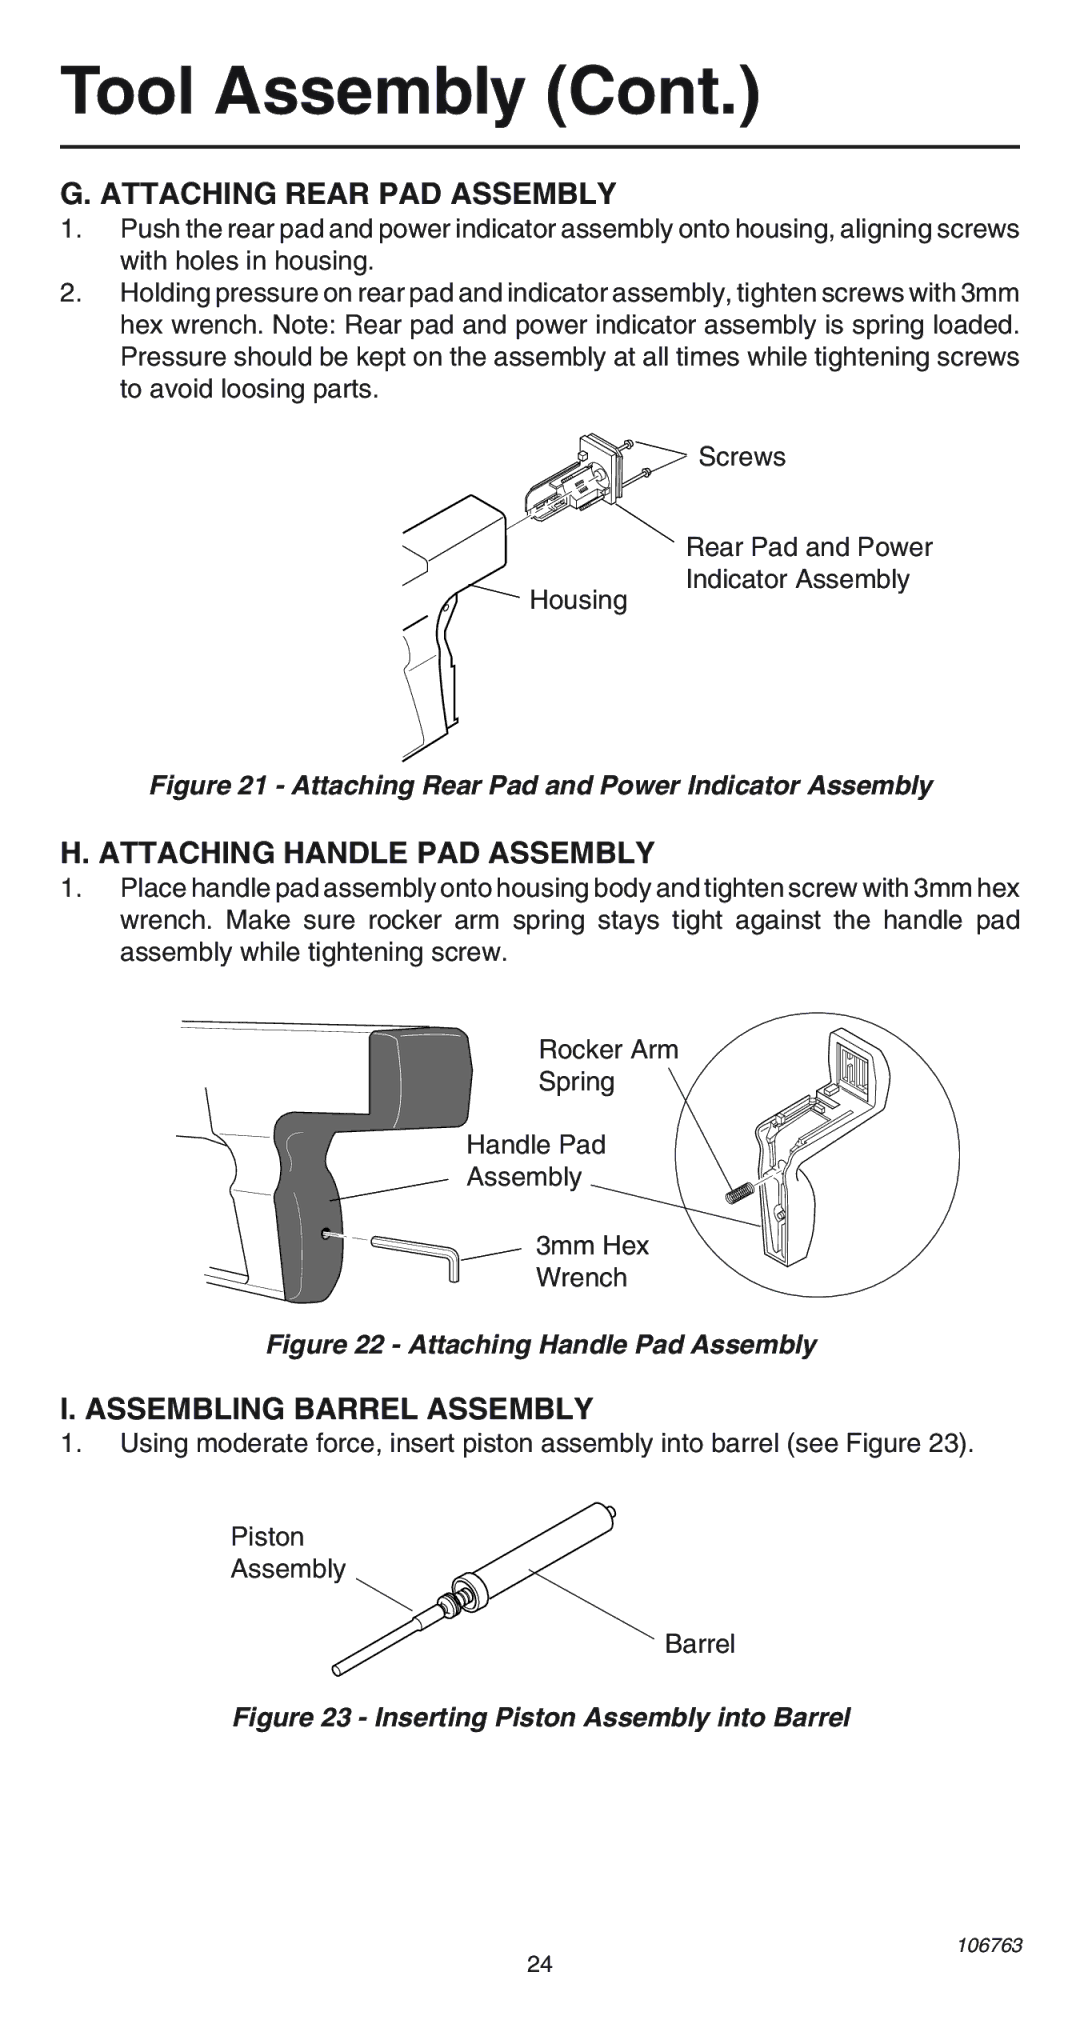
1.Push the rear pad and power indicator assembly onto housing, aligning screws with holes in housing.
2.Holding pressure on rear pad and indicator assembly, tighten screws with 3mm hex wrench. Note: Rear pad and power indicator assembly is spring loaded. Pressure should be kept on the assembly at all times while tightening screws to avoid loosing parts.
![]()
![]() Screws
Screws
![]() Housing
Housing
Rear Pad and Power Indicator Assembly
Figure 21 - Attaching Rear Pad and Power Indicator Assembly
H. ATTACHING HANDLE PAD ASSEMBLY
1.Place handle pad assembly onto housing body and tighten screw with 3mm hex wrench. Make sure rocker arm spring stays tight against the handle pad assembly while tightening screw.
Rocker Arm
Spring
Handle Pad
Assembly
3mm Hex Wrench
Figure 22 - Attaching Handle Pad Assembly
I. ASSEMBLING BARREL ASSEMBLY
1.Using moderate force, insert piston assembly into barrel (see Figure 23).
Piston
Assembly
Barrel
Figure 23 - Inserting Piston Assembly into Barrel
106763
24