OWNER’S MANUAL
ASSEMBLY
Continued
INSTALLING AUTOMATIC CHAIN SHARPENER
(Fast Sharp Models Only)
1.Screw automatic chain sharpener into threaded hole.
2.Continue turning automatic chain sharpener until you hear five (5) clicks.
Automatic
Chain
Sharpener
PUSH
SHARPENTO
Figure 5 - Automatic Chain Sharpener (Fast Sharp Models Only)
SAW CHAIN
TENSION
ADJUSTMENT
![]() WARNING: Unplug chain saw from power source before adjust- ing saw chain tension.
WARNING: Unplug chain saw from power source before adjust- ing saw chain tension.
![]() WARNING: Cutting edges on chain are sharp. Use protective gloves when handling chain.
WARNING: Cutting edges on chain are sharp. Use protective gloves when handling chain.
![]() WARNING: Maintain proper chain tension always. A loose chain will increase the risk of kickback. A loose chain may jump out of guide bar groove. This may injure operator and damage chain. A loose chain will cause chain, guide bar, and sprocket to wear rapidly.
WARNING: Maintain proper chain tension always. A loose chain will increase the risk of kickback. A loose chain may jump out of guide bar groove. This may injure operator and damage chain. A loose chain will cause chain, guide bar, and sprocket to wear rapidly.
Note: For pre assembled models, the saw chain tension is properly set at factory. A new chain will stretch. Check new chain after first few minutes of operation. Allow chain to cool down. Follow steps below to readjust saw chain tension.
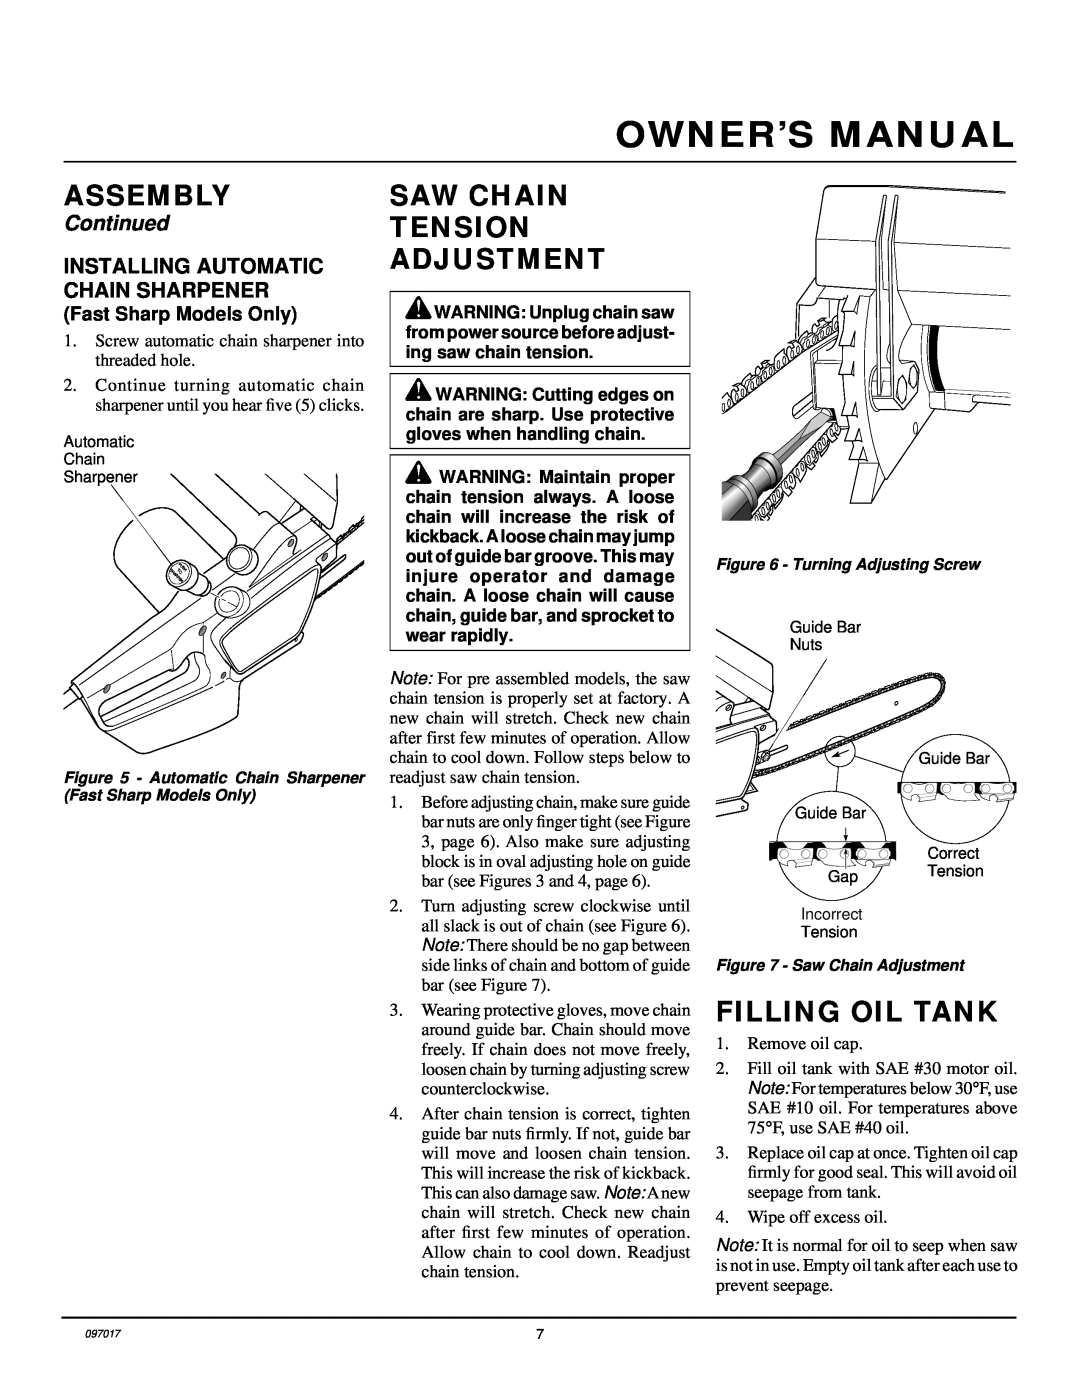
1.Before adjusting chain, make sure guide bar nuts are only finger tight (see Figure 3, page 6). Also make sure adjusting block is in oval adjusting hole on guide bar (see Figures 3 and 4, page 6).
2.Turn adjusting screw clockwise until all slack is out of chain (see Figure 6). Note: There should be no gap between side links of chain and bottom of guide bar (see Figure 7).
3.Wearing protective gloves, move chain around guide bar. Chain should move freely. If chain does not move freely, loosen chain by turning adjusting screw counterclockwise.
4.After chain tension is correct, tighten guide bar nuts firmly. If not, guide bar will move and loosen chain tension. This will increase the risk of kickback. This can also damage saw. Note: A new chain will stretch. Check new chain after first few minutes of operation. Allow chain to cool down. Readjust chain tension.
Figure 6 - Turning Adjusting Screw
Guide Bar
Nuts
Guide Bar
Guide Bar
Correct
Gap Tension
Incorrect
Tension
Figure 7 - Saw Chain Adjustment
FILLING OIL TANK
1.Remove oil cap.
2.Fill oil tank with SAE #30 motor oil. Note: For temperatures below 30°F, use
SAE #10 oil. For temperatures above 75°F, use SAE #40 oil.
3.Replace oil cap at once. Tighten oil cap firmly for good seal. This will avoid oil seepage from tank.
4.Wipe off excess oil.
Note: It is normal for oil to seep when saw is not in use. Empty oil tank after each use to prevent seepage.
097017 | 7 |