CAUTION
When using a humidifier check the breathing system regularly for accumulated water.
Note: When the mask type is set to Trach, the
Learn Circuit | Catheter mount** |
ResMed Leak Valve |
| configuration | 2 | HMEF* |
|
|
|
| ||
|
| Antibacterial filter |
| |
|
|
|
| |
1 |
|
| 5 | 10 |
|
|
| ||
|
|
|
| |
|
| 3 |
|
|
|
|
|
| 6 |
|
|
| 4 | Air tubing |
|
|
| External humidifier* | |
|
|
|
|
AC power cord
AC locking clip
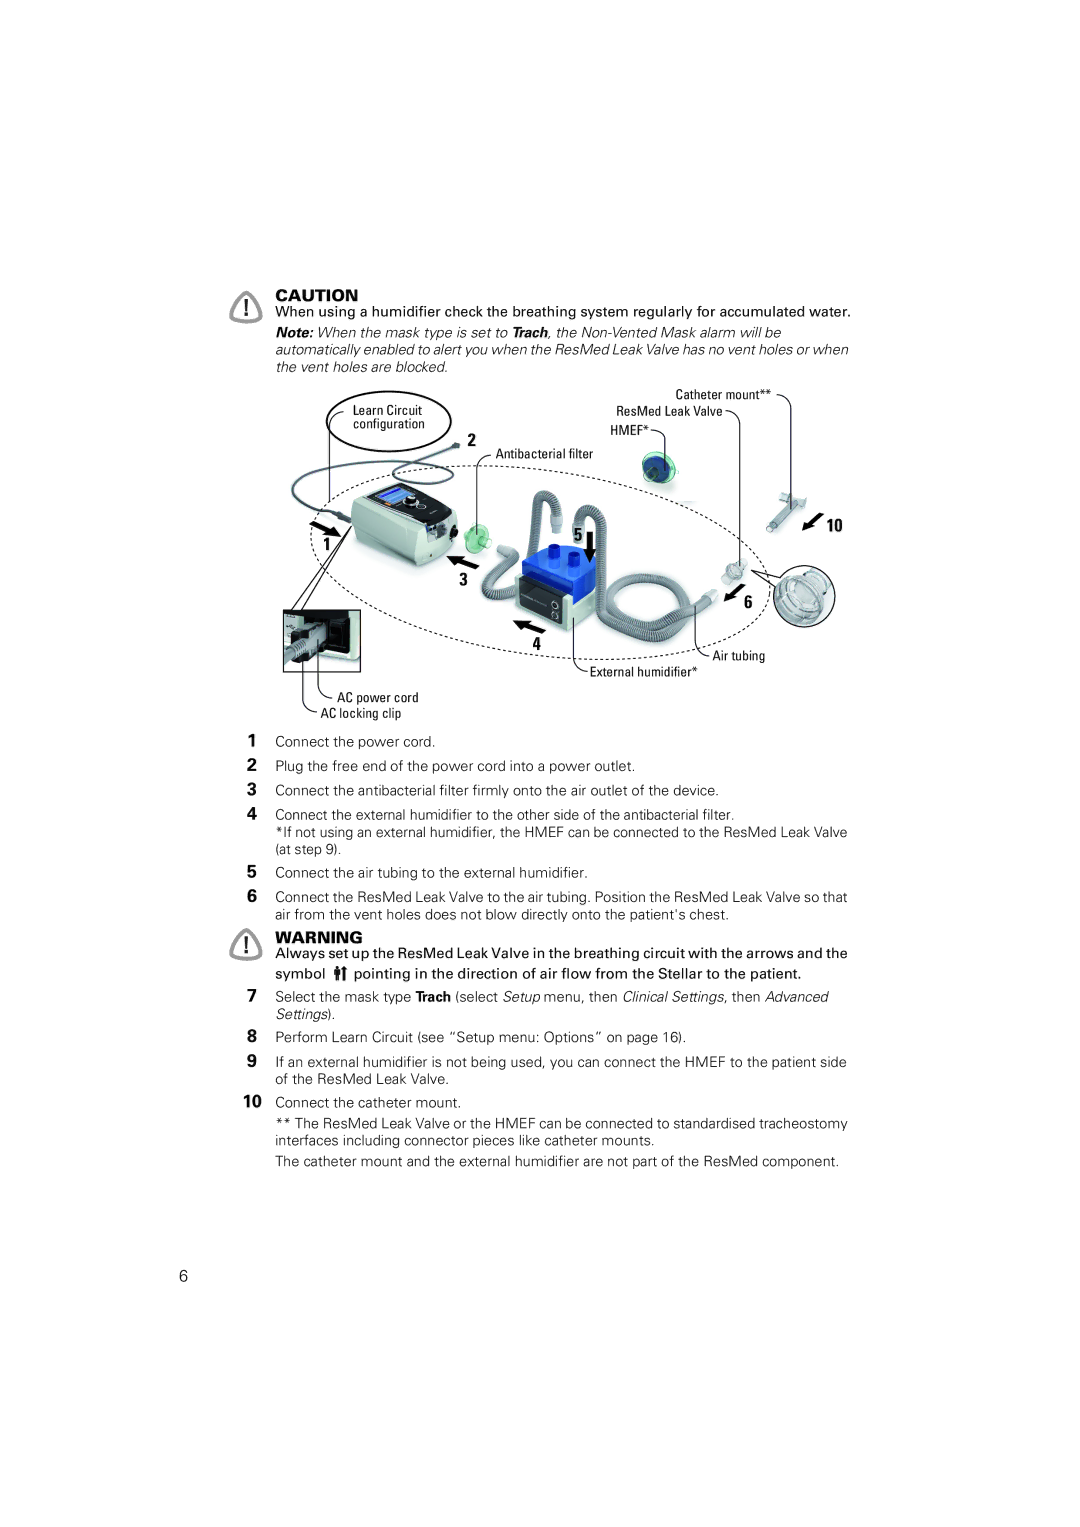
1Connect the power cord.
2Plug the free end of the power cord into a power outlet.
3Connect the antibacterial filter firmly onto the air outlet of the device.
4Connect the external humidifier to the other side of the antibacterial filter.
*If not using an external humidifier, the HMEF can be connected to the ResMed Leak Valve (at step 9).
5Connect the air tubing to the external humidifier.
6Connect the ResMed Leak Valve to the air tubing. Position the ResMed Leak Valve so that air from the vent holes does not blow directly onto the patient's chest.
WARNING
Always set up the ResMed Leak Valve in the breathing circuit with the arrows and the symbol ![]() pointing in the direction of air flow from the Stellar to the patient.
pointing in the direction of air flow from the Stellar to the patient.
7Select the mask type Trach (select Setup menu, then Clinical Settings, then Advanced Settings).
8Perform Learn Circuit (see “Setup menu: Options” on page 16).
9If an external humidifier is not being used, you can connect the HMEF to the patient side of the ResMed Leak Valve.
10Connect the catheter mount.
**The ResMed Leak Valve or the HMEF can be connected to standardised tracheostomy interfaces including connector pieces like catheter mounts.
The catheter mount and the external humidifier are not part of the ResMed component.
6
