ASSEMBLY
ASSEMBLY
DEALER SETUP INSTRUCTIONS
Set up mower as received from factory with these instructions. Refer to complete check list when setup is finished.
Select a suitable working area. Open parts box and lay out parts to make location easy. Refer to Parts Lists in Section 6 of manual and packing list. Cut all wire ties.
This mower is shipped partially assembled. Assembly will be easier if components are aligned and loosely assembled before tightening hardware. Refer to bolt torque chart in Maintenance Section. All bolts are Grade 5 unless otherwise specified.
1.Position on flat surface.
2.Apply light oil to gear box input shaft.
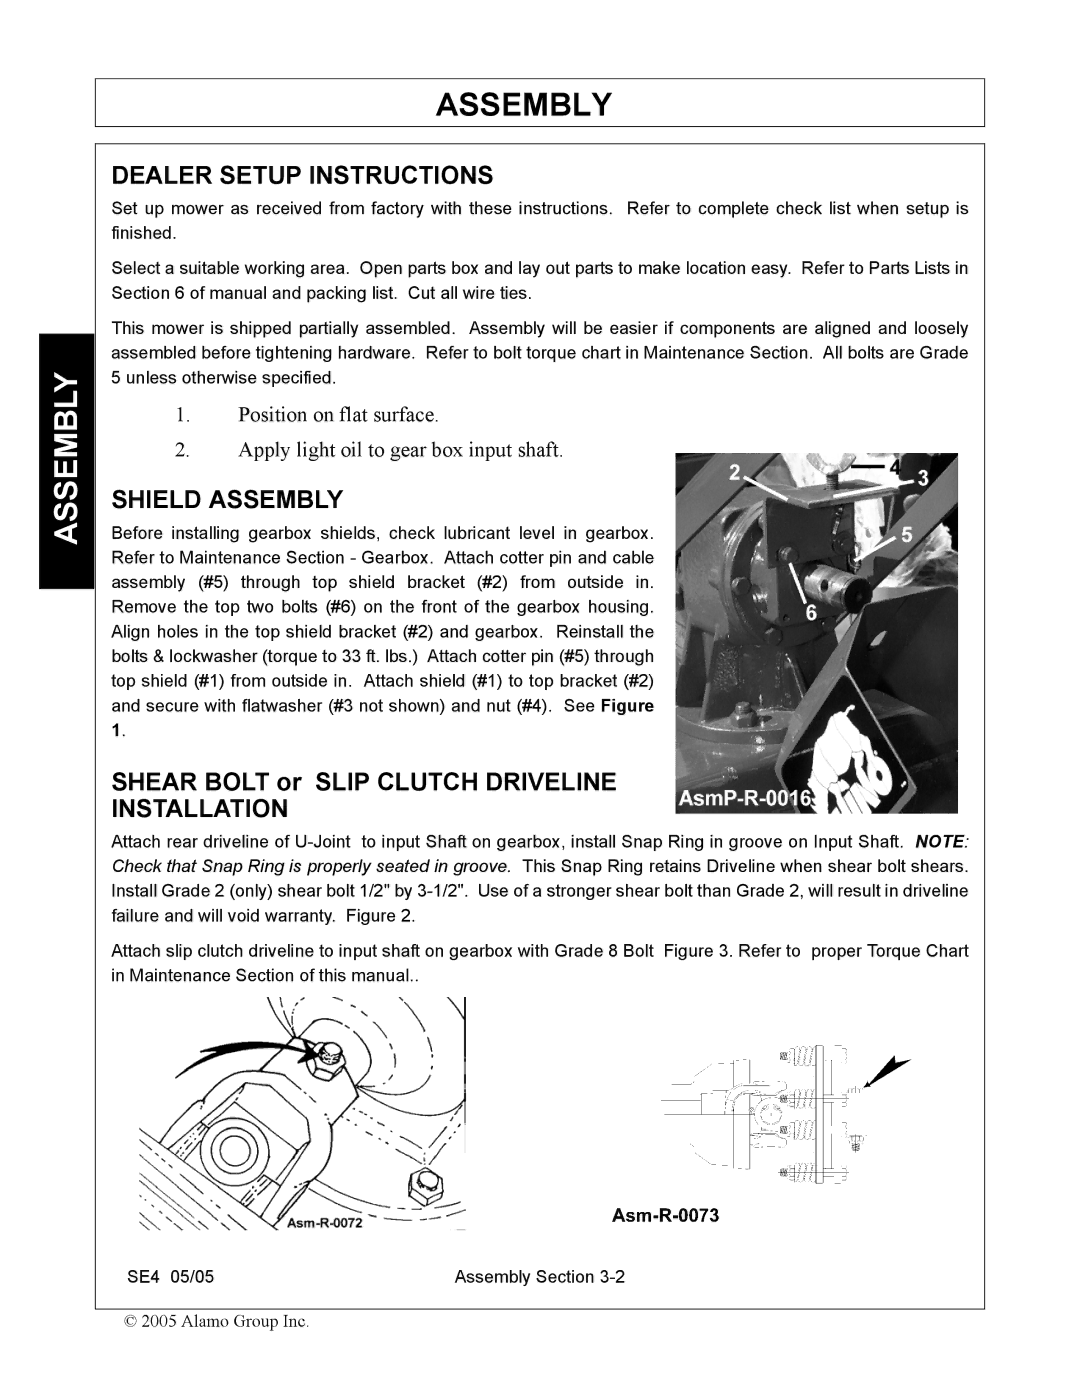
SHIELD ASSEMBLY
Before installing gearbox shields, check lubricant level in gearbox. Refer to Maintenance Section - Gearbox. Attach cotter pin and cable assembly (#5) through top shield bracket (#2) from outside in. Remove the top two bolts (#6) on the front of the gearbox housing. Align holes in the top shield bracket (#2) and gearbox. Reinstall the bolts & lockwasher (torque to 33 ft. lbs.) Attach cotter pin (#5) through top shield (#1) from outside in. Attach shield (#1) to top bracket (#2) and secure with flatwasher (#3 not shown) and nut (#4). See Figure 1.
SHEAR BOLT or SLIP CLUTCH DRIVELINE
INSTALLATION
Attach rear driveline of
Attach slip clutch driveline to input shaft on gearbox with Grade 8 Bolt Figure 3. Refer to proper Torque Chart in Maintenance Section of this manual..
SE4 05/05 | Assembly Section |
© 2005 Alamo Group Inc.