MAINTENANCE
MAINTENANCE
BLADE SHARPENING
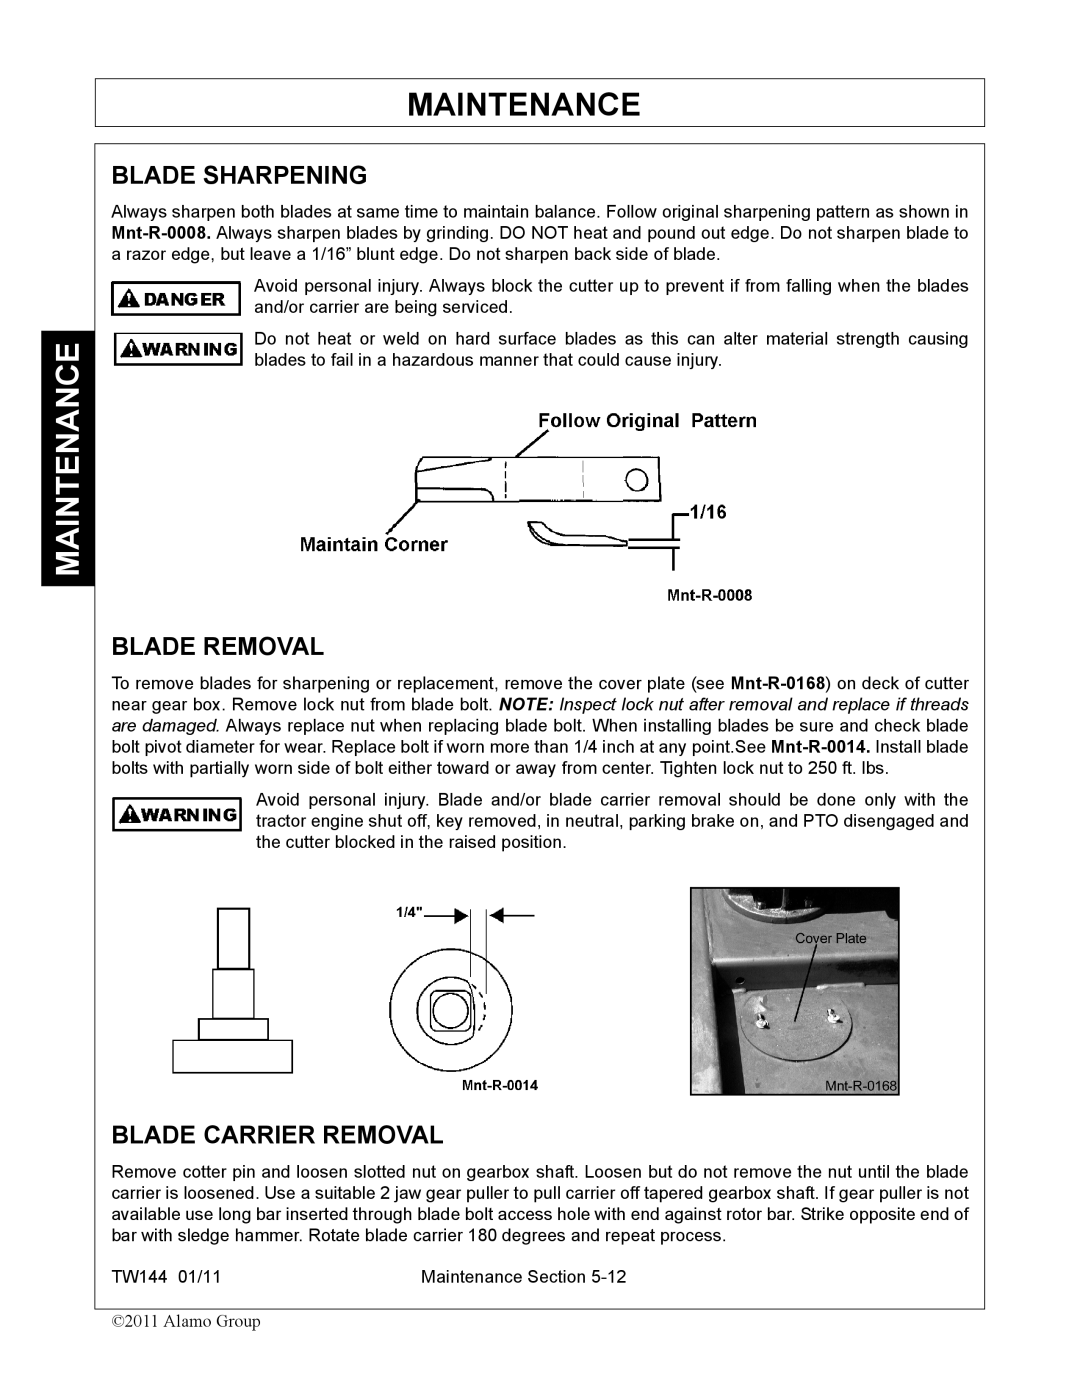
Always sharpen both blades at same time to maintain balance. Follow original sharpening pattern as shown in
Avoid personal injury. Always block the cutter up to prevent if from falling when the blades and/or carrier are being serviced.
Do not heat or weld on hard surface blades as this can alter material strength causing blades to fail in a hazardous manner that could cause injury.
BLADE REMOVAL
To remove blades for sharpening or replacement, remove the cover plate (see
Avoid personal injury. Blade and/or blade carrier removal should be done only with the tractor engine shut off, key removed, in neutral, parking brake on, and PTO disengaged and the cutter blocked in the raised position.
BLADE CARRIER REMOVAL
Remove cotter pin and loosen slotted nut on gearbox shaft. Loosen but do not remove the nut until the blade carrier is loosened. Use a suitable 2 jaw gear puller to pull carrier off tapered gearbox shaft. If gear puller is not available use long bar inserted through blade bolt access hole with end against rotor bar. Strike opposite end of bar with sledge hammer. Rotate blade carrier 180 degrees and repeat process.
TW144 01/11 | Maintenance Section |
©2011 Alamo Group