No. 700 Portable Power Drive
•Depress and hold the switch. Inspect the moving parts for misalignment, binding, odd noises or any other unusual conditions that may affect the safe and normal operation of the tool. If such condi- tions are present, have the Power Drive serviced.
•Depress switch in the opposite direction. Check that the Power Drive rotates in the opposite direction.
Operating Instructions
For Threading With Drop Head
Die Heads
![]() WARNING
WARNING
Do not wear gloves or loose clothing when oper- ating Power Drive. Keep sleeves and jackets but- toned.
Do not use this Power Drive if the switch is bro- ken. Always wear eye protection to protect eyes from dirt and other foreign objects.
When threading pipe one inch or larger, use the No. 775 Support Arm or other mechanical means to resist high handle force developed during threading.
1.Push Die Heads or Adapters, spline end first, square- ly into the Power Drive until the
NOTE! Installation can be made into either side of the Power Drive.
Die Head ![]()
Figure 3 – Installing No. 12-R Drop Head Die Head
2.If possible, secure the pipe in a portable tristand vise or a bench vise.
![]() WARNING To prevent tipping, long lengths of pipe should also be supported with pipe stand.
WARNING To prevent tipping, long lengths of pipe should also be supported with pipe stand.
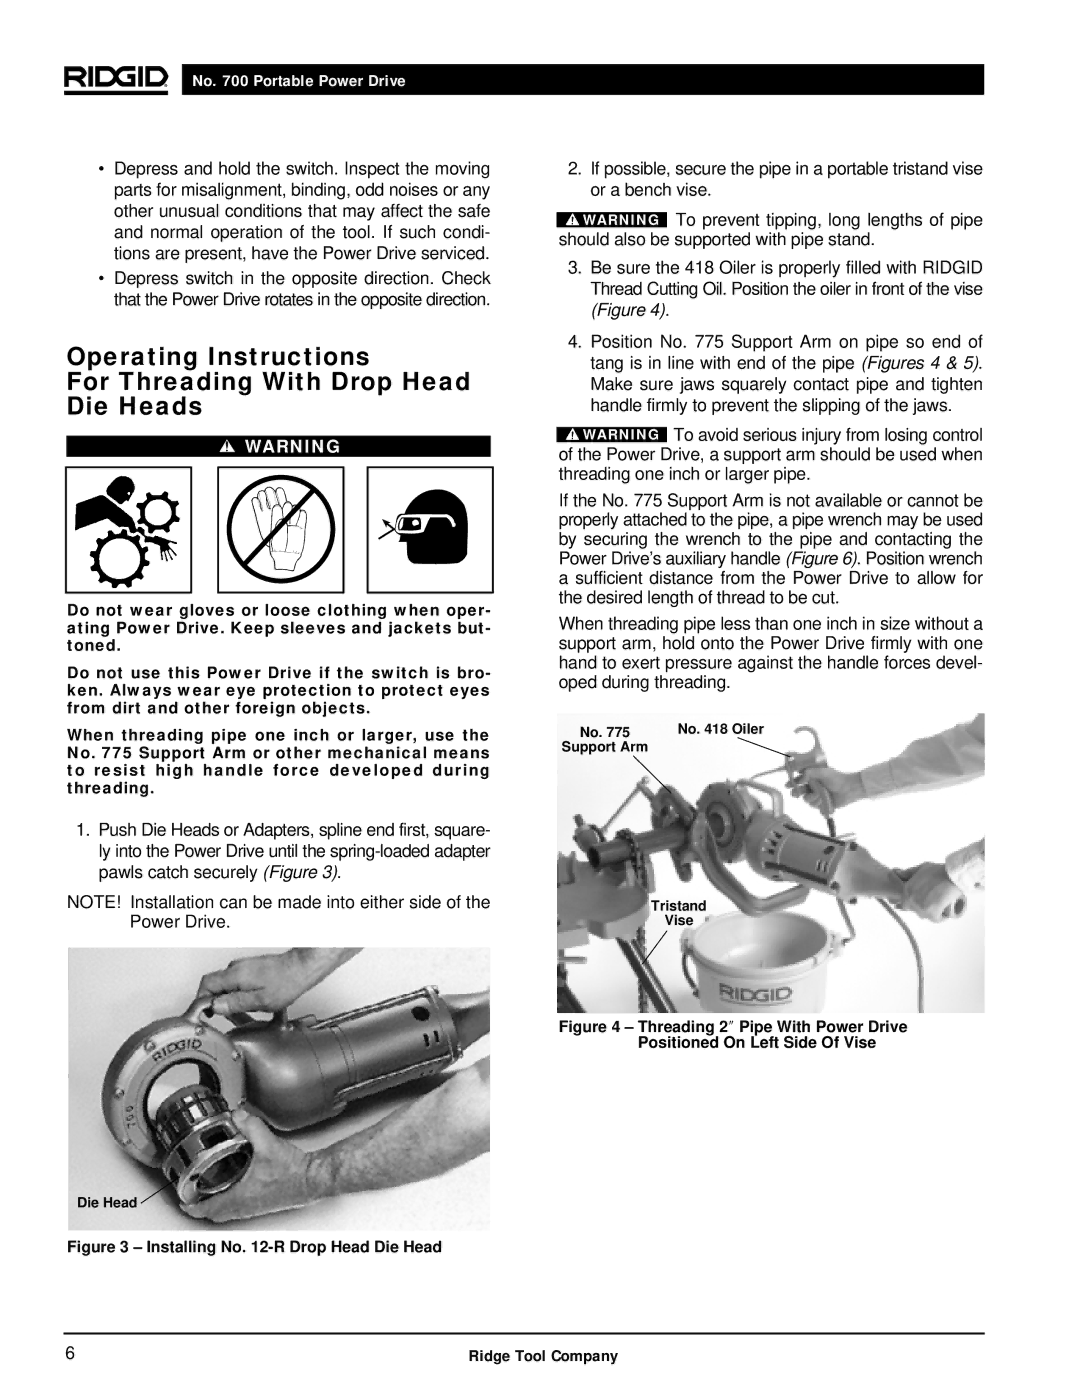
3.Be sure the 418 Oiler is properly filled with RIDGID Thread Cutting Oil. Position the oiler in front of the vise (Figure 4).
4.Position No. 775 Support Arm on pipe so end of tang is in line with end of the pipe (Figures 4 & 5). Make sure jaws squarely contact pipe and tighten handle firmly to prevent the slipping of the jaws.
![]() WARNING To avoid serious injury from losing control of the Power Drive, a support arm should be used when threading one inch or larger pipe.
WARNING To avoid serious injury from losing control of the Power Drive, a support arm should be used when threading one inch or larger pipe.
If the No. 775 Support Arm is not available or cannot be properly attached to the pipe, a pipe wrench may be used by securing the wrench to the pipe and contacting the Power Drive’s auxiliary handle (Figure 6). Position wrench a sufficient distance from the Power Drive to allow for the desired length of thread to be cut.
When threading pipe less than one inch in size without a support arm, hold onto the Power Drive firmly with one hand to exert pressure against the handle forces devel- oped during threading.
No. 775 | No. 418 Oiler |
Support Arm |
|
Tristand
Vise
Figure 4 – Threading 2″ Pipe With Power Drive
Positioned On Left Side Of Vise
6 | Ridge Tool Company |