5.Turn assembly over onto the legs. Be sure all four feet sit flat on the ground. Adjustment of the feet will be completed after the band saw is attached to the stand.
6.Tighten all stand fasteners at this time.
7.With the aid of a second person, lift the saw body out of the shipping container and place onto the stand top. Be sure front of saw faces stand front by aligning holes.
![]() CAUTION: Saw body is heavy! Use care when lift- ing and stabilize until it is firmly attached to the stand! Get help when lifting and mounting saw.
CAUTION: Saw body is heavy! Use care when lift- ing and stabilize until it is firmly attached to the stand! Get help when lifting and mounting saw.
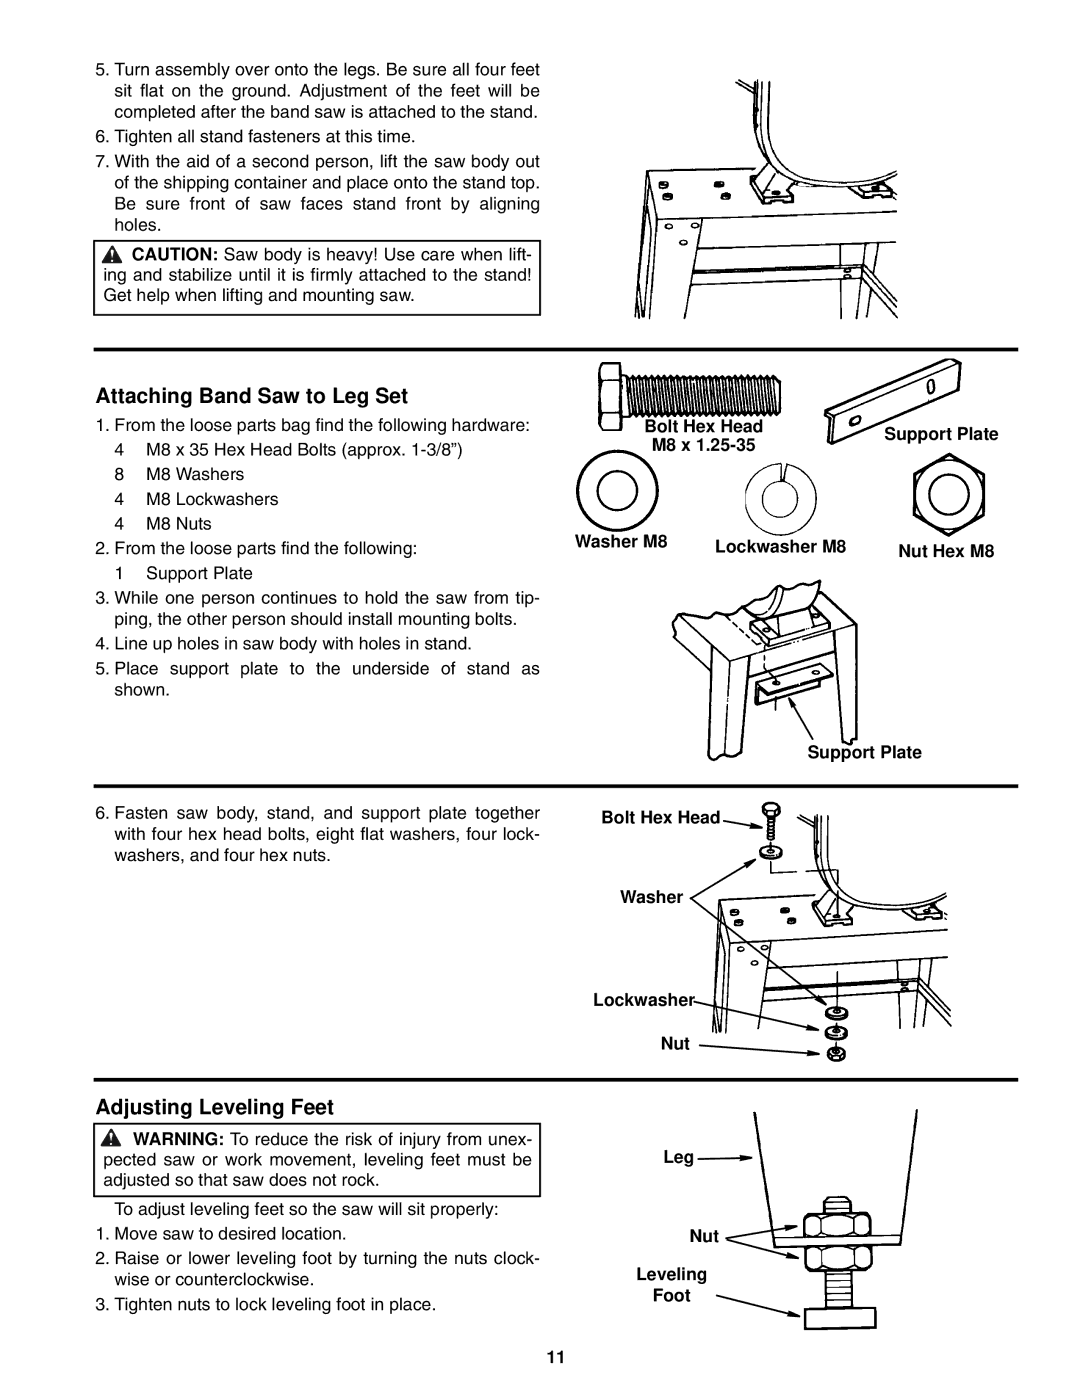
Attaching Band Saw to Leg Set
1.From the loose parts bag find the following hardware:
4M8 x 35 Hex Head Bolts (approx.
8M8 Washers
4M8 Lockwashers
4M8 Nuts
2.From the loose parts find the following:
1Support Plate
3.While one person continues to hold the saw from tip- ping, the other person should install mounting bolts.
4.Line up holes in saw body with holes in stand.
5.Place support plate to the underside of stand as shown.
Bolt Hex Head | Support | Plate | |
M8 x | |||
|
| ||
|
|
Washer M8 | Lockwasher M8 | Nut Hex M8 |
Support Plate
6.Fasten saw body, stand, and support plate together with four hex head bolts, eight flat washers, four lock- washers, and four hex nuts.
Bolt Hex Head ![]()
Washer ![]()
Lockwasher
Nut ![]()
Adjusting Leveling Feet
![]() WARNING: To reduce the risk of injury from unex- pected saw or work movement, leveling feet must be adjusted so that saw does not rock.
WARNING: To reduce the risk of injury from unex- pected saw or work movement, leveling feet must be adjusted so that saw does not rock.
To adjust leveling feet so the saw will sit properly:
1.Move saw to desired location.
2.Raise or lower leveling foot by turning the nuts clock- wise or counterclockwise.
3.Tighten nuts to lock leveling foot in place.
Leg ![]()
![]()
Nut ![]()
Leveling
Foot
11