Model
6.When plugging the Pipe Thawing Tool into the elec- trical outlet, making sure to position the power cord along the clear path selected earlier. If the power cord does not reach the outlet, use an extension cord in good condition.
![]() WARNING To avoid electric shock and electrical fires, never use an extension cord that is damaged or does not meet the following requirements:
WARNING To avoid electric shock and electrical fires, never use an extension cord that is damaged or does not meet the following requirements:
•The cord has a
•The cord is rated as “W” or
•The cord has sufficient wire thickness (14 AWG below 25′/12 AWG 25′ - 50′). If the wire thickness is too small, the cord may overheat, melting the cord’s insulation or causing nearby objects to ignite.
![]() WARNING To reduce risk of electrical shock, keep all electrical connections dry and off the ground. Do not touch plug with wet hands.
WARNING To reduce risk of electrical shock, keep all electrical connections dry and off the ground. Do not touch plug with wet hands.
Operating Instructions
![]() WARNING
WARNING
To reduce risk of electrical shock, keep all electri- cal connections dry and off the ground. Do not touch plug with wet hands.
Be very careful when thawing frozen pipes. Clamp tips and cable connections become hot during use. Avoid contact with skin as burns can result.
Keep clamps away from combustible materials or articles that can be damaged by heat.
Do not leave the unit unattended while thawing.
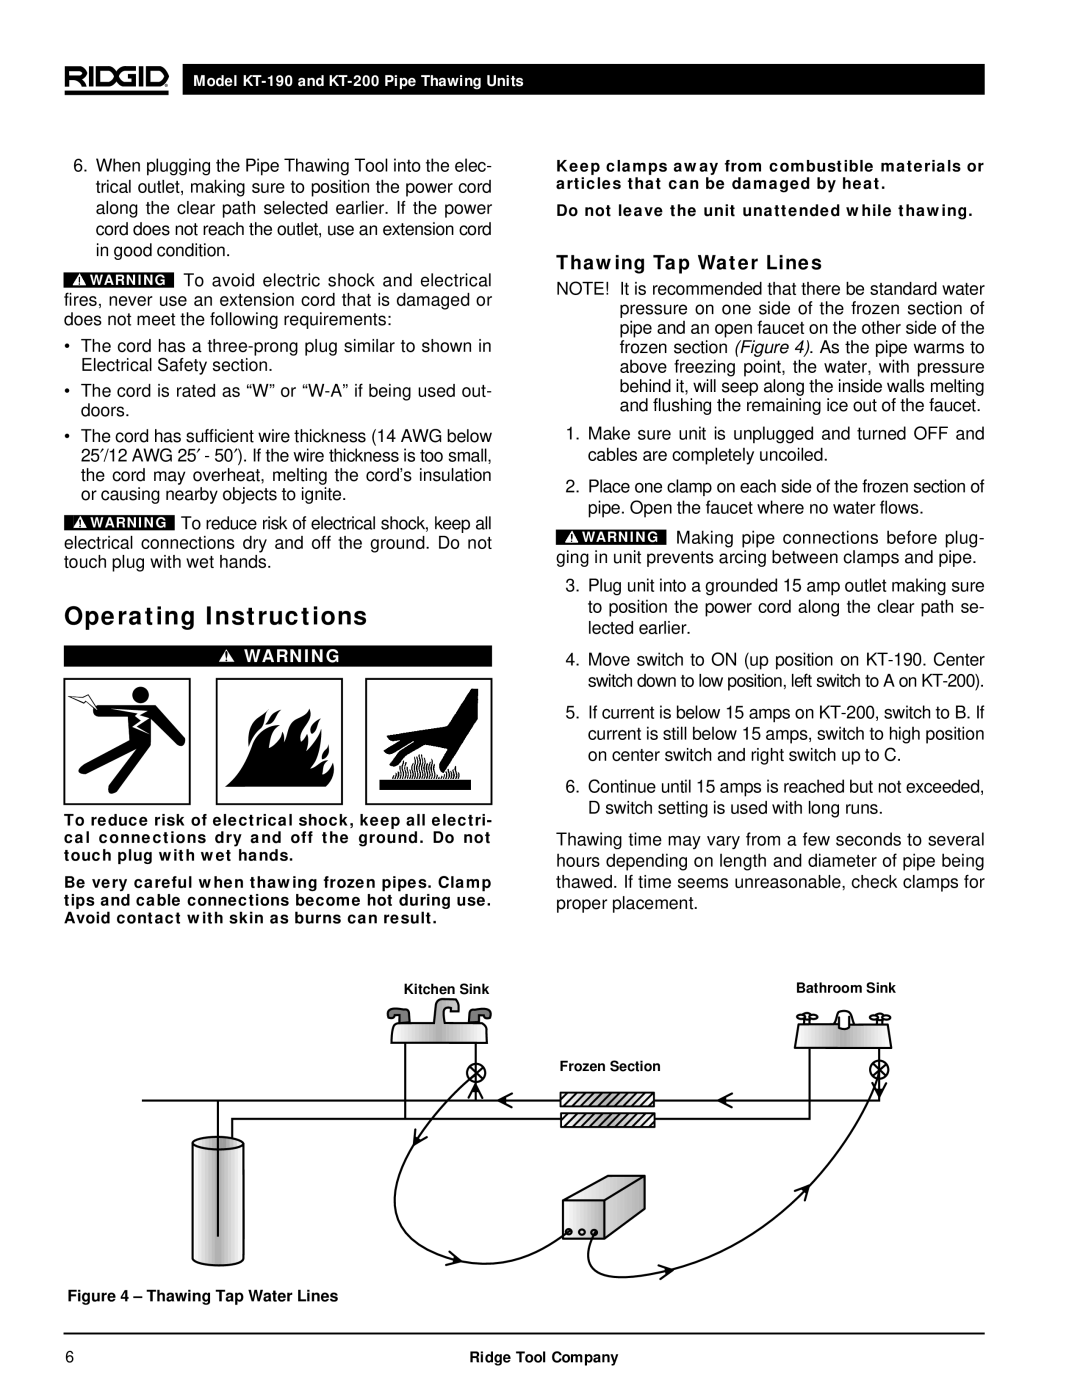
Thawing Tap Water Lines
NOTE! It is recommended that there be standard water pressure on one side of the frozen section of pipe and an open faucet on the other side of the frozen section (Figure 4). As the pipe warms to above freezing point, the water, with pressure behind it, will seep along the inside walls melting and flushing the remaining ice out of the faucet.
1.Make sure unit is unplugged and turned OFF and cables are completely uncoiled.
2.Place one clamp on each side of the frozen section of pipe. Open the faucet where no water flows.
![]() WARNING Making pipe connections before plug- ging in unit prevents arcing between clamps and pipe.
WARNING Making pipe connections before plug- ging in unit prevents arcing between clamps and pipe.
3.Plug unit into a grounded 15 amp outlet making sure to position the power cord along the clear path se- lected earlier.
4.Move switch to ON (up position on
5.If current is below 15 amps on
6.Continue until 15 amps is reached but not exceeded, D switch setting is used with long runs.
Thawing time may vary from a few seconds to several hours depending on length and diameter of pipe being thawed. If time seems unreasonable, check clamps for proper placement.
Kitchen Sink | Bathroom Sink |
Frozen Section |
Figure 4 – Thawing Tap Water Lines
6 | Ridge Tool Company |