OPERATION
TO INSTALL/CHANGE SANDING BELT
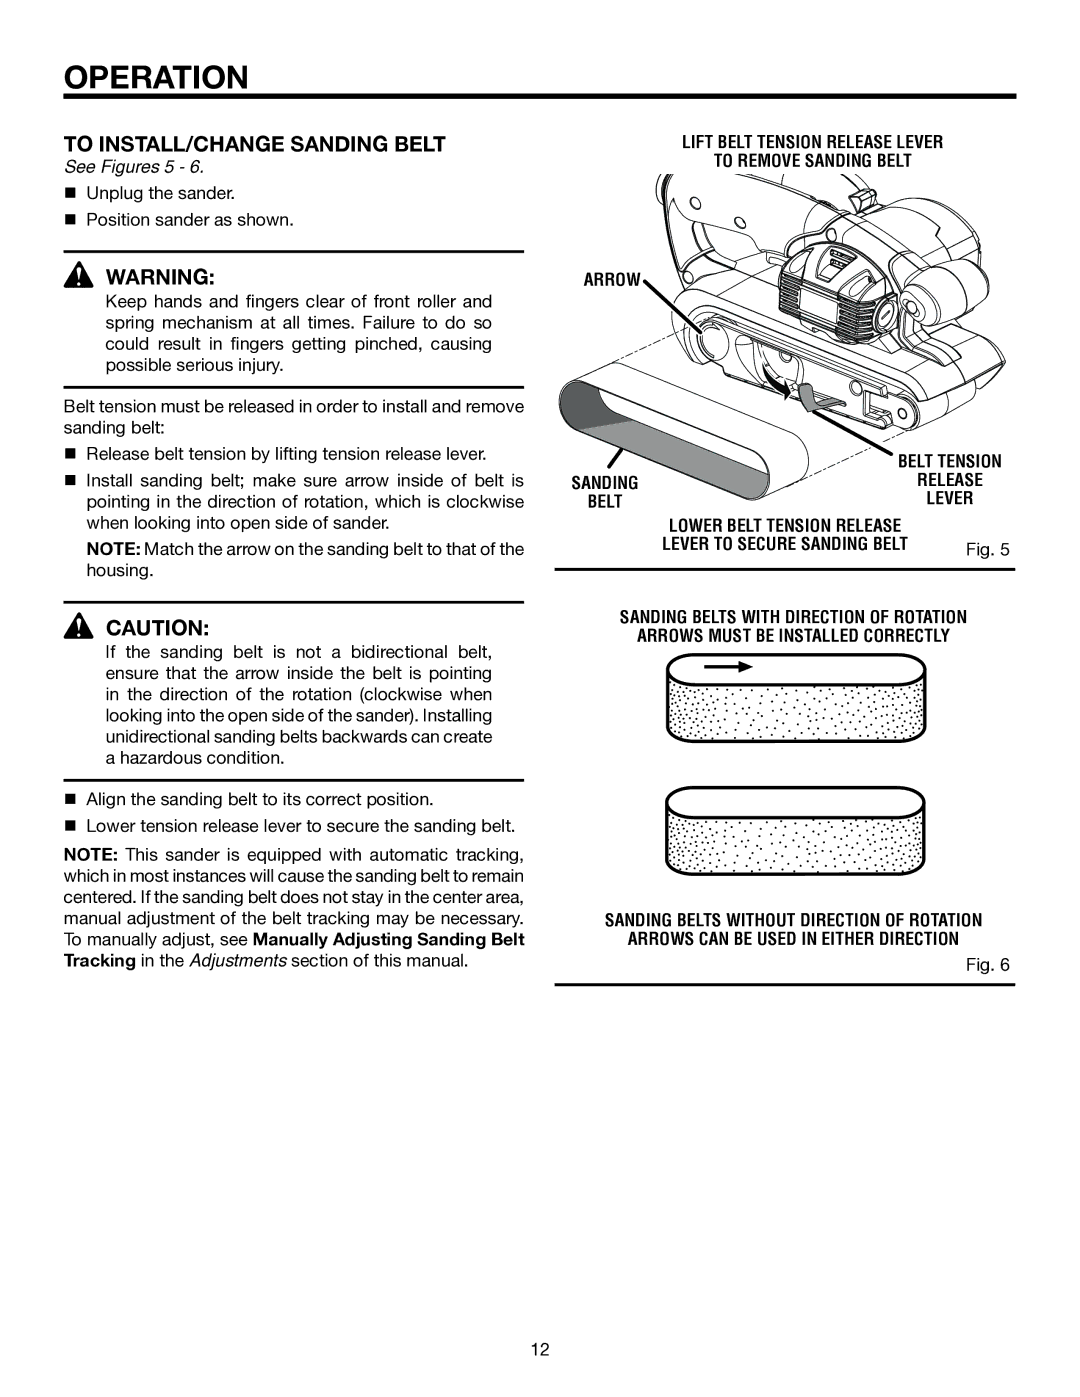
See Figures 5 - 6.
nUnplug the sander.
nPosition sander as shown.
![]() WARNING:
WARNING:
Keep hands and fingers clear of front roller and spring mechanism at all times. Failure to do so could result in fingers getting pinched, causing possible serious injury.
Belt tension must be released in order to install and remove sanding belt:
nRelease belt tension by lifting tension release lever.
nInstall sanding belt; make sure arrow inside of belt is pointing in the direction of rotation, which is clockwise when looking into open side of sander.
NOTE: Match the arrow on the sanding belt to that of the housing.
![]() CAUTION:
CAUTION:
If the sanding belt is not a bidirectional belt, ensure that the arrow inside the belt is pointing in the direction of the rotation (clockwise when looking into the open side of the sander). Installing unidirectional sanding belts backwards can create a hazardous condition.
nAlign the sanding belt to its correct position.
nLower tension release lever to secure the sanding belt.
NOTE: This sander is equipped with automatic tracking, which in most instances will cause the sanding belt to remain centered. If the sanding belt does not stay in the center area, manual adjustment of the belt tracking may be necessary. To manually adjust, see Manually Adjusting Sanding Belt Tracking in the Adjustments section of this manual.
Lift Belt tension release lever
to remove sanding belt
arrow
BELT TENSION
SANDING | RELEASE |
BELT | LEVER |
Lower Belt tension release |
|
lever to secure sanding belt | Fig. 5 |
|
|
SANDING BELTs with direction of rotation arrows must be installed correctly
SANDING BELTs without direction of rotation
arrows can be used in either direction
Fig. 6
12
