OPERATION
CHARGER AND BATTERY PACKS SOLD SEPARATELY
This product will accept RIDGID 24 V and RIDGID 18 V
NOTE: Do not attempt to use the 9.6 V RIDGID
For complete charging and battery pack instructions, refer to the operator’s manuals included with chargers and battery packs listed in the General Safety Rules for this manual.
NOTE: The radio does not charge battery packs. Battery packs must be charged in RIDGID brand chargers.
Only the 18 V
GENERAL USAGE TIPS
reception
To decrease interference or electrical noise, reception may be improved by rotating the antenna or moving the radio/ scanner to a higher elevation.
use of headphones/earphones
![]() WARNING:
WARNING:
Use of an incorrect earphone or stereo headset, or the type of headphone placed directly into the ear canal, may be potentially hazardous to your hearing.
Always use the correct type of headphones or earphones to help prevent discomfort or possible hearing damage if the volume level increases unexpectedly due to changes in the volume control or squelch setting.
To listen to the unit privately, headphones or
NOTE: Attaching headphones/earphones disconnects the internal speakers.
aa |
|
BATTERIES |
|
| SCREW |
BATTERY |
|
DOOR | Fig. 3 |
|
a/c cord
The A/C cord can connect the radio to a power supply when a battery is not available. An iPod can be charged in the radio when the A/C cord or battery pack is in use, but the battery pack cannot be charged by the radio.
Always turn the radio/scanner off before disconnecting it from the power source.
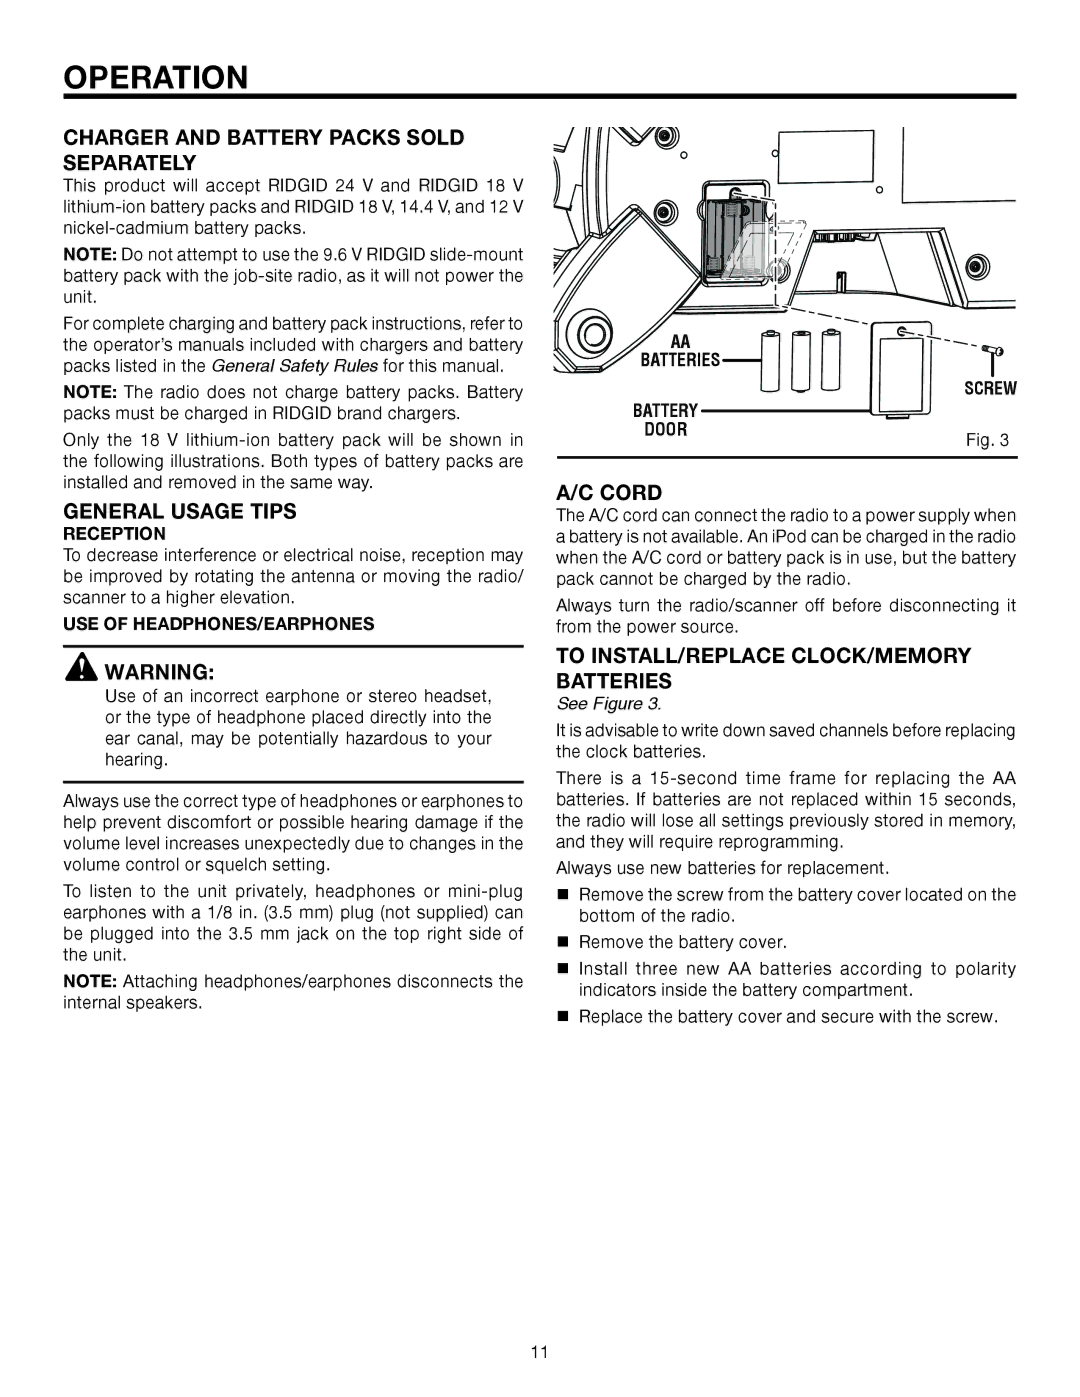
TO install/REPLACE clock/MEMORY batteries
See Figure 3.
It is advisable to write down saved channels before replacing the clock batteries.
There is a
Always use new batteries for replacement.
Remove the screw from the battery cover located on the bottom of the radio.
Remove the battery cover.
Install three new AA batteries according to polarity indicators inside the battery compartment.
Replace the battery cover and secure with the screw.
11
