Manuals
/
Rimage
/
Household Appliance
/
Pet Fence
Rimage
RAS10
manual
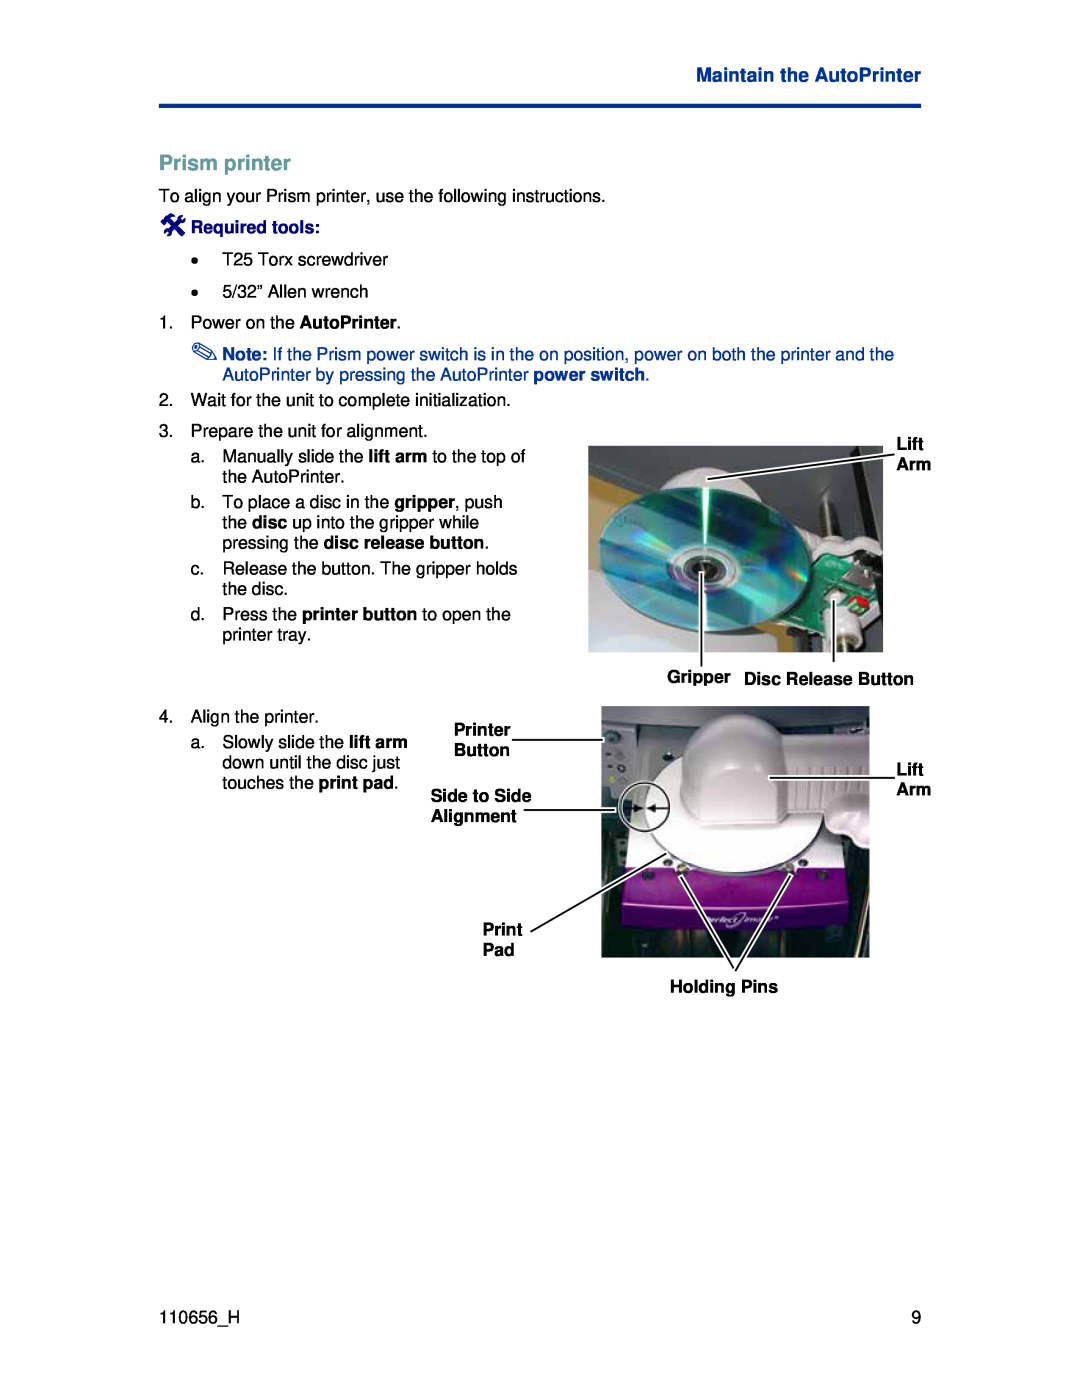
Prism printer, Gripper Disc Release Button Printer Button Lift, Required tools
Models:
RAS10
1
15
20
20
Download
20 pages
61.06 Kb
12
13
14
15
16
17
18
19
Specification
Install
Setting printing preferences
Cleaning method and schedule
Safety testing
Safety precautions
Page 15
Image 15
Page 14
Page 16
Page 15
Image 15
Page 14
Page 16
Contents
Rimage AutoPrinter User Guide
Page
Corporate Headquarters
European Headquarters
CD and DVD Recording Software Disclaimer
Support information
US, Asia/Pacific, Mexico/Latin America
Europe
When you contact Rimage Services, please provide
Operate the AutoPrinter
Contents
Contents
Introduction
Rimage AutoPrinter User Guide
AutoPrism
Introduction
Operating system requirements
AutoEverest
Lift Arm
Identify the parts of the AutoPrinter
Front view
Rimage AutoPrinter
Functionality
Operator panel
Identify the parts of the AutoPrinter
Name
Everest Printer
USB Cable Serial Cable Power Switch Power Switch AutoEverest
Prism Printer Prism Power Switch AutoPrism
Rear view
Operate the AutoPrinter
Installing the carousel
Powering on and off
Power Switch
Load the discs
Setting printing preferences
Reset the AutoPrinter to pick discs from bin
Loading and unloading discs
Aligning the printer
Installing ribbons
Cleaning method and schedule
Maintain the AutoPrinter
Tip Tighten each screw in increments to prevent shifting
Print Pad Holding Pins Front to Back Alignment Screw
Button
Alignment
Side to SideArm Alignment Print Pad Holding Pins
Prism printer
Gripper Disc Release Button Printer Button Lift
Front to Back Alignment Screw
Print Pad
Side to Side Alignment Screws
Learn More
AutoPrinter specifications
Note Specifications for the printer are in the printer user guide
Power
Technical support and product updates
Safety information
Safety precautions
Model RAS10
Safety testing
Product Safety Statement
Product name AutoPrinter
Rimage AutoPrinter II Limited One Year Warranty
Top
Page
Image
Contents