TEMPERATURE CONTROLS - INSTALLATION
Universal Temperature Controller
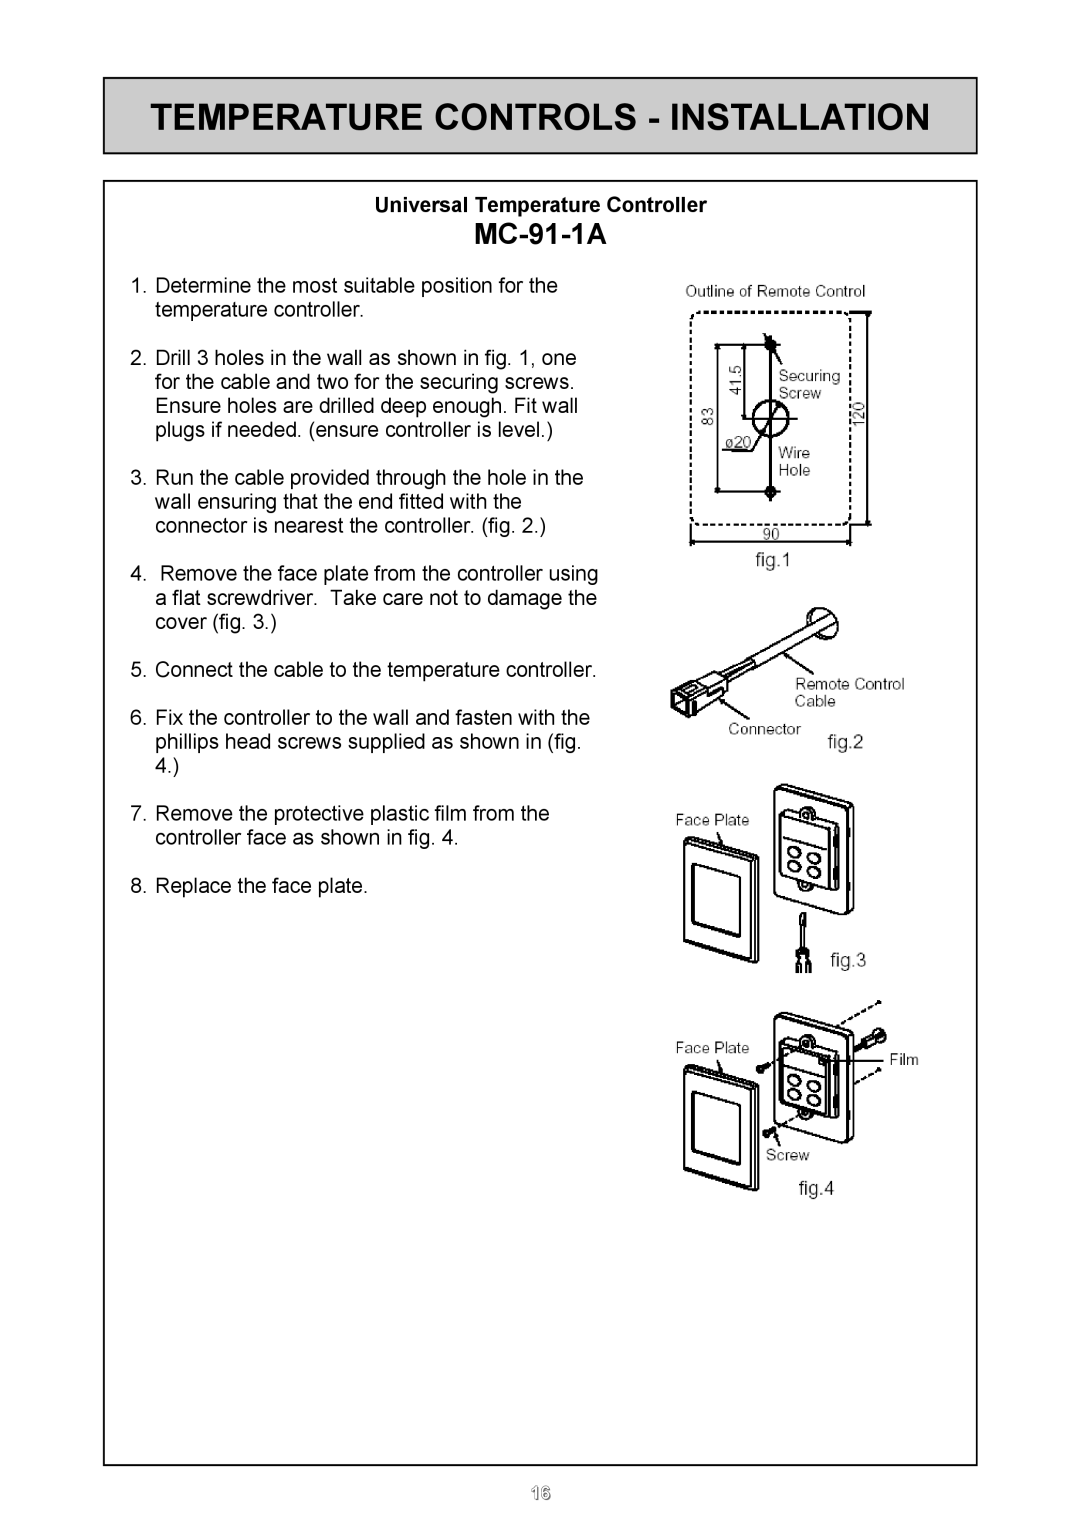
MC-91-1A
1.Determine the most suitable position for the temperature controller.
2.Drill 3 holes in the wall as shown in fig. 1, one for the cable and two for the securing screws. Ensure holes are drilled deep enough. Fit wall plugs if needed. (ensure controller is level.)
3.Run the cable provided through the hole in the wall ensuring that the end fitted with the connector is nearest the controller. (fig. 2.)
4.Remove the face plate from the controller using a flat screwdriver. Take care not to damage the cover (fig. 3.)
5.Connect the cable to the temperature controller.
6.Fix the controller to the wall and fasten with the phillips head screws supplied as shown in (fig. 4.)
7.Remove the protective plastic film from the controller face as shown in fig. 4.
8.Replace the face plate.
NOTE
16