Installing Body Assembly in an Open
Install Doors if Applicable
Refer to separate installation instructions.
Install Body Assembly into Frame
The body assembly includes the burner assembly.
Unpack and fit assembly into frame using the mounting brackets.
For an open
Attach Mounting Brackets
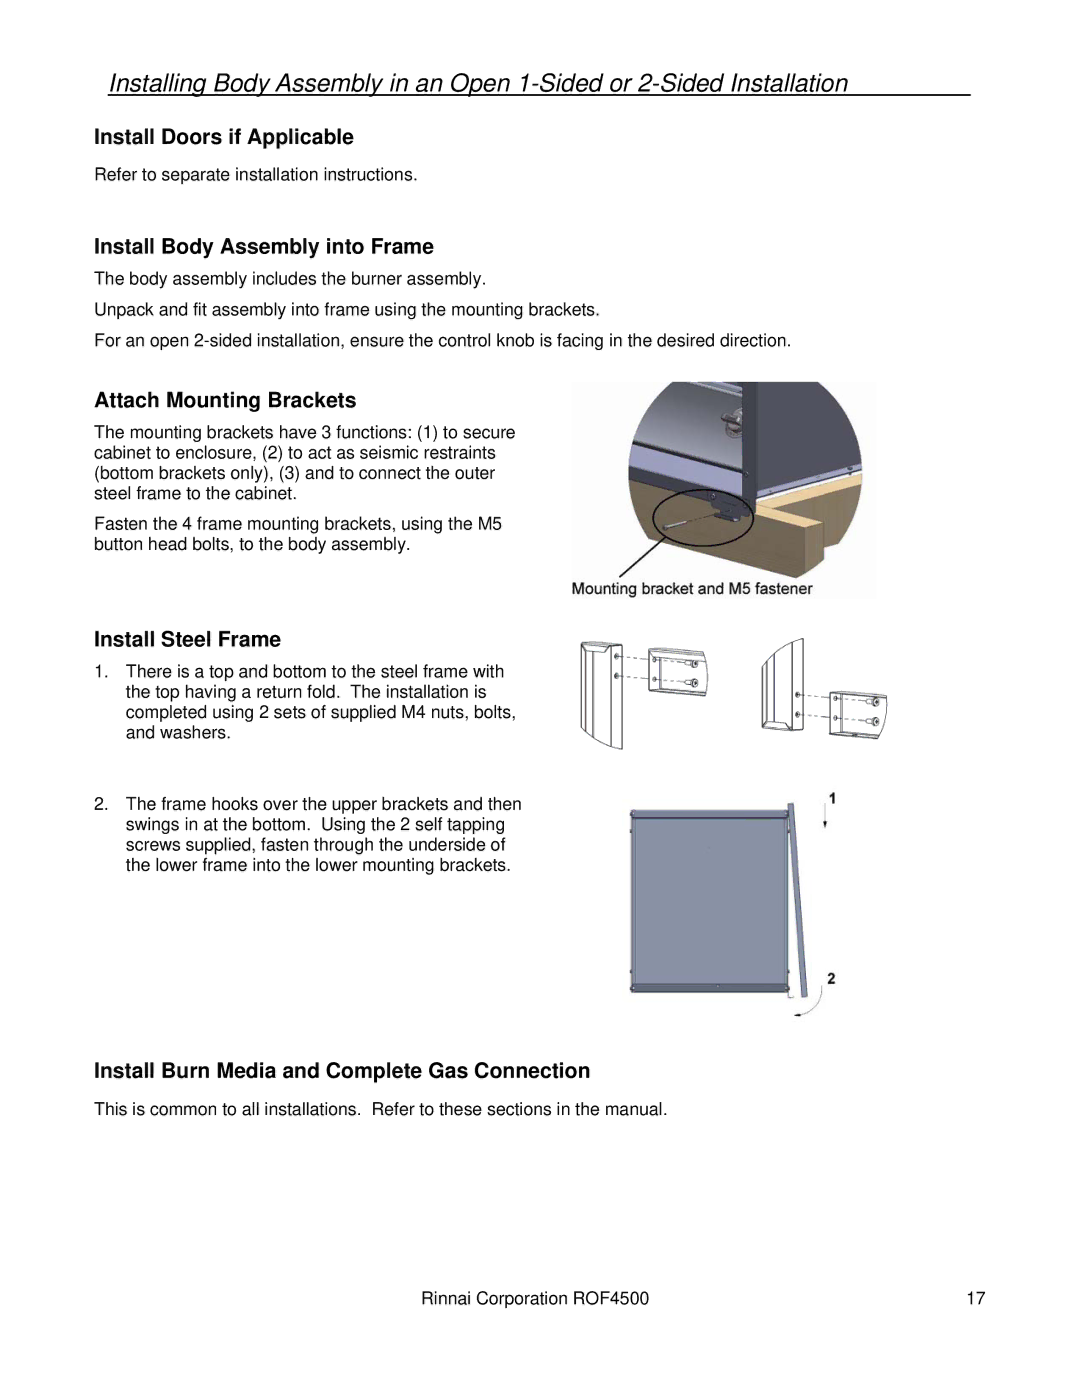
The mounting brackets have 3 functions: (1) to secure cabinet to enclosure, (2) to act as seismic restraints (bottom brackets only), (3) and to connect the outer steel frame to the cabinet.
Fasten the 4 frame mounting brackets, using the M5 button head bolts, to the body assembly.
Install Steel Frame
1.There is a top and bottom to the steel frame with the top having a return fold. The installation is completed using 2 sets of supplied M4 nuts, bolts, and washers.
2.The frame hooks over the upper brackets and then swings in at the bottom. Using the 2 self tapping screws supplied, fasten through the underside of the lower frame into the lower mounting brackets.
Install Burn Media and Complete Gas Connection
This is common to all installations. Refer to these sections in the manual.
Rinnai Corporation ROF4500 | 17 |
