Introduction
Assembling the F-100
Make sure that another person is on hand to help with the assembly and setup.
To move the piano, lift it
Always carry out this procedure with the
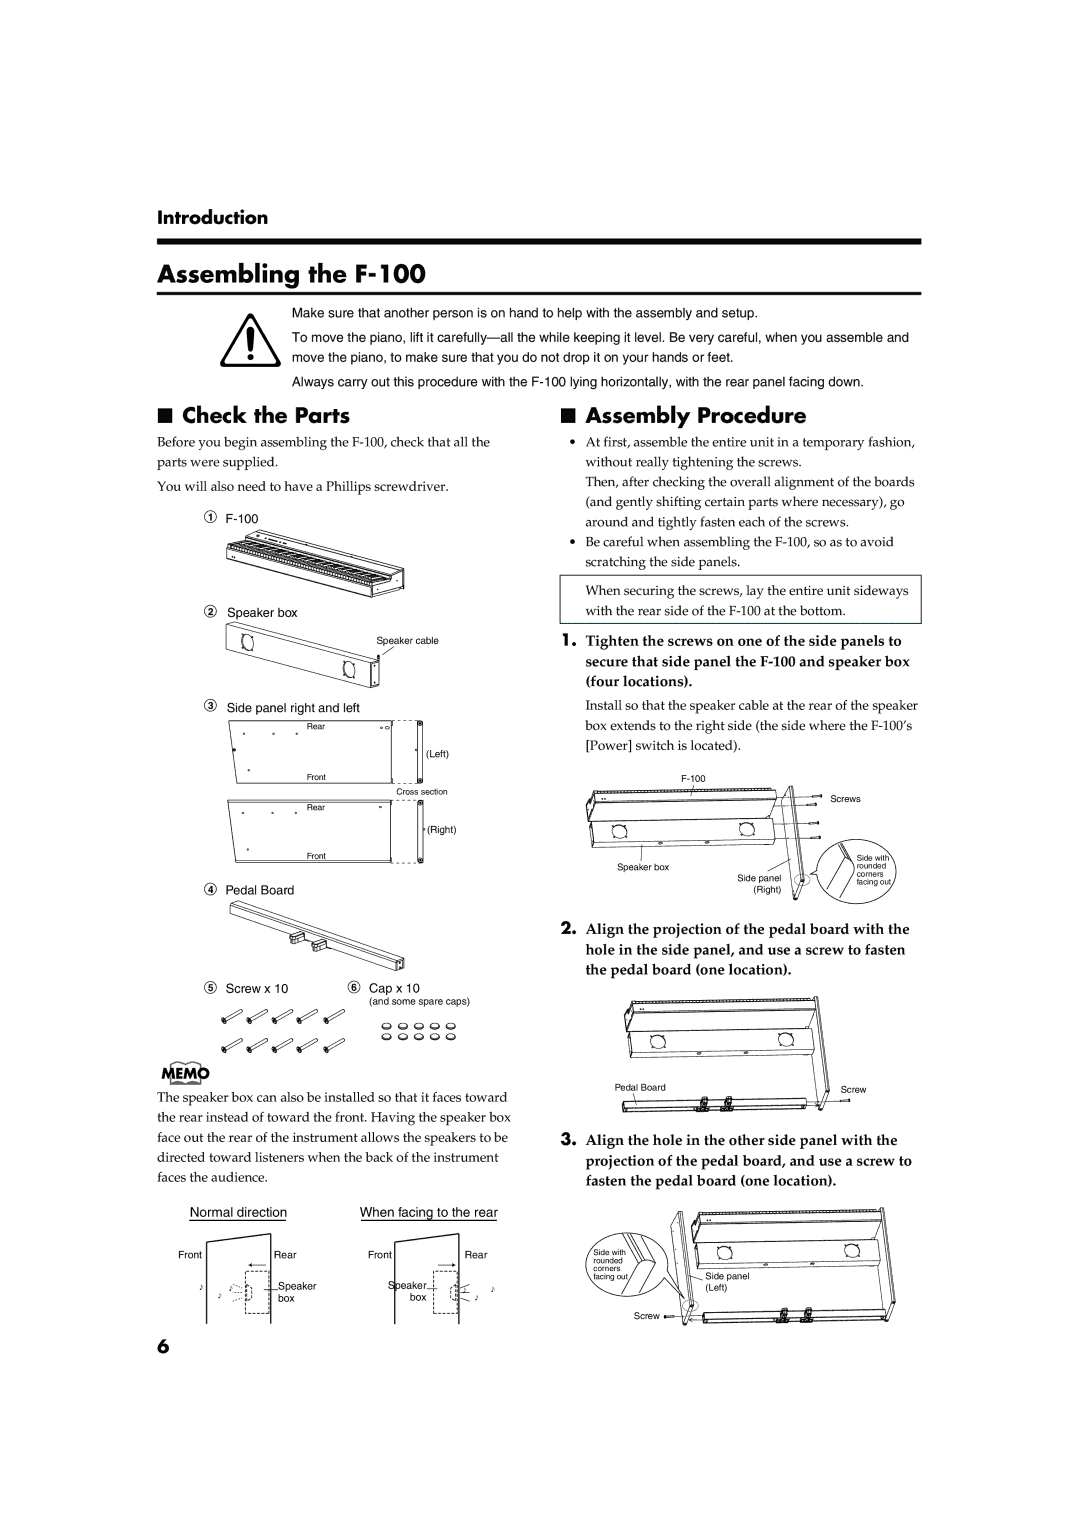
■Check the Parts
Before you begin assembling the
You will also need to have a Phillips screwdriver.
fig.st1
1
2Speaker box
Speaker cable
3Side panel right and left
Rear
(Left)
Front
Cross section
Rear
(Right)
Front
4Pedal Board
5 Screw x 10 | 6 Cap x 10 |
(and some spare caps)
The speaker box can also be installed so that it faces toward the rear instead of toward the front. Having the speaker box face out the rear of the instrument allows the speakers to be directed toward listeners when the back of the instrument faces the audience.
fig.stsp
Normal direction | When facing to the rear | ||
Front | Rear | Front | Rear |
| Speaker | Speaker |
|
| box | box |
|
■Assembly Procedure
•At first, assemble the entire unit in a temporary fashion, without really tightening the screws.
Then, after checking the overall alignment of the boards (and gently shifting certain parts where necessary), go around and tightly fasten each of the screws.
•Be careful when assembling the
When securing the screws, lay the entire unit sideways with the rear side of the
1.Tighten the screws on one of the side panels to secure that side panel the
Install so that the speaker cable at the rear of the speaker box extends to the right side (the side where the
[Power] switch is located).
fig.st02-2
|
| |
|
| Screws |
|
| Side with |
Speaker box |
| rounded |
| Side panel | corners |
| facing out | |
| (Right) | |
|
|
2.Align the projection of the pedal board with the hole in the side panel, and use a screw to fasten
the pedal board (one location).
fig.st02-2
Pedal Board | Screw |
3.Align the hole in the other side panel with the projection of the pedal board, and use a screw to
fasten the pedal board (one location).
fig.st02-2
Side with rounded corners
facing out![]() Side panel (Left)
Side panel (Left)
Screw ![]()
![]()
![]()
6