8RR-969
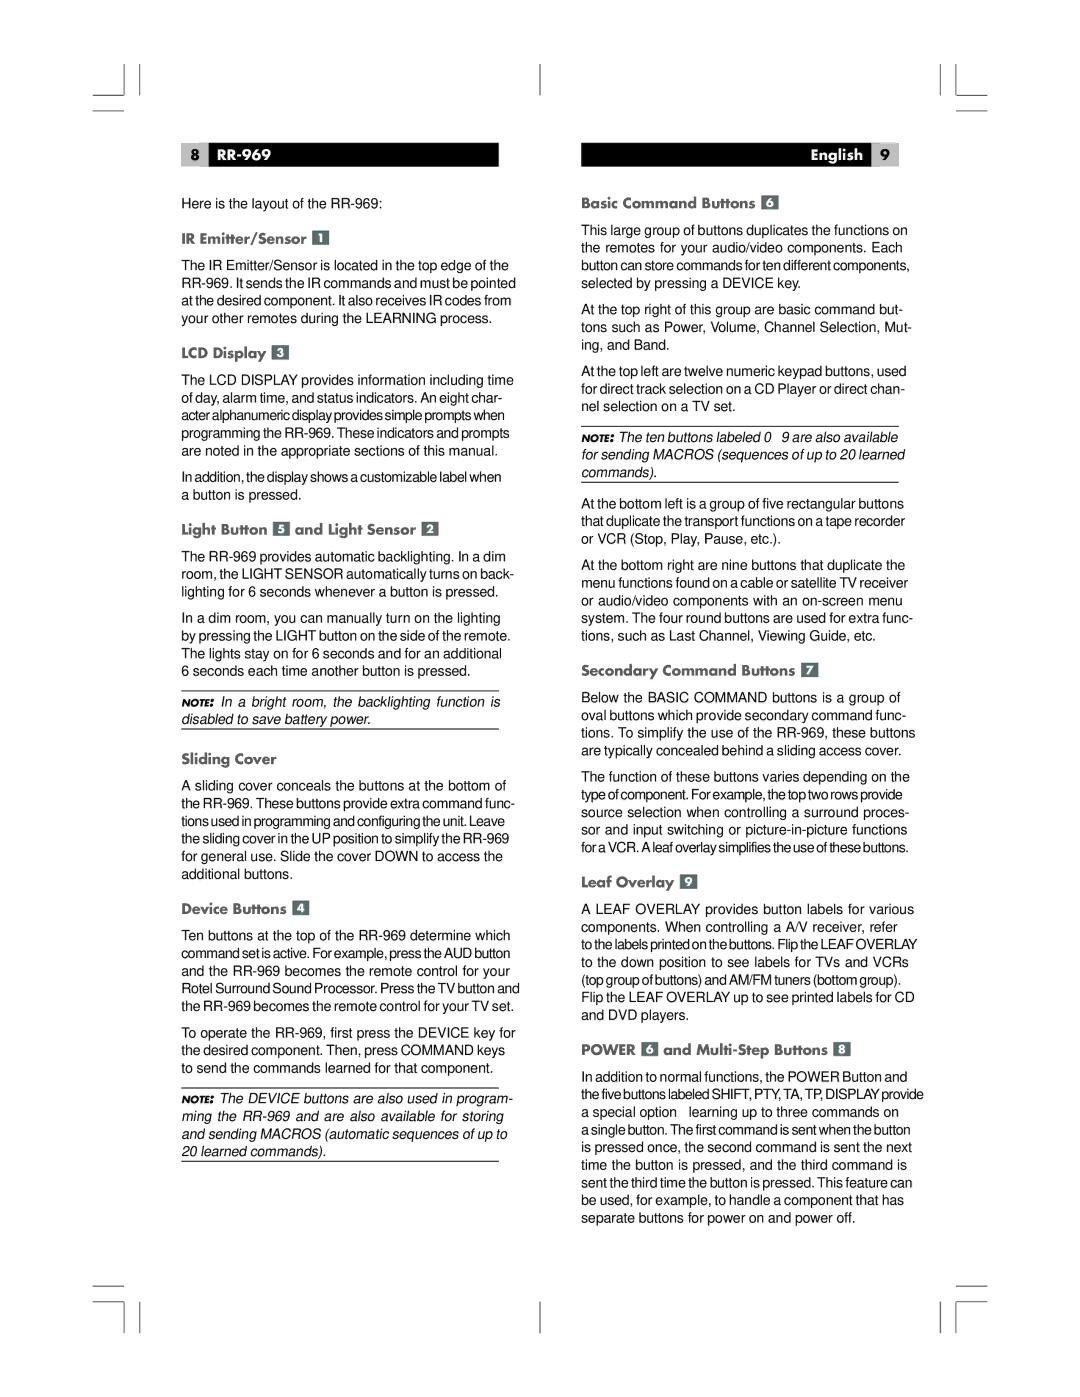
Here is the layout of the
IR Emitter/Sensor 
The IR Emitter/Sensor is located in the top edge of the
LCD Display 
The LCD DISPLAY provides information including time of day, alarm time, and status indicators. An eight char- acter alphanumeric display provides simple prompts when programming the
In addition, the display shows a customizable label when a button is pressed.
Light Button  and Light Sensor
The
In a dim room, you can manually turn on the lighting by pressing the LIGHT button on the side of the remote. The lights stay on for 6 seconds and for an additional 6 seconds each time another button is pressed.
NOTE: In a bright room, the backlighting function is disabled to save battery power.
Sliding Cover
A sliding cover conceals the buttons at the bottom of the
Device Buttons 
Ten buttons at the top of the
To operate the
NOTE: The DEVICE buttons are also used in program- ming the
English 9
Basic Command Buttons 
This large group of buttons duplicates the functions on the remotes for your audio/video components. Each button can store commands for ten different components, selected by pressing a DEVICE key.
At the top right of this group are basic command but- tons such as Power, Volume, Channel Selection, Mut- ing, and Band.
At the top left are twelve numeric keypad buttons, used for direct track selection on a CD Player or direct chan- nel selection on a TV set.
NOTE: The ten buttons labeled 0 – 9 are also available for sending MACROS (sequences of up to 20 learned commands).
At the bottom left is a group of five rectangular buttons that duplicate the transport functions on a tape recorder or VCR (Stop, Play, Pause, etc.).
At the bottom right are nine buttons that duplicate the menu functions found on a cable or satellite TV receiver or audio/video components with an
Secondary Command Buttons 
Below the BASIC COMMAND buttons is a group of oval buttons which provide secondary command func- tions. To simplify the use of the
The function of these buttons varies depending on the type of component. For example, the top two rows provide source selection when controlling a surround proces- sor and input switching or
Leaf Overlay 
A LEAF OVERLAY provides button labels for various components. When controlling a A/V receiver, refer to the labels printed on the buttons. Flip the LEAF OVERLAY to the down position to see labels for TVs and VCRs (top group of buttons) and AM/FM tuners (bottom group). Flip the LEAF OVERLAY up to see printed labels for CD and DVD players.
POWER  and
and Multi-Step Buttons 
In addition to normal functions, the POWER Button and the five buttons labeled SHIFT, PTY, TA, TP, DISPLAY provide a special option – learning up to three commands on a single button. The first command is sent when the button is pressed once, the second command is sent the next time the button is pressed, and the third command is sent the third time the button is pressed. This feature can be used, for example, to handle a component that has separate buttons for power on and power off.