
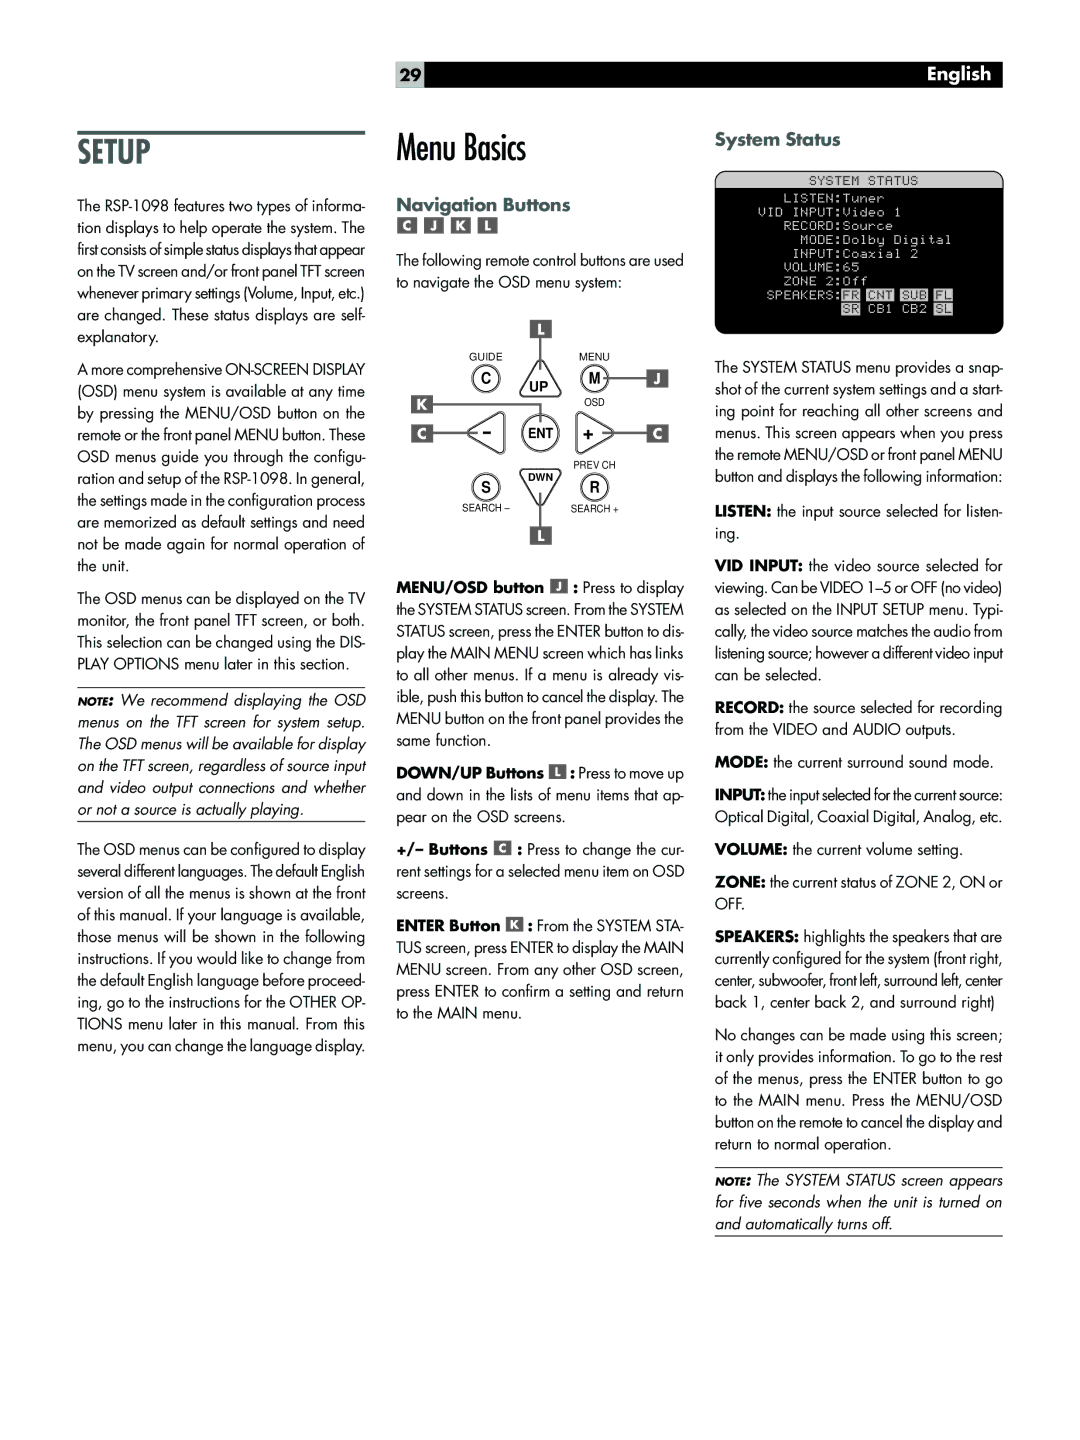
RSP-1098 specifications
The Rotel RSP-1098 is a remarkable surround sound processor that has set a high standard in the realm of home theater systems. Designed for audiophiles and movie enthusiasts alike, the RSP-1098 embodies innovative technology and high-performance audio processing.One of the standout features of the RSP-1098 is its advanced digital signal processing capabilities. This processor utilizes a 24-bit/192kHz DAC, allowing for incredibly precise audio reproduction that enhances the listening experience. The RSP-1098 supports a variety of audio formats, including Dolby Digital, DTS, and PCM, making it versatile enough for any media format you may encounter.
The unit provides multiple inputs and outputs, ensuring seamless connectivity with various audio and video components. Its seven-channel outputs facilitate the connection of a complete surround sound system. Additionally, the RSP-1098 includes balanced XLR outputs, which minimize noise and signal degradation, making it ideal for high-end audio systems.
Another major highlight of the Rotel RSP-1098 is its extensive room correction technology. The built-in Auto Setup feature utilizes a microphone to analyze your room’s acoustics, automatically adjusting settings for optimal sound. This ensures that you achieve the best audio performance regardless of your room’s characteristics.
The processor also features a user-friendly interface with an intuitive on-screen display, making it easy to navigate through settings and configurations. Equipped with a comprehensive remote control, the RSP-1098 allows you to take command of your home theater experience from the comfort of your seat.
In terms of build quality, Rotel is known for its commitment to excellence. The RSP-1098 features a robust chassis that minimizes vibrations, ensuring that the audio performance remains unadulterated. The elegant design, combined with high-quality components, resonates with the brand's dedication to achieving top-tier sound.
Overall, the Rotel RSP-1098 remains a significant player in the high-end audio segment, delivering exceptional performance, advanced technologies, and an impressive range of features. For those seeking an enriching home theater experience, the RSP-1098 stands out as a worthy investment that promises to elevate your audiovisual enjoyment to new heights.