ASSEMBLY
nUse the same steps to install the lower braces. Tighten all hex nuts with a wrench.
nPlace a carriage bolt in each of the four holes on the top of the leg stand and secure with a hex nut.
nTighten securely.
nPlace one foot on the bottom of each of the legs.
nMove the leg set to desired location.
TO MOUNT THE BAND SAW TO THE LEG STAND
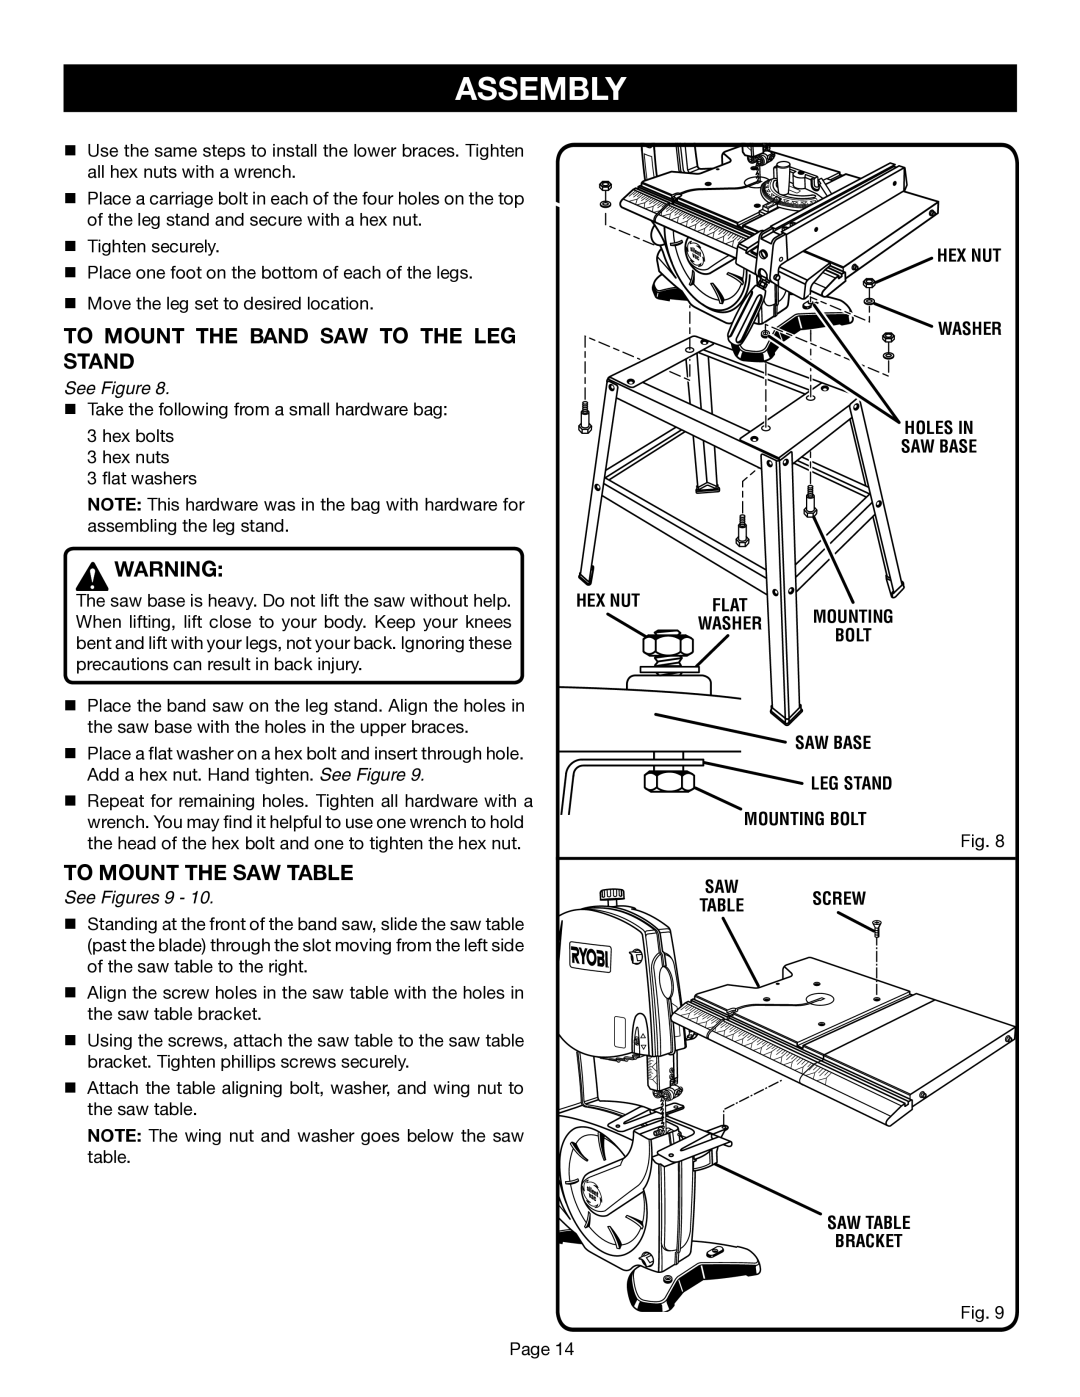
See Figure 8.
nTake the following from a small hardware bag:
3 hex bolts
3 hex nuts
3 flat washers
NOTE: This hardware was in the bag with hardware for assembling the leg stand.
WARNING:
The saw base is heavy. Do not lift the saw without help. When lifting, lift close to your body. Keep your knees bent and lift with your legs, not your back. Ignoring these precautions can result in back injury.
nPlace the band saw on the leg stand. Align the holes in the saw base with the holes in the upper braces.
nPlace a flat washer on a hex bolt and insert through hole. Add a hex nut. Hand tighten. See Figure 9.
nRepeat for remaining holes. Tighten all hardware with a wrench. You may find it helpful to use one wrench to hold the head of the hex bolt and one to tighten the hex nut.
HEX NUT


 WASHER
HOLES IN
SAW BASE
HEX NUT | FLAT | MOUNTING |
| WASHER | |
| BOLT | |
|
|
 SAW BASE


 LEG STAND
MOUNTING BOLT
Fig. 8
TO MOUNT THE SAW TABLE
See Figures 9 - 10.
nStanding at the front of the band saw, slide the saw table
(past the blade) through the slot moving from the left side of the saw table to the right.
nAlign the screw holes in the saw table with the holes in the saw table bracket.
n Using the screws, attach the saw table to the saw table bracket. Tighten phillips screws securely.
n Attach the table aligning bolt, washer, and wing nut to the saw table.
NOTE: The wing nut and washer goes below the saw table.
Page 14
SAW
TABLE SCREW
SAW TABLE
BRACKET
Fig. 9