OPERATION
USING THE RIP FENCE
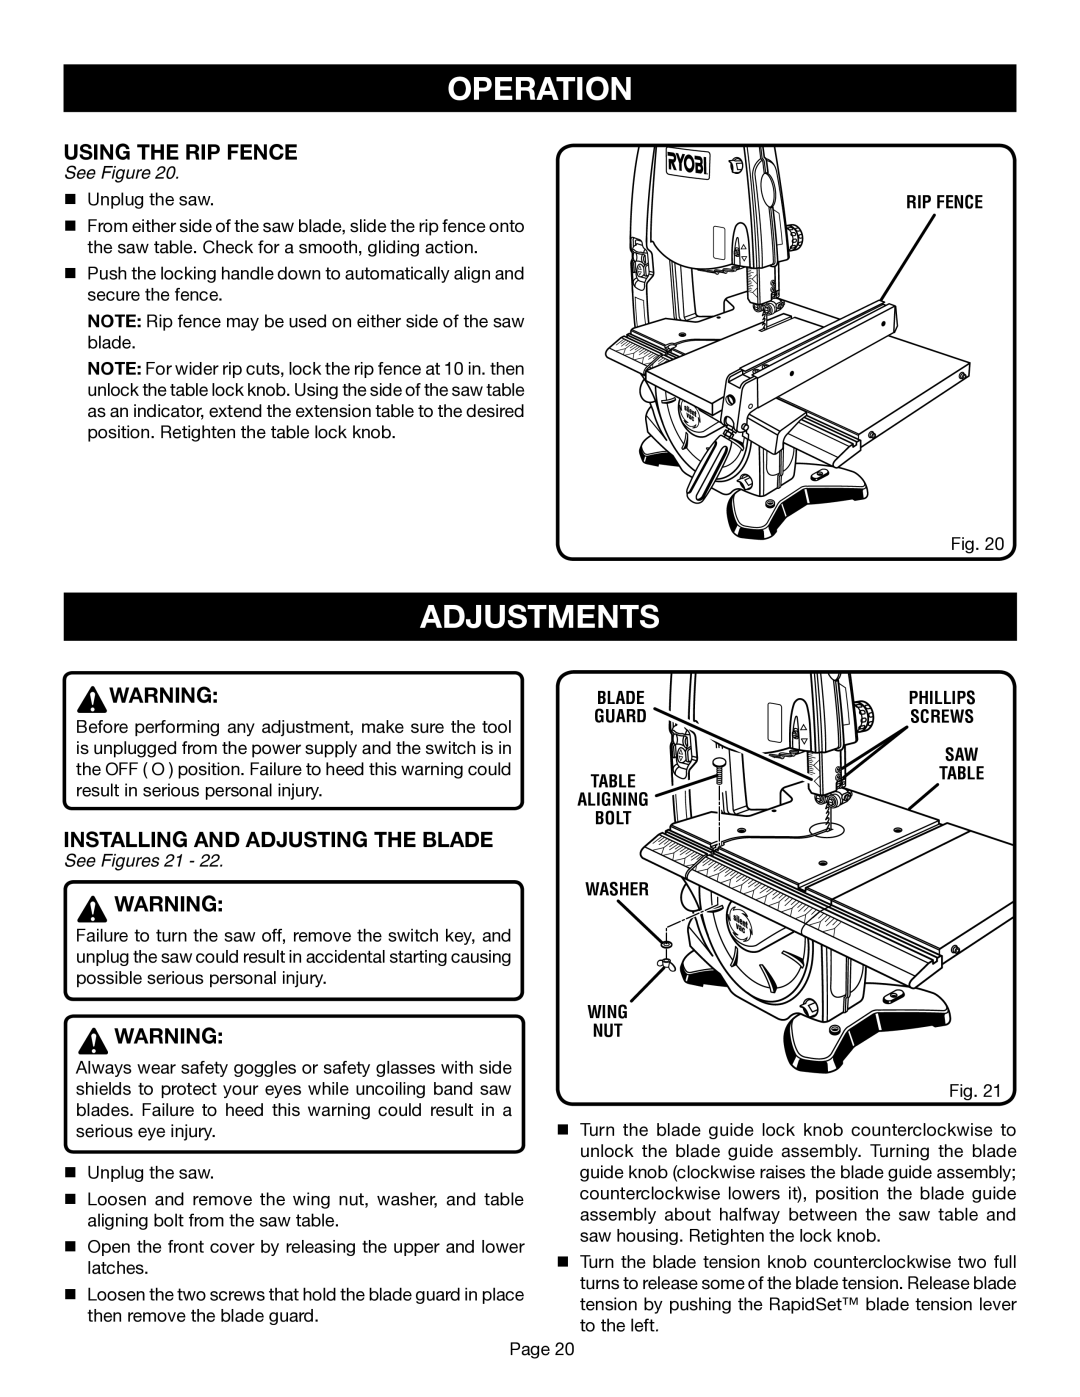
See Figure 20.
nUnplug the saw.
nFrom either side of the saw blade, slide the rip fence onto
the saw table. Check for a smooth, gliding action.
n Push the locking handle down to automatically align and secure the fence.
NOTE: Rip fence may be used on either side of the saw blade.
NOTE: For wider rip cuts, lock the rip fence at 10 in. then unlock the table lock knob. Using the side of the saw table as an indicator, extend the extension table to the desired position. Retighten the table lock knob.
RIP FENCE
Fig. 20
ADJUSTMENTS
![]() WARNING:
WARNING:
Before performing any adjustment, make sure the tool is unplugged from the power supply and the switch is in the OFF ( O ) position. Failure to heed this warning could result in serious personal injury.
INSTALLING AND ADJUSTING THE BLADE
See Figures 21 - 22.
![]() WARNING:
WARNING:
Failure to turn the saw off, remove the switch key, and unplug the saw could result in accidental starting causing possible serious personal injury.
![]() WARNING:
WARNING:
Always wear safety goggles or safety glasses with side shields to protect your eyes while uncoiling band saw blades. Failure to heed this warning could result in a serious eye injury.
nUnplug the saw.
nLoosen and remove the wing nut, washer, and table aligning bolt from the saw table.
nOpen the front cover by releasing the upper and lower latches.
nLoosen the two screws that hold the blade guard in place then remove the blade guard.
BLADE | PHILLIPS |
GUARD | SCREWS |
| SAW |
TABLE | TABLE |
| |
ALIGNING |
|
BOLT |
|
WASHER |
|
WING
NUT
Fig. 21
nTurn the blade guide lock knob counterclockwise to unlock the blade guide assembly. Turning the blade guide knob (clockwise raises the blade guide assembly; counterclockwise lowers it), position the blade guide assembly about halfway between the saw table and saw housing. Retighten the lock knob.
nTurn the blade tension knob counterclockwise two full turns to release some of the blade tension. Release blade tension by pushing the RapidSet™ blade tension lever to the left.
Page 20