ADJUSTMENTS
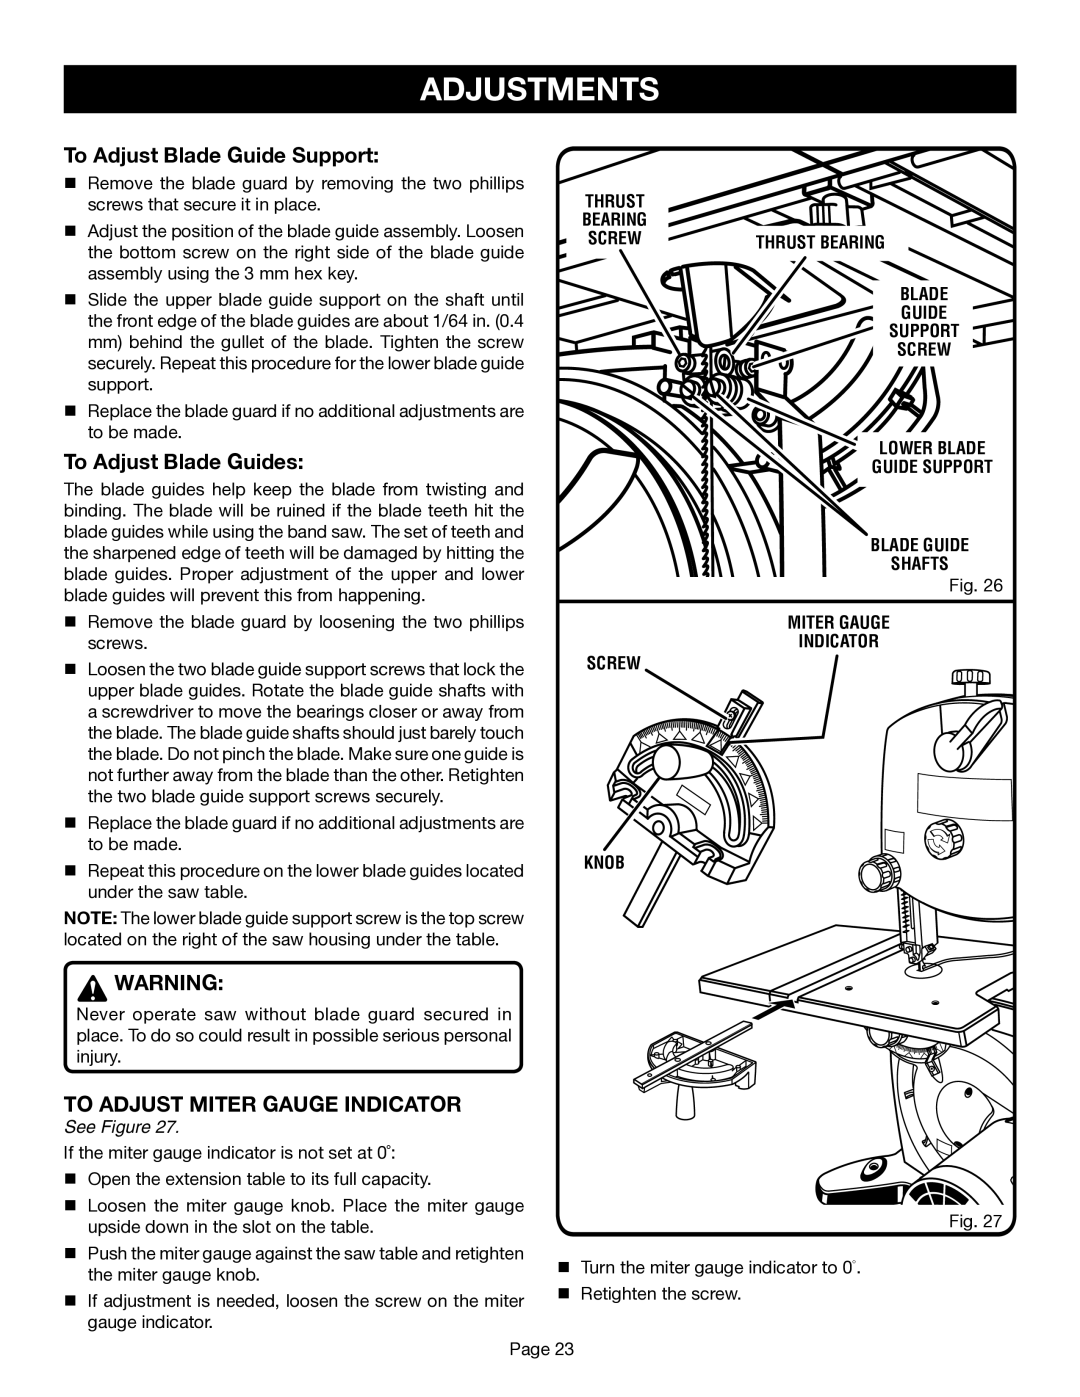
To Adjust Blade Guide Support:
nRemove the blade guard by removing the two phillips screws that secure it in place.
nAdjust the position of the blade guide assembly. Loosen the bottom screw on the right side of the blade guide assembly using the 3 mm hex key.
nSlide the upper blade guide support on the shaft until the front edge of the blade guides are about 1/64 in. (0.4
mm)behind the gullet of the blade. Tighten the screw securely. Repeat this procedure for the lower blade guide support.
nReplace the blade guard if no additional adjustments are to be made.
To Adjust Blade Guides:
The blade guides help keep the blade from twisting and binding. The blade will be ruined if the blade teeth hit the blade guides while using the band saw. The set of teeth and the sharpened edge of teeth will be damaged by hitting the blade guides. Proper adjustment of the upper and lower blade guides will prevent this from happening.
nRemove the blade guard by loosening the two phillips screws.
nLoosen the two blade guide support screws that lock the upper blade guides. Rotate the blade guide shafts with a screwdriver to move the bearings closer or away from the blade. The blade guide shafts should just barely touch the blade. Do not pinch the blade. Make sure one guide is not further away from the blade than the other. Retighten the two blade guide support screws securely.
nReplace the blade guard if no additional adjustments are to be made.
nRepeat this procedure on the lower blade guides located under the saw table.
NOTE: The lower blade guide support screw is the top screw located on the right of the saw housing under the table.
![]() WARNING:
WARNING:
Never operate saw without blade guard secured in place. To do so could result in possible serious personal injury.
TO ADJUST MITER GAUGE INDICATOR
See Figure 27.
If the miter gauge indicator is not set at 0˚:
nOpen the extension table to its full capacity.
nLoosen the miter gauge knob. Place the miter gauge upside down in the slot on the table.
nPush the miter gauge against the saw table and retighten the miter gauge knob.
nIf adjustment is needed, loosen the screw on the miter gauge indicator.
THRUST |
|
BEARING |
|
SCREW | THRUST BEARING |
BLADE
GUIDE
SUPPORT
![]() SCREW
SCREW
LOWER BLADE
GUIDE SUPPORT
BLADE GUIDE
SHAFTS
Fig. 26
MITER GAUGE
INDICATOR
SCREW
KNOB
Fig. 27
nTurn the miter gauge indicator to 0°.
nRetighten the screw.
Page 23