ASSEMBLY
TO MOUNT THE TABLE SAW TO THE LEG STAND
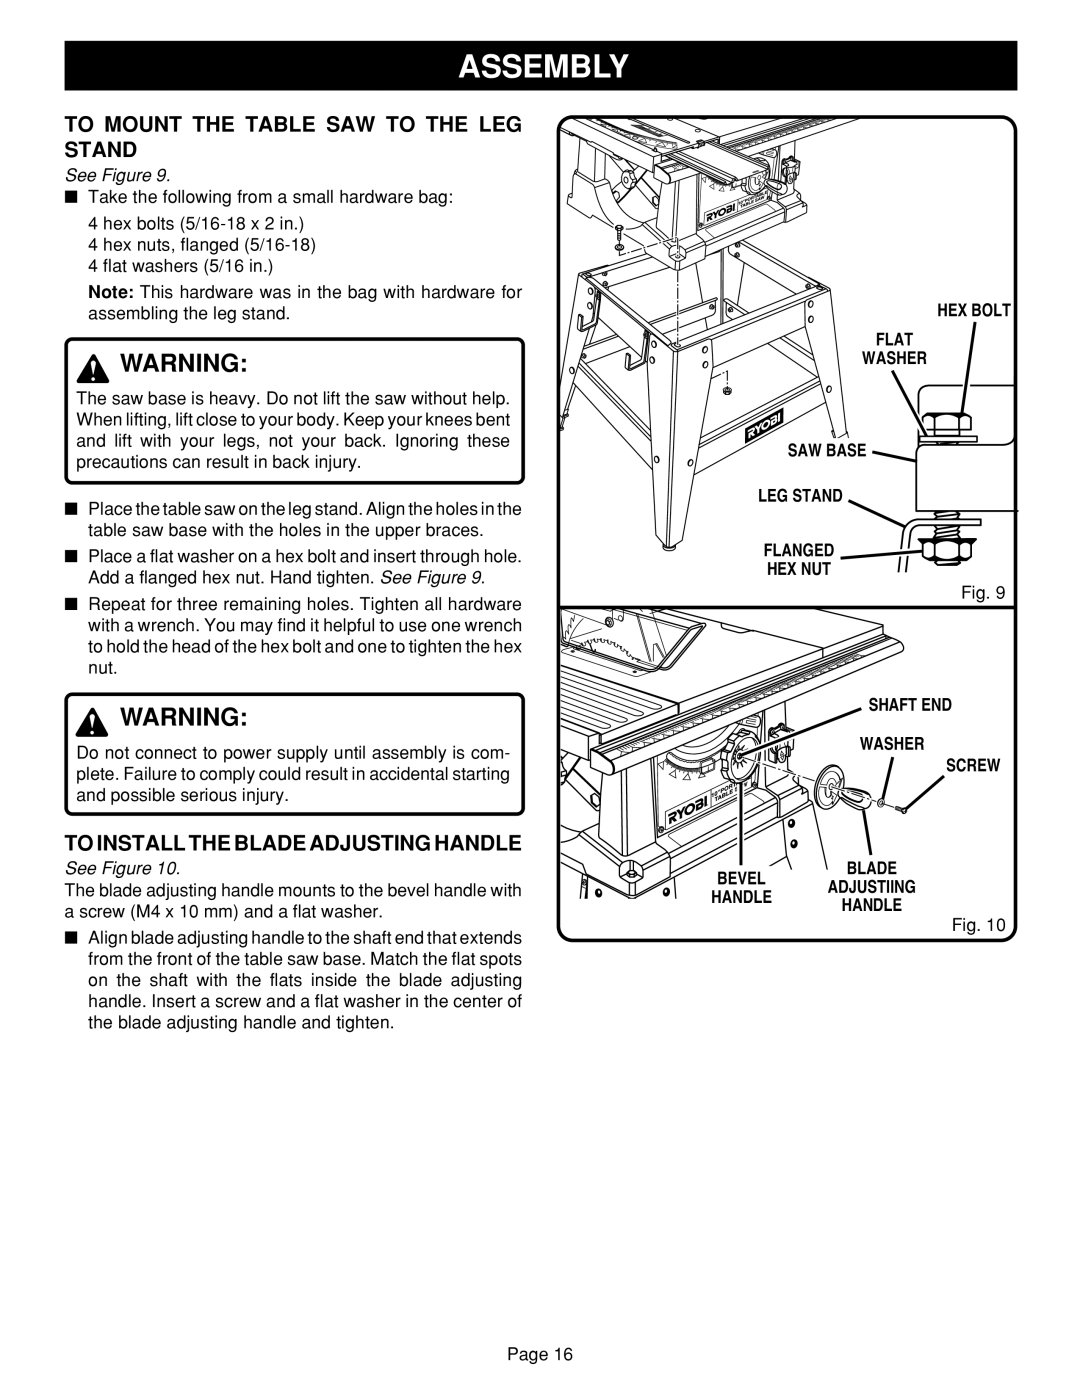
See Figure 9.
■Take the following from a small hardware bag:
4 hex bolts
4 hex nuts, flanged
4 flat washers (5/16 in.)
Note: This hardware was in the bag with hardware for assembling the leg stand.
![]() WARNING:
WARNING:
The saw base is heavy. Do not lift the saw without help. When lifting, lift close to your body. Keep your knees bent and lift with your legs, not your back. Ignoring these precautions can result in back injury.
■Place the table saw on the leg stand. Align the holes in the table saw base with the holes in the upper braces.
■Place a flat washer on a hex bolt and insert through hole. Add a flanged hex nut. Hand tighten. See Figure 9.
■Repeat for three remaining holes. Tighten all hardware with a wrench. You may find it helpful to use one wrench to hold the head of the hex bolt and one to tighten the hex nut.
![]() WARNING:
WARNING:
Do not connect to power supply until assembly is com- plete. Failure to comply could result in accidental starting and possible serious injury.
TO INSTALL THE BLADE ADJUSTING HANDLE
See Figure 10.
The blade adjusting handle mounts to the bevel handle with a screw (M4 x 10 mm) and a flat washer.
■Align blade adjusting handle to the shaft end that extends from the front of the table saw base. Match the flat spots on the shaft with the flats inside the blade adjusting handle. Insert a screw and a flat washer in the center of the blade adjusting handle and tighten.
HEX BOLT
FLAT
WASHER
SAW BASE
LEG STAND
FLANGED ![]()
HEX NUT
Fig. 9
SHAFT END
WASHER
SCREW
BLADE
BEVEL ADJUSTIING
HANDLE HANDLE
Fig. 10
Page 16