ACCESSORIES
TRIMMING WITH SUBBASE ACCESSORY
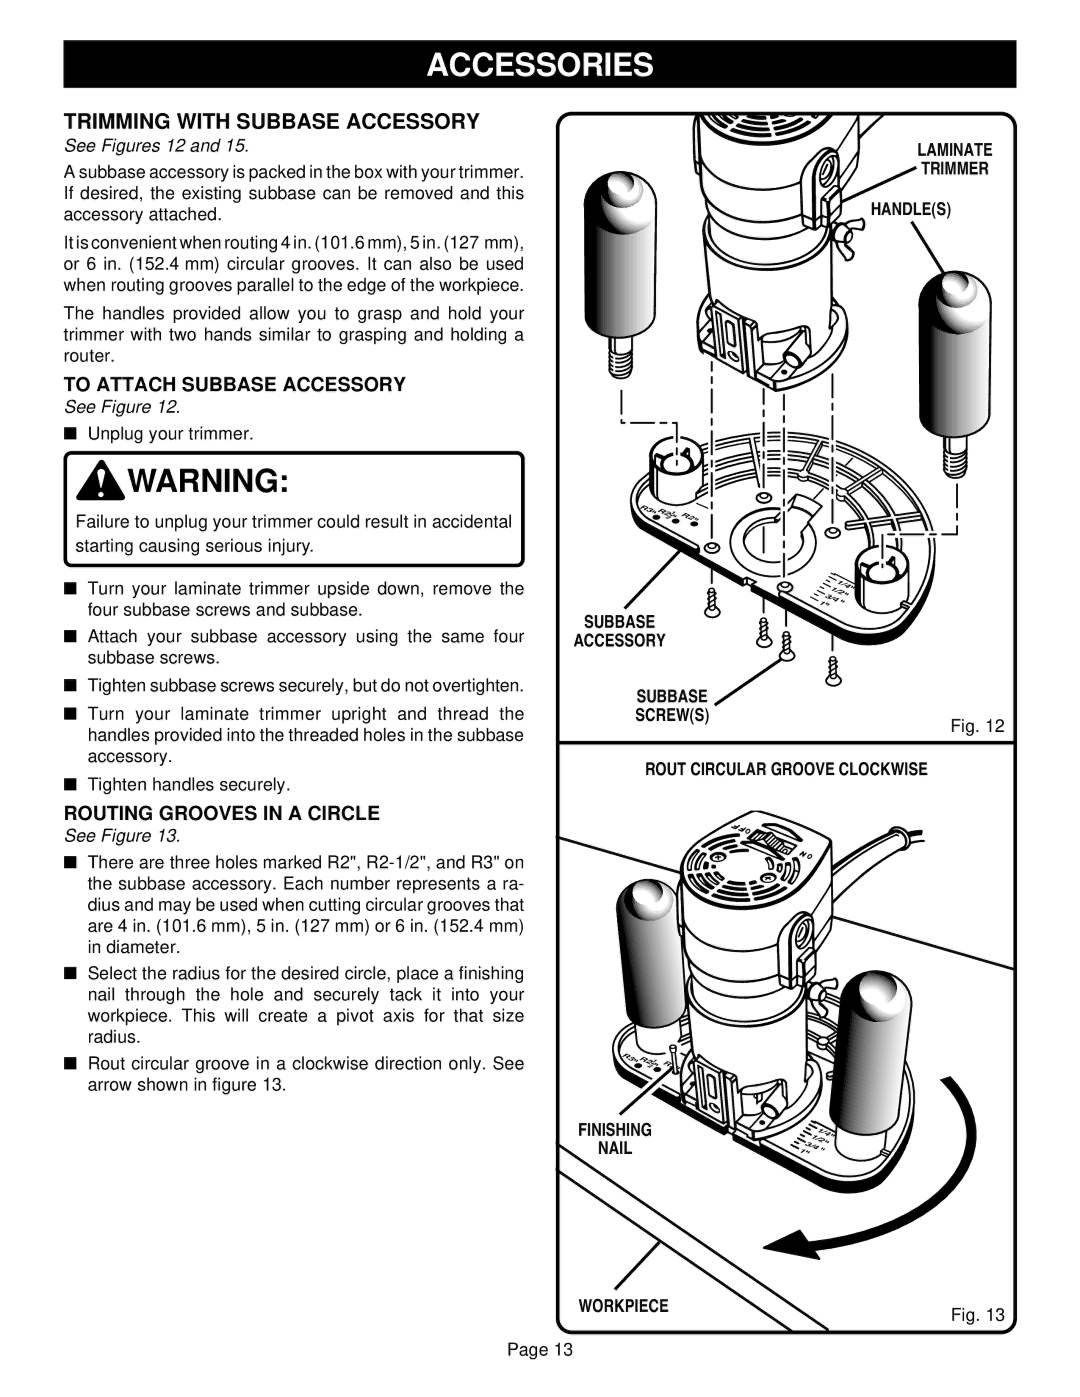
See Figures 12 and 15.
A subbase accessory is packed in the box with your trimmer. If desired, the existing subbase can be removed and this accessory attached.
It is convenient when routing 4 in. (101.6 mm), 5 in. (127 mm), or 6 in. (152.4 mm) circular grooves. It can also be used when routing grooves parallel to the edge of the workpiece.
The handles provided allow you to grasp and hold your trimmer with two hands similar to grasping and holding a router.
TO ATTACH SUBBASE ACCESSORY
See Figure 12.
■Unplug your trimmer.
![]() WARNING:
WARNING:
Failure to unplug your trimmer could result in accidental starting causing serious injury.
■Turn your laminate trimmer upside down, remove the four subbase screws and subbase.
■Attach your subbase accessory using the same four subbase screws.
■Tighten subbase screws securely, but do not overtighten.
■Turn your laminate trimmer upright and thread the handles provided into the threaded holes in the subbase accessory.
■Tighten handles securely.
ROUTING GROOVES IN A CIRCLE
See Figure 13.
■There are three holes marked R2",
■Select the radius for the desired circle, place a finishing nail through the hole and securely tack it into your workpiece. This will create a pivot axis for that size radius.
■Rout circular groove in a clockwise direction only. See arrow shown in figure 13.
LAMINATE
TRIMMER
HANDLE(S)
R | R |
|
|
|
3 | 1 |
|
| |
| 2 | R | 2 | |
| 2 |
| ||
|
|
|
| 1/4 |
| 1/2 |
1 | 3/4 |
|
SUBBASE
ACCESSORY
SUBBASE
SCREW(S)
Fig. 12
ROUT CIRCULAR GROOVE CLOCKWISE
R3 | R2 | 1 | R2 |
| |||
| 2 |
|
FINISHING |
|
| 1 | 1 | /4 |
NAIL |
| 3 |
| /2 | |
1 | /4 |
| |||
|
|
|
|
| |
WORKPIECE | Fig. 13 |
|
Page 13