Connecting pipes
ffTightening of connection parts
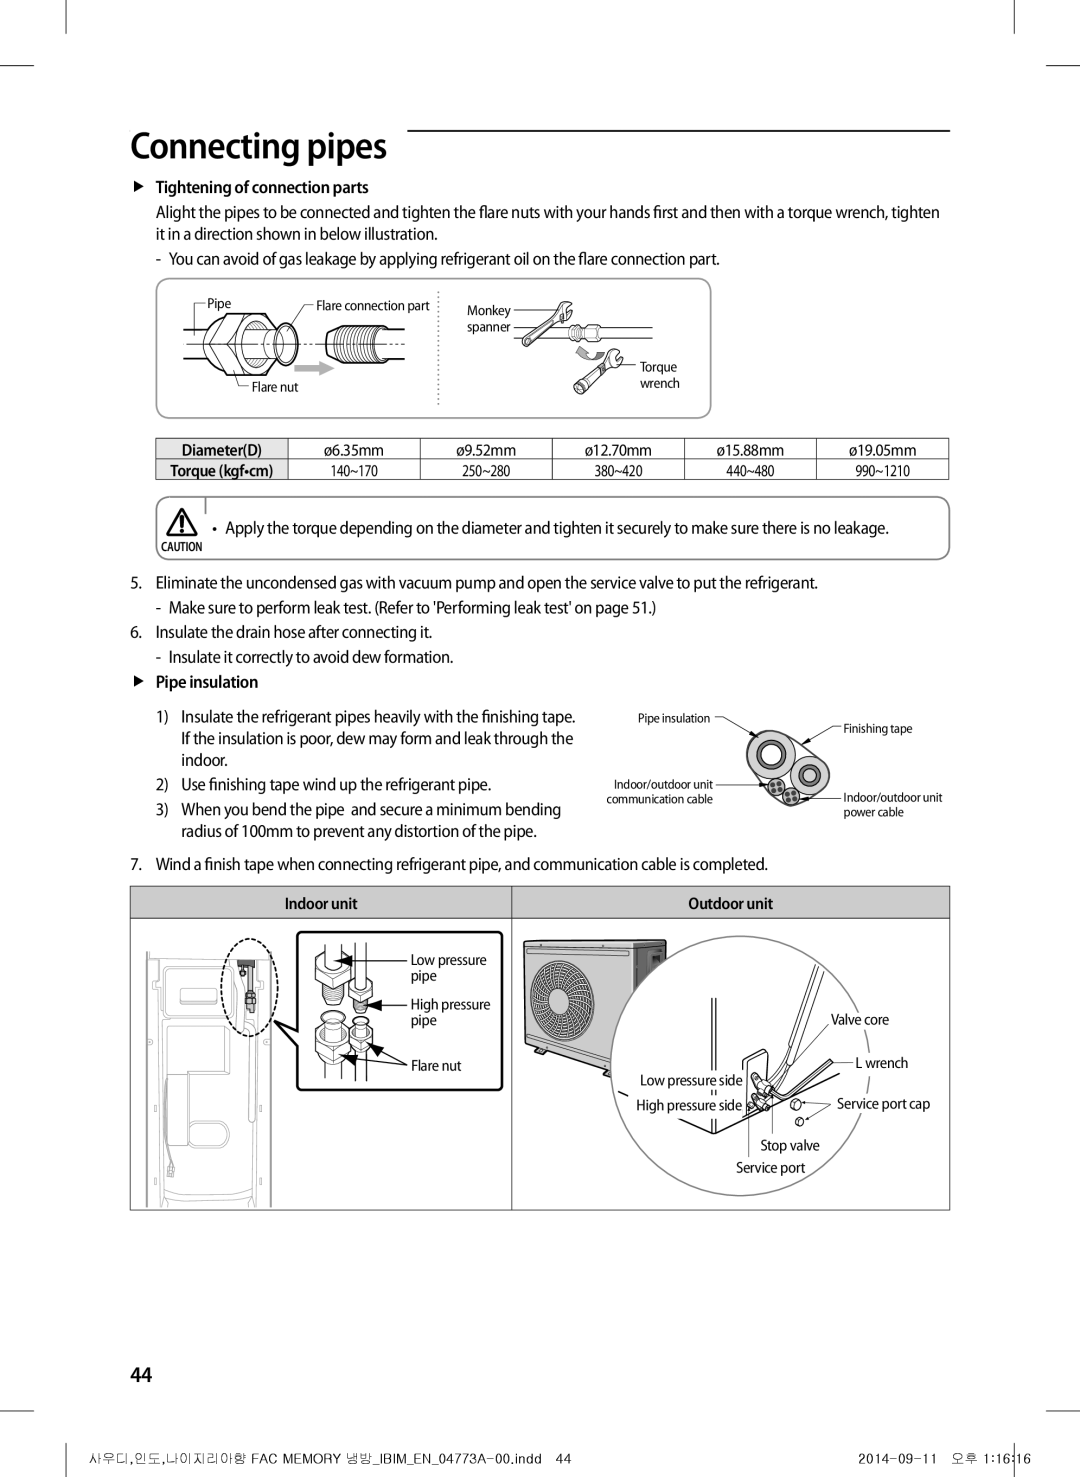
Alight the pipes to be connected and tighten the flare nuts with your hands first and then with a torque wrench, tighten it in a direction shown in below illustration.
Pipe | Flare connection part | Monkey |
|
| |
|
| spanner |
|
| Torque |
Flare nut |
| wrench |
Diameter(D) | ø6.35mm | ø9.52mm | ø12.70mm | ø15.88mm | ø19.05mm |
Torque (kgf•cm) | 140~170 | 250~280 | 380~420 | 440~480 | 990~1210 |
• Apply the torque depending on the diameter and tighten it securely to make sure there is no leakage.
CAUTION
5.Eliminate the uncondensed gas with vacuum pump and open the service valve to put the refrigerant.
6.Insulate the drain hose after connecting it.
ffPipe insulation
1) Insulate the refrigerant pipes heavily with the finishing tape. | Pipe insulation | Finishing tape |
If the insulation is poor, dew may form and leak through the |
| |
|
| |
indoor. |
|
|
2)Use finishing tape wind up the refrigerant pipe.
3)When you bend the pipe and secure a minimum bending radius of 100mm to prevent any distortion of the pipe.
Indoor/outdoor unit ![]()
![]()
communication cable![]()
![]()
![]() Indoor/outdoor unit power cable
Indoor/outdoor unit power cable
7. Wind a finish tape when connecting refrigerant pipe, and communication cable is completed.
Indoor unit | Outdoor unit |
|
Low pressure |
|
|
pipe |
|
|
High pressure |
| Valve core |
pipe |
| |
Flare nut | Low pressure side | L wrench |
|
| |
| High pressure side | Service port cap |
| Stop valve |
|
| Service port |
|
44
사우디,인도,나이지리아향 FAC MEMORY |
