Step 4.3 Performing final check and trial operation
1Check the following:
•Strength of the installation site
•Tightness of pipe connection to detect gas leak
•Electric wiring connection
•
•Drainage
•Grounding conductor connection
•Correct operation (Take the following steps.)
2Press the ![]() (Power) button on the remote control to check the following:
(Power) button on the remote control to check the following:
•The indicator on the indoor unit lights up.
•The airflow blade opens and the fan gears up for operation.
3Press the ![]()
![]()
![]()
![]() (Mode) button to select Cool mode. Then take the following
(Mode) button to select Cool mode. Then take the following
•In Cool mode, use the Temperature button to set the set temperature to 16 °C.
•Check whether, approximately 3 to 5 minutes later, the outdoor unit starts, and a cool air blows out.
•After12 minutes of stationary condition, check the indoor unit air treatment.
4Press the ![]()
![]() (Air swing) button to check whether the airflow blades work properly.
(Air swing) button to check whether the airflow blades work properly.
5Press the ![]() (Power) button to stop the trial operation.
(Power) button to stop the trial operation.
Pumping down for removing the product
![]() WARNING
WARNING
•After installing the product, be sure to perform leak tests on the piping connections. After pumping down refrigerant to inspect or relocate the outdoor unit, be sure to stop the compressor and then remove the connected pipes.
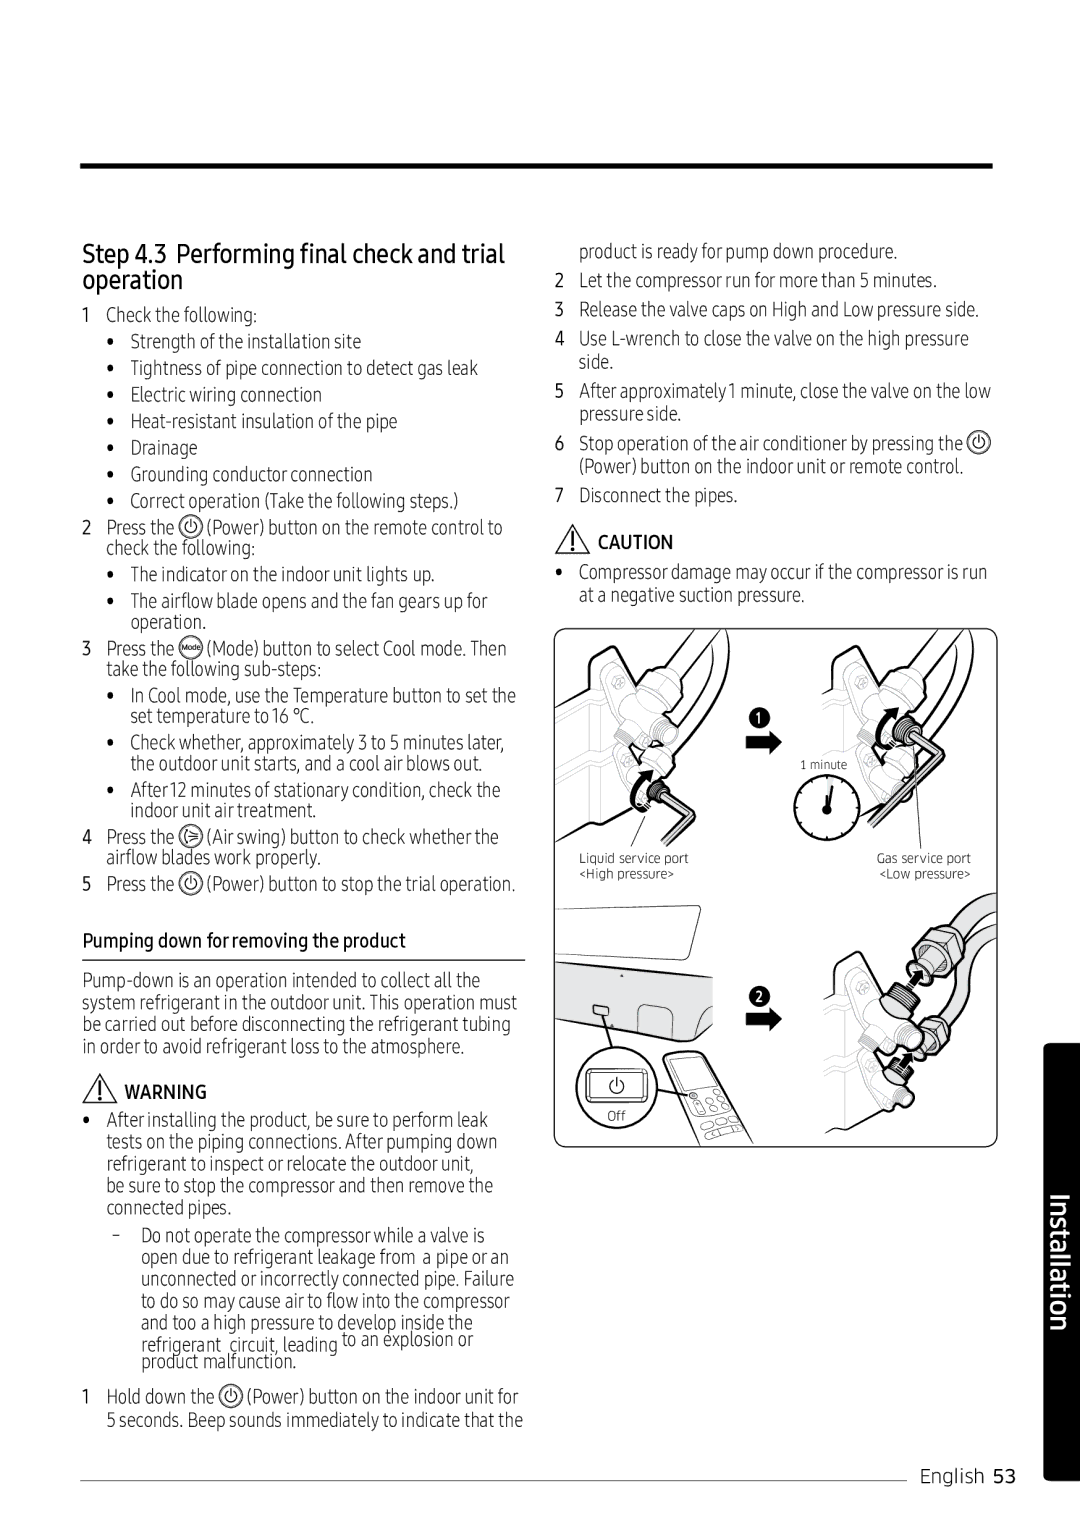
1Hold down the ![]() (Power) button on the indoor unit for
(Power) button on the indoor unit for
5 seconds. Beep sounds immediately to indicate that the
product is ready for pump down procedure.
2Let the compressor run for more than 5 minutes.
3Release the valve caps on High and Low pressure side.
4Use
5After approximately1 minute, close the valve on the low pressure side.
6Stop operation of the air conditioner by pressing the ![]()
(Power) button on the indoor unit or remote control.
7Disconnect the pipes.
![]() CAUTION
CAUTION
•Compressor damage may occur if the compressor is run at a negative suction pressure.
| 1 |
| 1 minute |
Liquid service port | Gas service port |
<High pressure> | <Low pressure> |
2
Off
Installation
English 53
