Connecting & Setting up
Case 2 : Connecting to a TV with DVI Jack
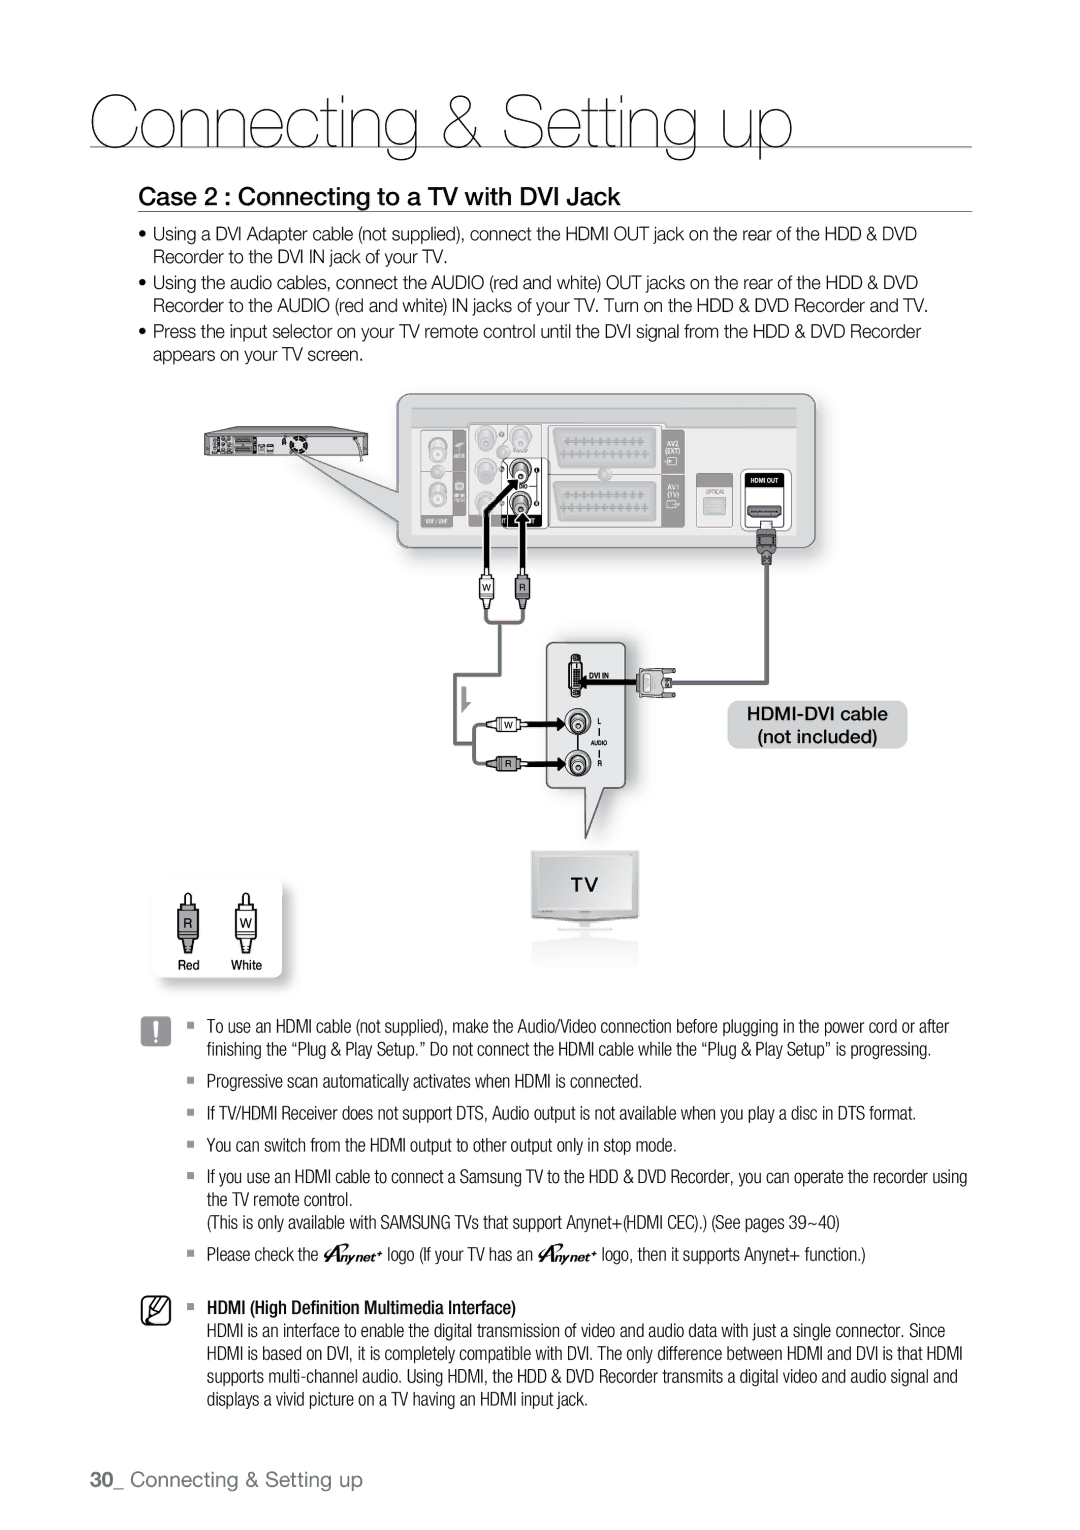
~Using a DVI Adapter cable (not supplied), connect the HDMI OUT jack on the rear of the HDD & DVD Recorder to the DVI IN jack of your TV.
~Using the audio cables, connect the AUDIO (red and white) OUT jacks on the rear of the HDD & DVD Recorder to the AUDIO (red and white) IN jacks of your TV. Turn on the HDD & DVD Recorder and TV.
~Press the input selector on your TV remote control until the DVI signal from the HDD & DVD Recorder appears on your TV screen.
(not included)
Red White
J | ` To use an HDMI cable (not supplied), make the Audio/Video connection before plugging in the power cord or after |
| finishing the “Plug & Play Setup.” Do not connect the HDMI cable while the “Plug & Play Setup” is progressing. |
| ` Progressive scan automatically activates when HDMI is connected. |
| ` If TV/HDMI Receiver does not support DTS, Audio output is not available when you play a disc in DTS format. |
| ` You can switch from the HDMI output to other output only in stop mode. |
| ` If you use an HDMI cable to connect a Samsung TV to the HDD & DVD Recorder, you can operate the recorder using |
| the TV remote control. |
| (This is only available with SAMSUNG TVs that support Anynet+(HDMI CEC).) (See pages 39~40) |
| ` Please check the ' logo (If your TV has an ' logo, then it supports Anynet+ function.) |
M | ` HDMI (High Definition Multimedia Interface) |
| HDMI is an interface to enable the digital transmission of video and audio data with just a single connector. Since |
| HDMI is based on DVI, it is completely compatible with DVI. The only difference between HDMI and DVI is that HDMI |
| supports |
| displays a vivid picture on a TV having an HDMI input jack. |
30_ Connecting & Setting up