
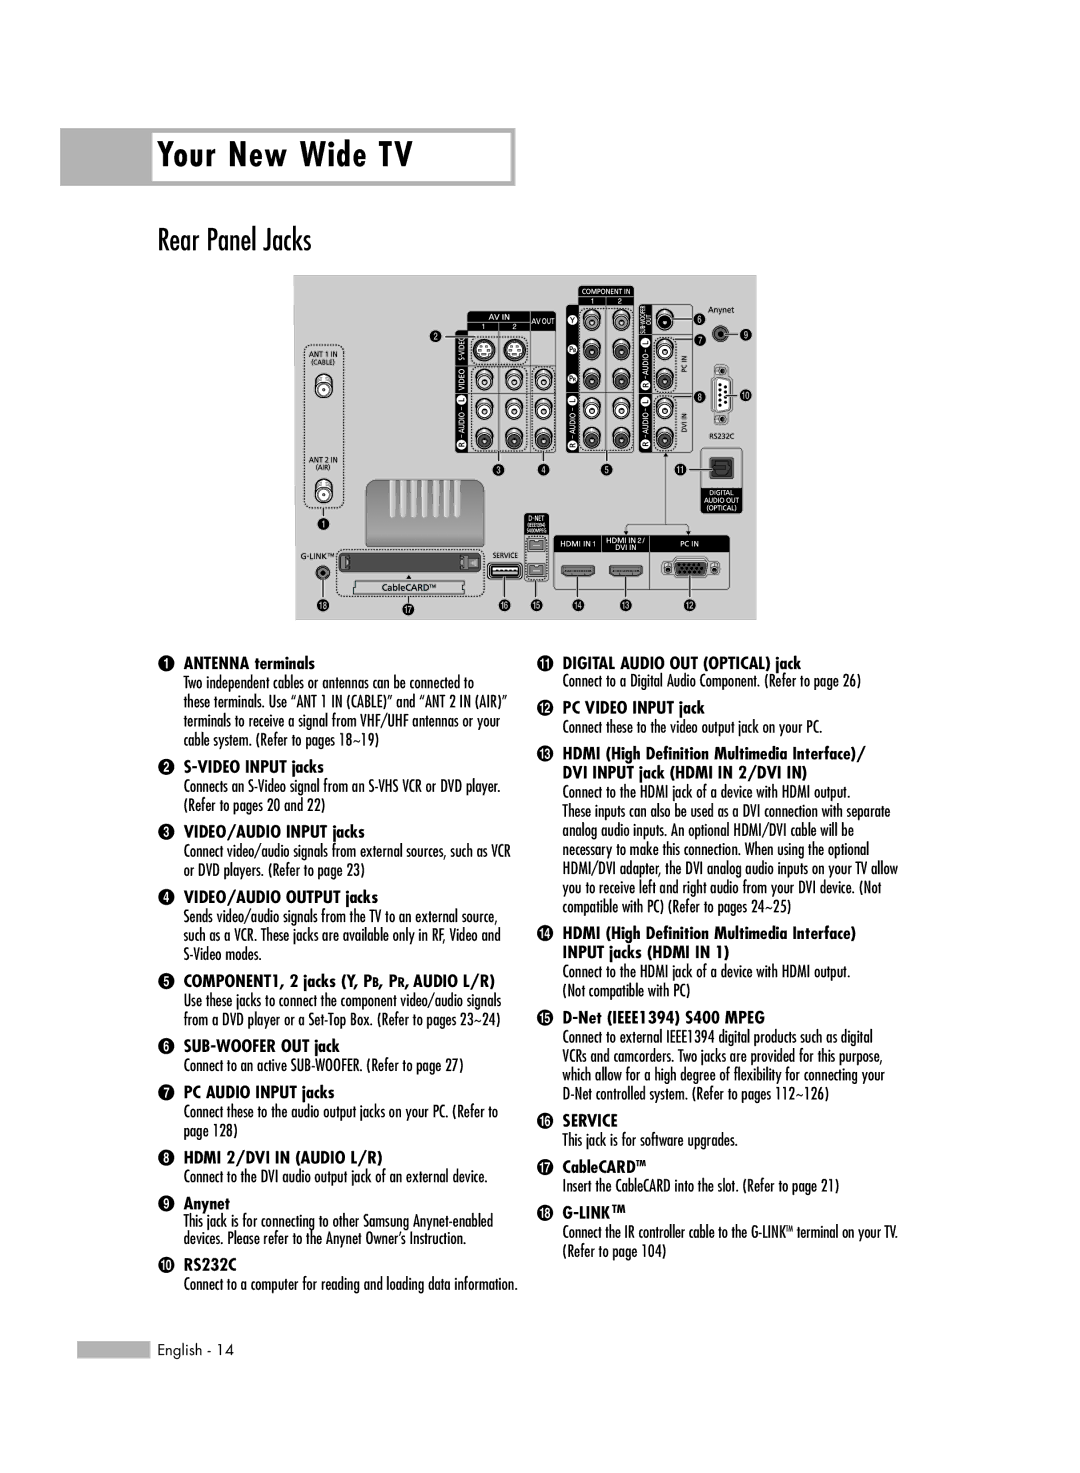
HL-R7178W, HL-R5678W, HL-R6178W specifications
The Samsung HL-R5678W, HL-R5078W, HL-R6178W, and HL-R7178W are high-quality DLP (Digital Light Processing) televisions that were notably popular in the mid-2000s. Each model is part of Samsung's series of rear-projection HDTVs, designed to deliver exceptional performance and a captivating viewing experience.Starting with the HL-R5678W, this model features a 56-inch screen with a native resolution of 1080p, ensuring sharp and detailed imagery. It utilizes Samsung's proprietary DLP technology, which effectively minimizes motion blur and enhances color accuracy, making it suitable for a variety of content, from sports to movies. Additionally, its slim design and lightweight build allow for easy placement in any room, while the integrated HDTV tuner provides access to over-the-air broadcasts without the need for an external decoder.
The HL-R5078W is a 50-inch variant that shares many similarities with its larger counterpart but offers a more compact size. This model is ideal for smaller living spaces while still maintaining a stunning picture quality. The HL-R5078W boasts a contrast ratio that enhances the depth of blacks and whites, giving viewers a more immersive experience. Its connectivity options, including HDMI and component inputs, make it compatible with most modern devices, ensuring versatility in terms of connectivity.
Moving on to the HL-R6178W, this model steps up to a 61-inch display, aimed at users looking for a larger viewing area without compromising on quality. The HL-R6178W includes advanced features like a triple focus system, which optimizes light precision for deeper colors and better overall illumination. This model is particularly acclaimed for its wide viewing angles, allowing viewers to enjoy an excellent picture from various positions in the room.
Finally, the HL-R7178W is the flagship of the lineup, featuring a massive 71-inch screen that commands attention in any setting. The larger size does not mean a sacrifice in technology, as this TV incorporates high-end features such as a 1080p resolution, superb brightness levels, and a dynamic contrast ratio. The HL-R7178W is equipped with multiple HDMI ports, allowing for seamless connection to gaming consoles, Blu-ray players, or sound systems, elevating the overall entertainment experience.
In summary, these Samsung rear-projection televisions are defined by their combination of DLP technology, impressive resolutions, and varied screen sizes, catering to diverse user needs. Their thoughtful design and robust feature sets underscore Samsung's commitment to quality in home entertainment, making these models a solid choice for those seeking rich visuals and a great viewing experience.