 Picture Control
Setting the My Color Control Mode
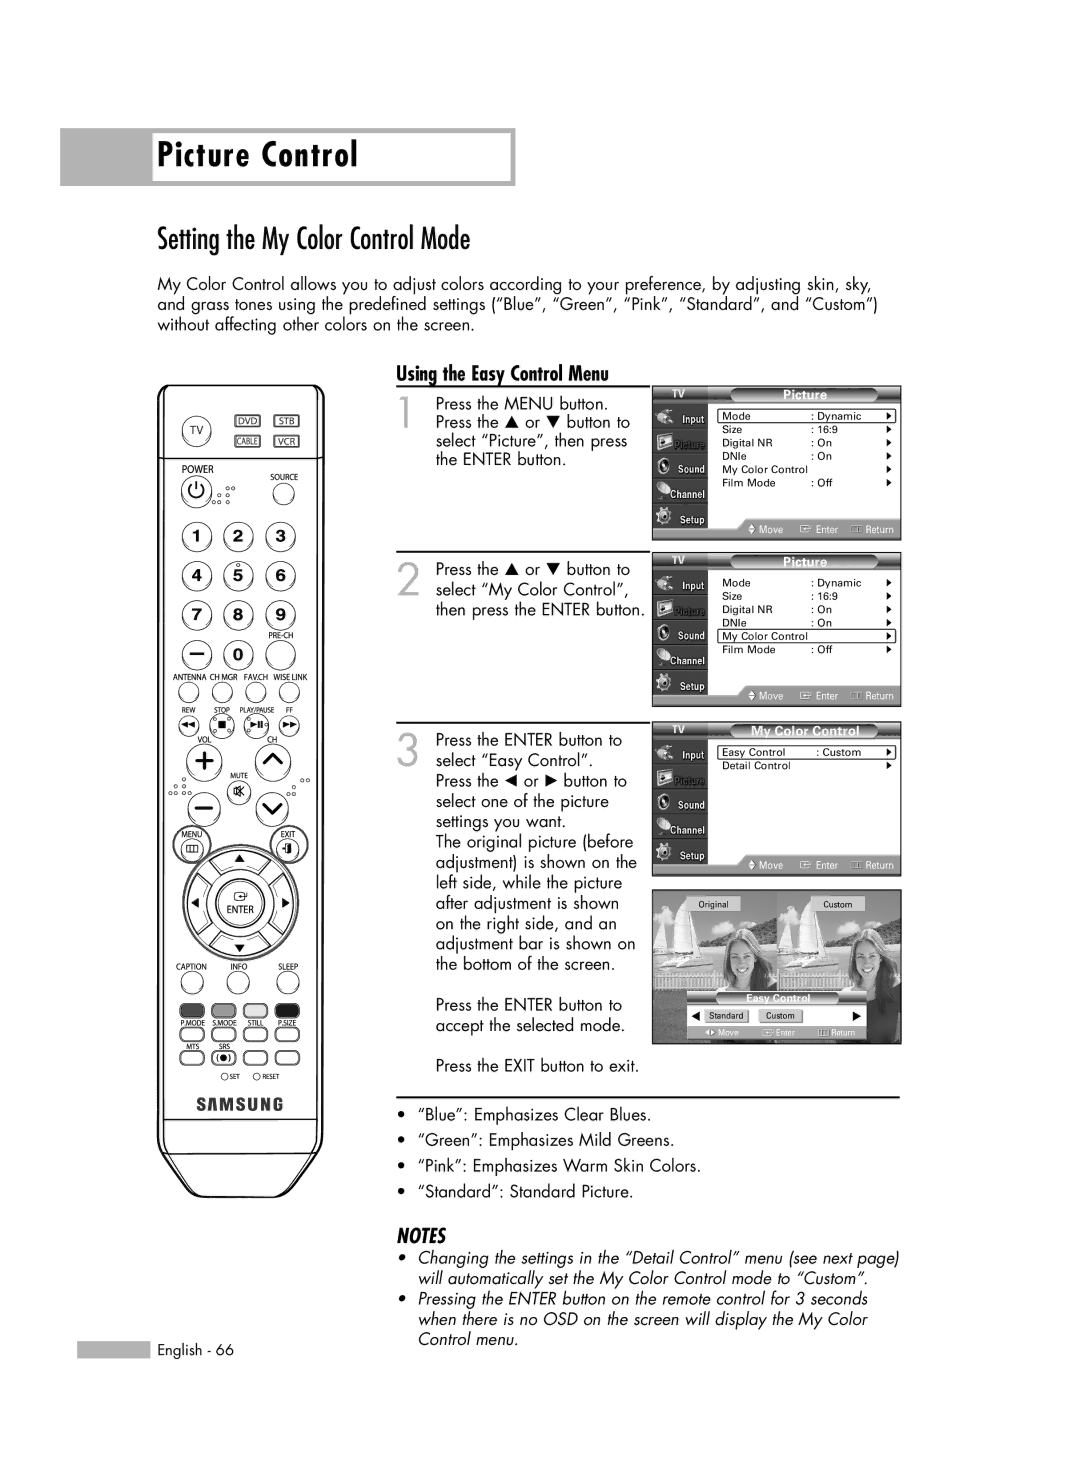
My Color Control allows you to adjust colors according to your preference, by adjusting skin, sky, and grass tones using the predefined settings (“Blue”, “Green”, “Pink”, “Standard”, and “Custom”) without affecting other colors on the screen.
Using the Easy Control Menu
1 | Press the MENU button. |
Press the … or † button to |
select “Picture”, then press the ENTER button.
Picture
Mode | : Dynamic | √ |
Size | : 16:9 | √ |
Digital NR | : On | √ |
DNIe | : On | √ |
My Color Control |
| √ |
Film Mode | : Off | √ |
Move | Enter | Return |
2 Press the … or † button to select “My Color Control”, then press the ENTER button.
3 Press the ENTER button to select “Easy Control”. Press the œ or √ button to select one of the picture settings you want.
The original picture (before adjustment) is shown on the left side, while the picture after adjustment is shown on the right side, and an adjustment bar is shown on the bottom of the screen.
Press the ENTER button to accept the selected mode.
Press the EXIT button to exit.
Picture
Mode | : Dynamic | √ |
Size | : 16:9 | √ |
Digital NR | : On | √ |
DNIe | : On | √ |
My Color Control |
| √ |
Film Mode | : Off | √ |
Move | Enter | Return |
|
| |
|
| |
My Color Control |
| |
Easy Control | : Custom | √ |
Detail Control |
| √ |
| Move | Enter | Return |
Original |
| Custom |
|
| Easy Control |
|
|
œ Standard | Custom | √ |
|
Move | Enter | Return |
|
•“Blue”: Emphasizes Clear Blues.
•“Green”: Emphasizes Mild Greens.
•“Pink”: Emphasizes Warm Skin Colors.
•“Standard”: Standard Picture.
NOTES
• Changing the settings in the “Detail Control” menu (see next page) will automatically set the My Color Control mode to “Custom”.
• Pressing the ENTER button on the remote control for 3 seconds when there is no OSD on the screen will display the My Color
English - 66
Control menu.
