Description
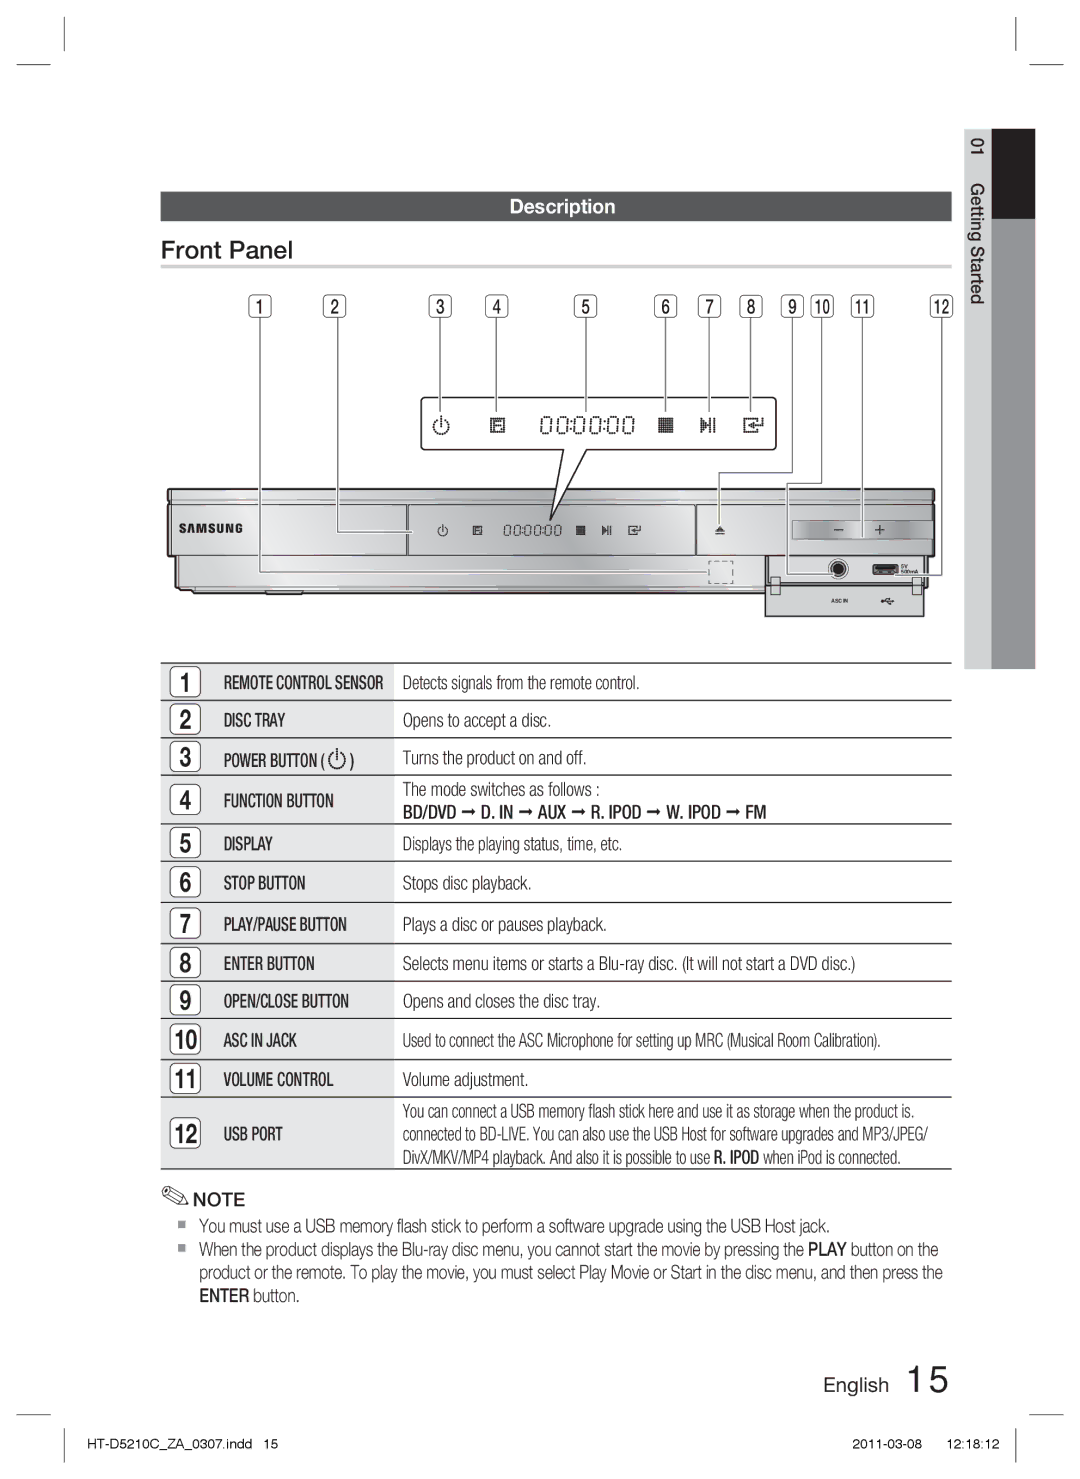
Front Panel
1 | 2 | 3 | 4 | 5 | 6 | 7 | 8 | 9 | 10 | 11 | 12 |
|
|
|
|
|
|
|
|
|
|
| 5V |
|
|
|
|
|
|
|
|
|
|
| 500mA |
|
|
|
|
|
|
|
|
|
| ASC IN |
|
01 Getting Started
1REMOTE CONTROL SENSOR Detects signals from the remote control.
2 | DISC TRAY |
| Opens to accept a disc. |
3 | POWER BUTTON ( | ) | Turns the product on and off. |
4 | FUNCTION BUTTON |
| The mode switches as follows : |
| BD/DVD D. IN AUX R. IPOD W. IPOD FM | ||
|
|
| |
5 | DISPLAY |
| Displays the playing status, time, etc. |
6 | STOP BUTTON |
| Stops disc playback. |
|
|
|
|
7 | PLAY/PAUSE BUTTON |
| Plays a disc or pauses playback. |
|
|
|
|
8 | ENTER BUTTON |
| Selects menu items or starts a |
9 | OPEN/CLOSE BUTTON |
| Opens and closes the disc tray. |
10 | ASC IN JACK |
| Used to connect the ASC Microphone for setting up MRC (Musical Room Calibration). |
|
|
|
|
11 | VOLUME CONTROL |
| Volume adjustment. |
12 | USB PORT |
| You can connect a USB memory flash stick here and use it as storage when the product is. |
| connected to | ||
|
|
| DivX/MKV/MP4 playback. And also it is possible to use R. IPOD when iPod is connected. |
✎NOTE
You must use a USB memory flash stick to perform a software upgrade using the USB Host jack.
When the product displays the
