Attaching the BRACKET WALL
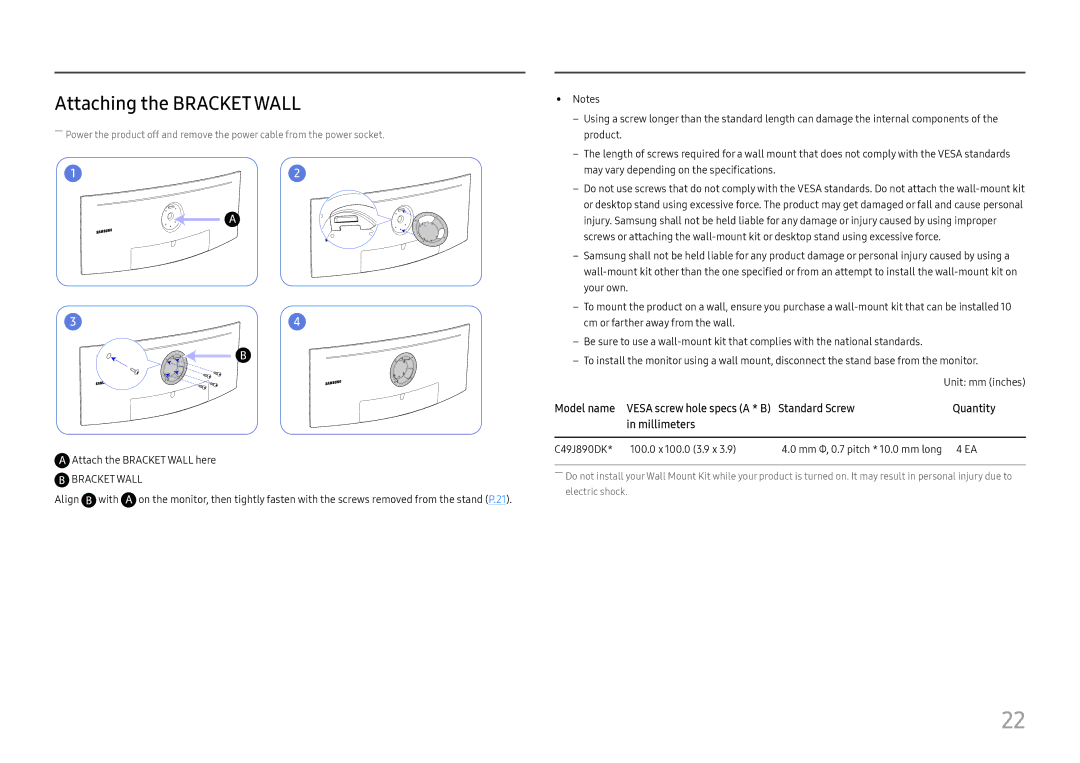
――Power the product off and remove the power cable from the power socket.
1 | 2 |
3 | 4 |
 Attach the BRACKET WALL here
 BRACKET WALL
Align ![]() with
with ![]() on the monitor, then tightly fasten with the screws removed from the stand (P.21).
on the monitor, then tightly fasten with the screws removed from the stand (P.21).
•• Notes
‒‒ Using a screw longer than the standard length can damage the internal components of the product.
‒‒ The length of screws required for a wall mount that does not comply with the VESA standards may vary depending on the specifications.
‒‒ Do not use screws that do not comply with the VESA standards. Do not attach the
‒‒ Samsung shall not be held liable for any product damage or personal injury caused by using a
‒‒ To mount the product on a wall, ensure you purchase a
‒‒ Be sure to use a
‒‒ To install the monitor using a wall mount, disconnect the stand base from the monitor.
|
|
| Unit: mm (inches) |
Model name | VESA screw hole specs (A * B) | Standard Screw | Quantity |
| in millimeters |
|
|
|
|
|
|
C49J890DK* | 100.0 x 100.0 (3.9 x 3.9) | 4.0 mm Φ, 0.7 pitch * 10.0 mm long | 4 EA |
――Do not install your Wall Mount Kit while your product is turned on. It may result in personal injury due to electric shock.
22