How to Adjust Mounting Angle
Notice : Please secure the mounting bracket on the wall surface after setting its angle at 0°.
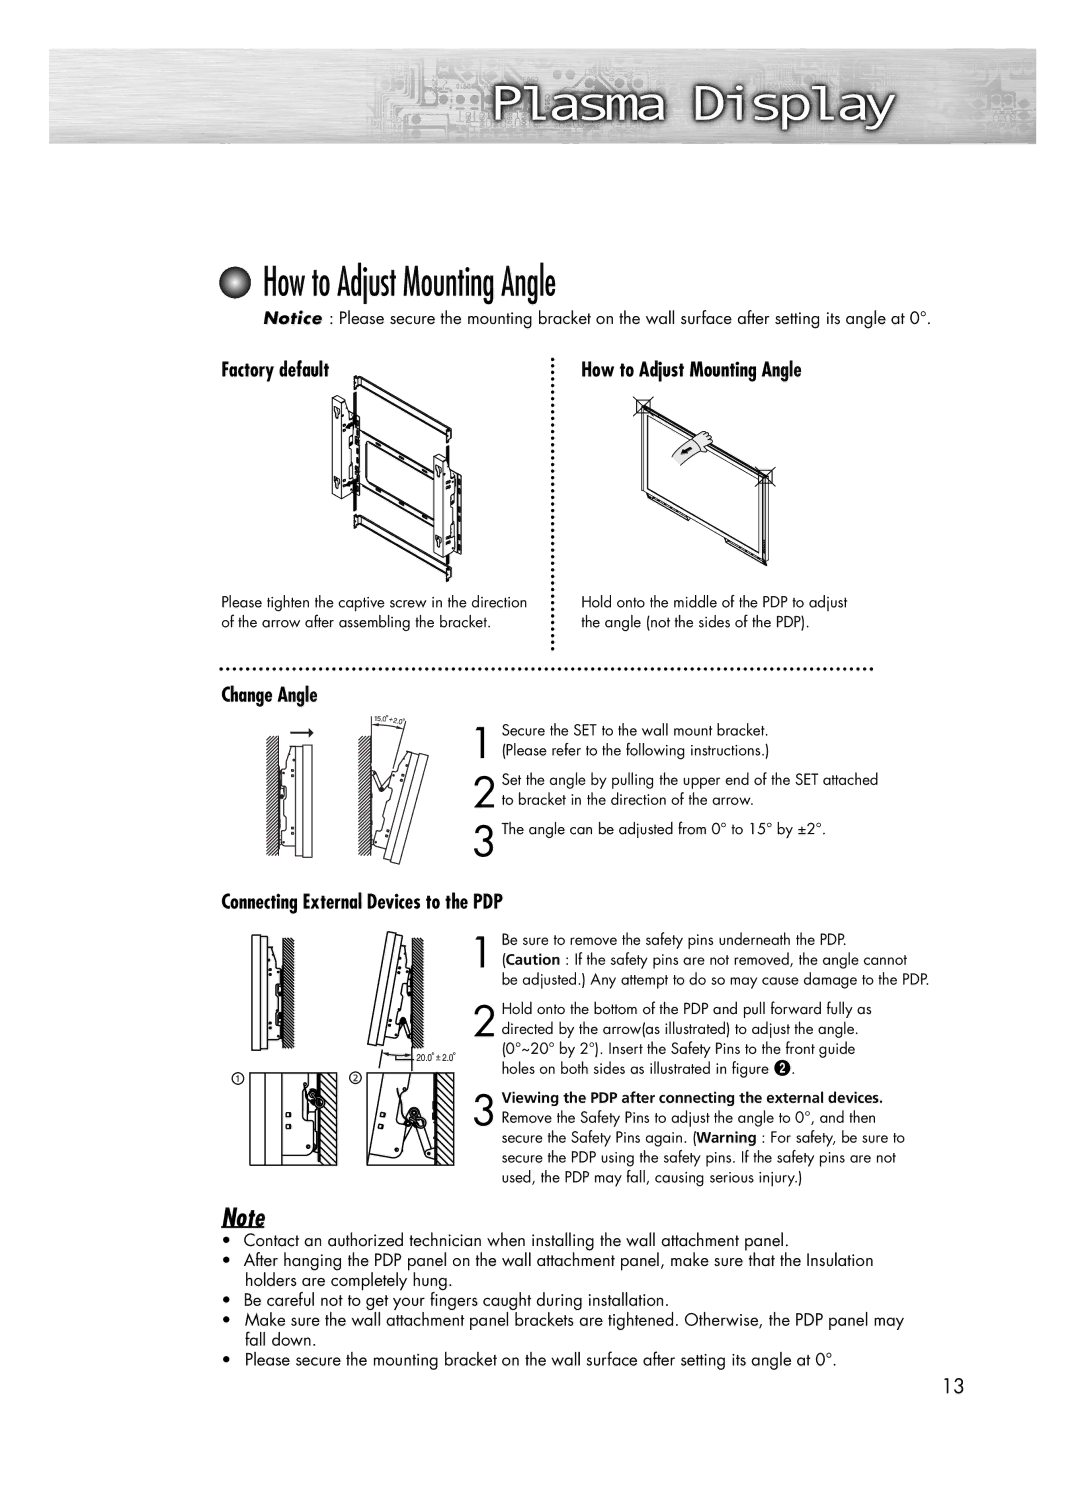
Factory default | How to Adjust Mounting Angle |
Please tighten the captive screw in the direction of the arrow after assembling the bracket.
Hold onto the middle of the PDP to adjust the angle (not the sides of the PDP).
Change Angle
1
Set the angle by pulling the upper end of the SET attached
2to bracket in the direction of the arrow.
3 The angle can be adjusted from 0° to 15° by ±2°.
Connecting External Devices to the PDP
Be sure to remove the safety pins underneath the PDP.
1 (Caution : If the safety pins are not removed, the angle cannot be adjusted.) Any attempt to do so may cause damage to the PDP.
Hold onto the bottom of the PDP and pull forward fully as
2directed by the arrow(as illustrated) to adjust the angle. (0°~20° by 2°). Insert the Safety Pins to the front guide holes on both sides as illustrated in figure ´.
3 Viewing the PDP after connecting the external devices. Remove the Safety Pins to adjust the angle to 0°, and then secure the Safety Pins again. (Warning : For safety, be sure to secure the PDP using the safety pins. If the safety pins are not used, the PDP may fall, causing serious injury.)
Note
•Contact an authorized technician when installing the wall attachment panel.
•After hanging the PDP panel on the wall attachment panel, make sure that the Insulation holders are completely hung.
•Be careful not to get your fingers caught during installation.
•Make sure the wall attachment panel brackets are tightened. Otherwise, the PDP panel may fall down.
•Please secure the mounting bracket on the wall surface after setting its angle at 0°.
13