Screen Burn Protection
To reduce the possibility of screen burn, this unit is equipped with screen burn prevention technology. This technology enables you to set picture movement up/down (Vertical Line) and side to side (Horizontal Dot). The Time setting allows you to program the time between movement of the picture in minutes.
1Press the MENU ( ![]() ) button to display the menu.
) button to display the menu.
2Press the … or † button to select Setup, then press the ENTER/OK ( ![]() ) button.
) button.
3Press the … or † button to select Screen Burn Protection, then press the ENTER/OK ( ![]() ) button.
) button.
4Select the required option by pressing the … or † button, then press the ENTER/OK ( ![]() ) button.
) button.
Available options: Pixel Shift, All White, Signal Pattern
5When you are satisfied with your setting, press the ENTER/OK ( ![]() ) button.
) button.
6Press the EXIT button to exit.
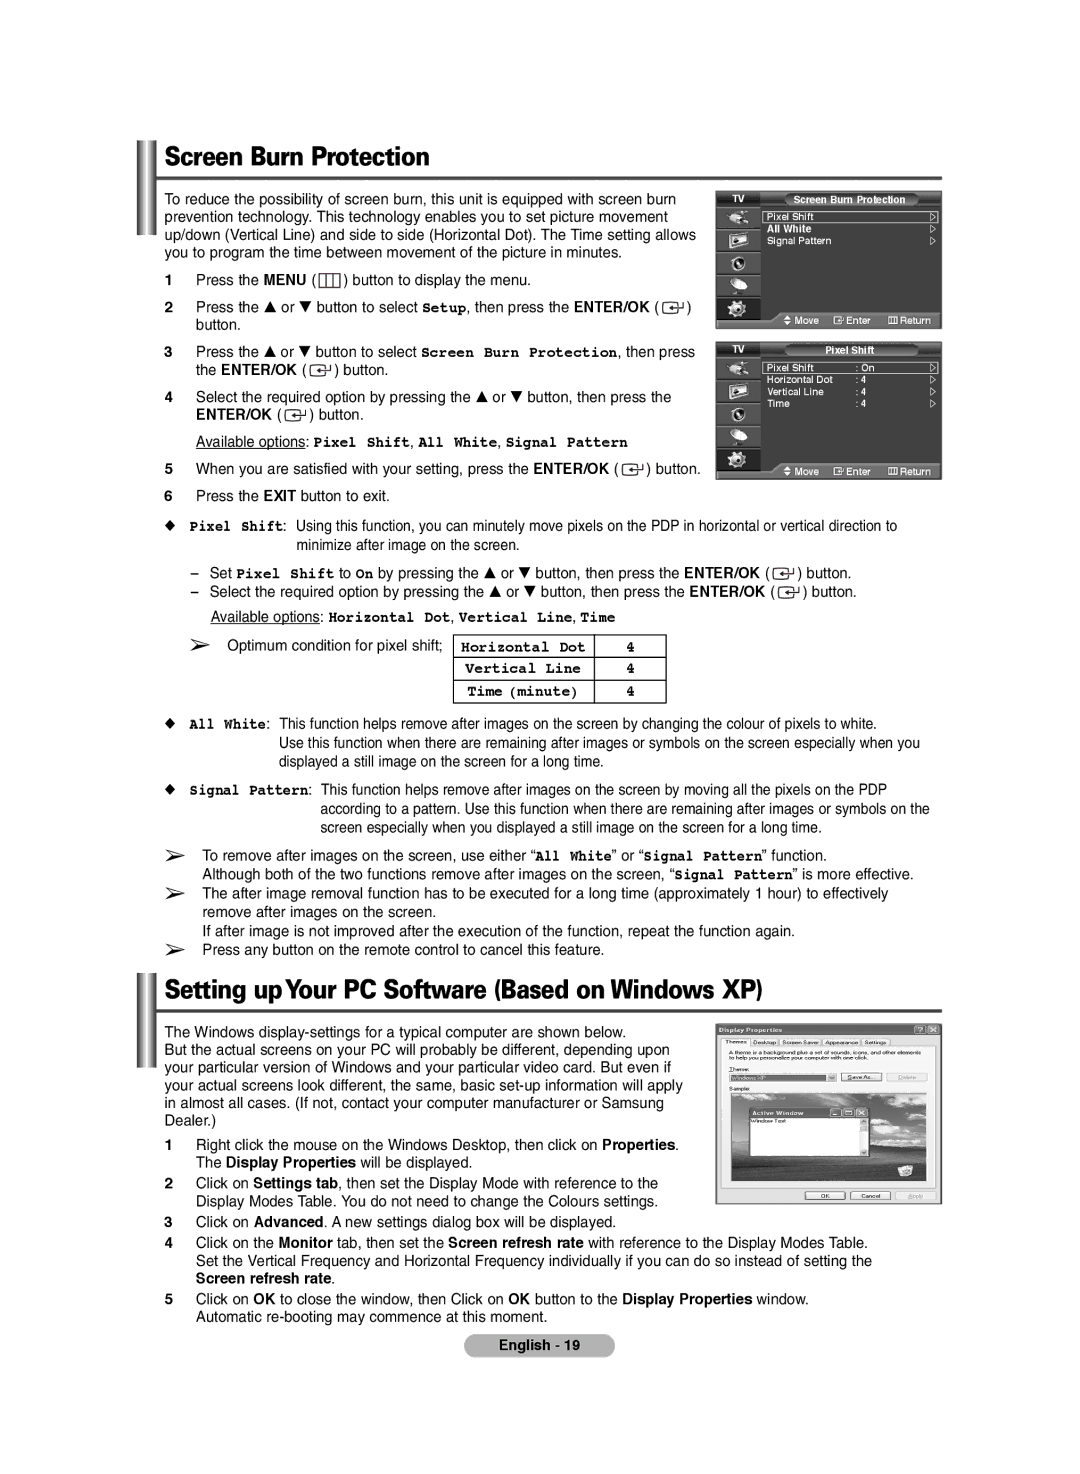
TV | Screen Burn Protection | ||
| Pixel Shift |
|
|
| All White |
|
|
| Signal Pattern |
| |
| Move | Enter | Return |
TV |
| Pixel Shift |
|
Pixel Shift | : On |
|
Horizontal Dot | : 4 |
|
Vertical Line | : 4 |
|
Time | : 4 |
|
Move | Enter | Return |
◆Pixel Shift: Using this function, you can minutely move pixels on the PDP in horizontal or vertical direction to minimize after image on the screen.
-Set Pixel Shift to On by pressing the … or † button, then press the ENTER/OK ( ![]() ) button.
) button.
-Select the required option by pressing the … or † button, then press the ENTER/OK ( ![]() ) button. Available options: Horizontal Dot, Vertical Line, Time
) button. Available options: Horizontal Dot, Vertical Line, Time
➢Optimum condition for pixel shift;
Horizontal Dot | 4 |
Vertical Line | 4 |
Time (minute) | 4 |
◆All White: This function helps remove after images on the screen by changing the colour of pixels to white.
Use this function when there are remaining after images or symbols on the screen especially when you displayed a still image on the screen for a long time.
◆Signal Pattern: This function helps remove after images on the screen by moving all the pixels on the PDP according to a pattern. Use this function when there are remaining after images or symbols on the screen especially when you displayed a still image on the screen for a long time.
➢To remove after images on the screen, use either “All White” or “Signal Pattern” function.
Although both of the two functions remove after images on the screen, “Signal Pattern” is more effective.
➢The after image removal function has to be executed for a long time (approximately 1 hour) to effectively remove after images on the screen.
If after image is not improved after the execution of the function, repeat the function again.
➢Press any button on the remote control to cancel this feature.
Setting upYour PC Software (Based on Windows XP)
The Windows
But the actual screens on your PC will probably be different, depending upon your particular version of Windows and your particular video card. But even if your actual screens look different, the same, basic
1Right click the mouse on the Windows Desktop, then click on Properties. The Display Properties will be displayed.
2Click on Settings tab, then set the Display Mode with reference to the Display Modes Table. You do not need to change the Colours settings.
3Click on Advanced. A new settings dialog box will be displayed.
4Click on the Monitor tab, then set the Screen refresh rate with reference to the Display Modes Table. Set the Vertical Frequency and Horizontal Frequency individually if you can do so instead of setting the
Screen refresh rate.
5Click on OK to close the window, then Click on OK button to the Display Properties window. Automatic
English - 19