Refrigerator
Safety Information
Safety Information
Important safety symbols and precautions
Allow the appliance to stand for 2 hours after installation
Critical Disposal
Contents
Removing the Refrigerator Doors
Accessories and Required Tools
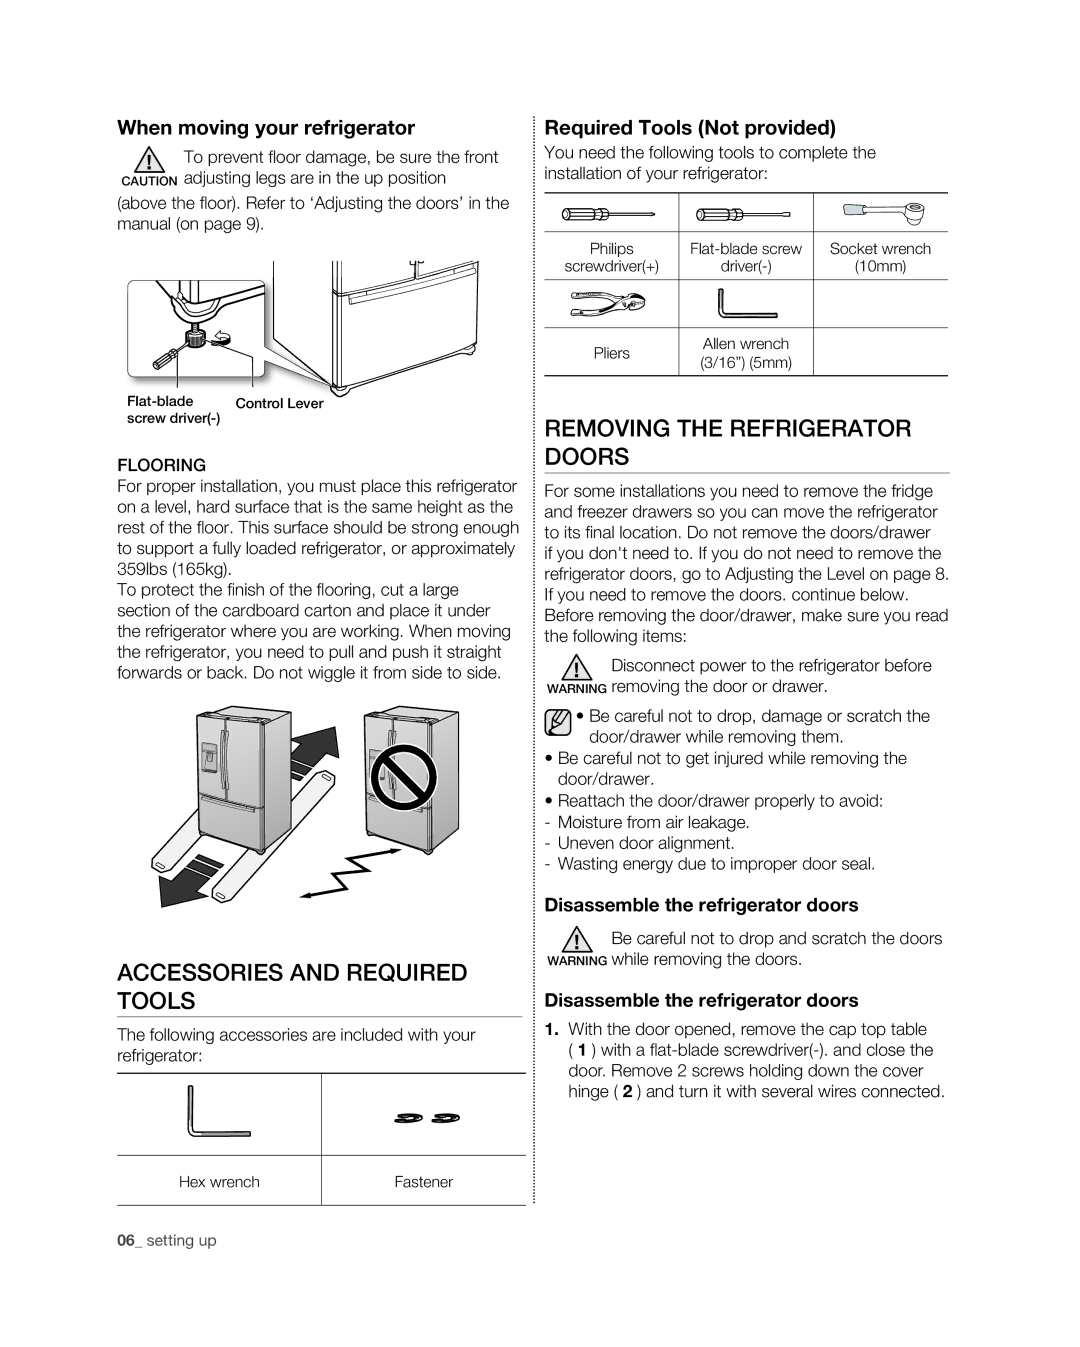
When moving your refrigerator
Required Tools Not provided
Reattaching
Refrigerator Doors
Disassemble the Freezer Drawer
How to adjust the level
Adjusting the Level
Making Minor Adjustments Between Doors
Assemble the Freezer Drawer
Water dispenser with a fi lter is one of the helpful
Features on your new refrigerator. To help promote
After adjustment
Better health, the water fi lter removes unwanted
Completing the SET UP
Connecting the water supply line to the refrigerator
Using the Control Panel
RFG297**, RFG29P RFG296**, RFG298**, RFG29T
Changing the Water Filter
Water filter usage
Controlling the Freezer temperature
Controlling the Temperature
Basic temperature of Freezer Refrigerator Compartments
Touch the Alarm/hold 3 sec for Filter Reset button
Using the ice Dispenser
Using the Cold Water Dispenser
Controlling the fridge temperature
Recommend Temp Fridge 38F or 3C
Using the ice off Function
Ice cubes may
Water clouding phenomenon
Parts and Features
Door Bins & Dairy Compartment
Using the Cool Select Pantry Plus on Some Models
Removing the Refrigerator Accessories
Pantry Selection Button
Vegetable & Fruit Drawers
Removing the Freezer Accessories
Tempered Glass shelves
Cool Select PantryPLUS
Freezer Drawer
Super Extended Drawer
Food Storage Tips
Foods Refrigerator Freezer Storage Tips
Freeze in original packaging
Sources
Der, etc
Frozen or Breaded Months Shellfish Shrimp uncooked Days Crab
Cleaning the Refrigerator
Troubleshooting
WarrantyUSA
Warranty on Samsung Refrigerator
Warranty Information Canada
Case the need for servicing arises
TEL 905-542-3535 FAX Samsung
Questions or COMMENTS?
How-to Videos and Live Shows
Samsung Electronics America, Inc
Refrigerador
Información sobre seguridad
Información Sobre Seguridad
Símbolos y advertencias de seguridad importantes
Advertencias MUY Advertencia Importantes Para EL USO
No desarme ni repare el refrigerador usted mismo
No dañe el circuito refrigerante
Precaución Precauciones DE USO
Precaución Precauciones Para LA Limpieza
No obstruya las tomas de aire
Contenido
Producto en forma segura
Modelo
Cuando mueva el refrigerador
Accesorios Y Herramientas Necesarias
Cómo Retirar LAS Puertas DEL Refrigerador
Herramientas necesarias No provistas
Rearmado DE LAS Puertas DEL Refrigerador
Desarmado DEL Cajón DEL Congelador
Levante la puerta del congelador de los rieles
Cómo Hacer Pequeños Ajustes Entre LAS Puertas
Monta JE DEL Cajón DEL Congelador
Ajuste DEL Nivel
Cómo ajustar el nivel
Conexión a la tubería del suministro de agua
Ajuste DEL Nivel DEL Cajón DEL Congelador
Instalación DE LA Tubería DEL Dispensador DE Agua
First, shut off the main water supply
Finalización DE LA Instalación
Refrigerador
Ltro de agua
USO DEL Panel DE Control
Enciende cuando la función se activa
Utilizarse simultáneamente con el modo
Cambio DEL Filtro DE Agua
Filter Uso del filtro de agua
El sentido contrario a las agujas del reloj
Suministro de agua por ósmosis inversa
Control DE LA Temperatura
Control de la temperatura del congelador
Durante aproximadamente
USO DEL Dispensador DE Agua
Control de la temperatura del refrigerador
Uso del dispensador de hielo
Uso de la función Ice Off Hielo desactivado
Después de haber eliminado el hielo de la
El fenómeno de turbidez del agua
Compartimento
Piezas Y Funciones
Luz
Inclinble
Botón de selección
USO DEL Cool Select Pantryplus EN Algún Modelo
Remoción DE LOS Acesorios DEL Refrigerador
Compartimentos de las puertas y de los lácteos
Cajones de vegetales y frutas
Desmonta JE DE LOS Accesorios DEL Refrigerador
Estantes de vidrio templado
Compartimento inclinable
Cajón superextensible
Cajón del congelador
Recomendaciones DE Almacenamiento DE Alimentos
Fuentes
Limpieza DEL Refrigerador
Solución de problemas
GarantíaUSA
Garantía DEL Refrigerador Samsung
Centro DE Asistencia AL Cliente DE Samsung
Road Ridgefi eld Park, NJ
Samsung Electronics Canada Inc. Customer Service
Samsung Electronics America, Inc Challenger
Standish Court Mississauga, Ontario L5R 4B2
Réfrigérateur
Consignes de sécurité
Symboles Davertissement
Consignes de sécurité importantes et symboles
Consignes DE Sécurité
Nendommagez pas le circuit frigorifi que
Symboles DE Prudence Attention Concernant Lutilisation
Symboles DE Prudence
Avertissement LA Mise AU Rebut
Avant Dinstaller LE Réfrigérateur
Choix du meilleur emplacement pour le réfrigérateur
Sommaire
Déplacer le réfrigérateur
Accessoires ET Outils Nécessaires
Retirer LES Portes DU Réfrigérateur
Outils nécessaires non fournis
Retirez le tiroir supérieur en le soulevant
Remise EN Place DES Portes DU Réfrigérateur
Démontage DU Tiroir DU Congélateur
Soulevez la porte du congélateur des rails
Comment ajuster le niveau
Montage DU Tiroir DU Congélateur
Mise À Niveau
Les deux molettes doivent toucher le sol
Installer LE Tuyau DU Distributeur Deau
Réglage DE LA Hauteur DU Tiroir DU Congélateur
Brancher le distributeur sur l’arrivée d’eau
Réglage DU Réfrigérateur
Raccordement du tuyau darrivée deau au réfrigérateur
Réfrigérateur
RFG297**, RFG29P
Remplacement DU Filtre Deau
Filter Usure du filtre deau
Contrôle DE LA Température
Contrôle de la température du congélateur
Arrivée deau par osmose inverse Important
Contrôle de la température du réfrigérateur
Température recommandée Réfrigérateur 38F ou 3C
Utilisation DU Distributeur Deau Froide
Sélectionnez le type de glace que vous souhaitez
Vous nutilisez pas le
Utilisation de la fonction Ice Off Désactivation glace
En cas de coupure de courant, il se peut que
Distributeur de glace
Pièces ET Caractéristiques
Bouton de sélection
Une fois le mode « Deli
Retrait DES Acesoires DU Réfrigérateur
Bacs de la porte et compartiment à produits laitiers
Bacs à fruits et légumes
Retrait DES Acesoires DU Congélateur
Clayettes en verre tempérées
Garde-manger Cool SelectPLUS
Tiroir grande capacité
Seau à glace
Tiroir du congélateur
Ne retirez pas la grille de séparation
Conseils DE Conservation DES Aliments
Reau, truite, saumon
Poisson
Jours Mois
Poisson maigre ca Jours Mois
Nettoyage DU Réfrigérateur
Dépannage
GarantieCANADA
Customer Care Center 1-800-SAMSUNG Customer Care Center fax
Memo
Memo
Memo
Service clientèle, 55 Standish Court Mississauga
DES Questions OU DES Commentaires ?