advanced recording
Settings | Contents | ||||||
display | |||||||
|
| ||||||
Auto | This option is generally used to control the white balance automatically. |
|
|
|
|
| |
|
|
|
|
|
|
| |
Daylight | This controls the white balance according to the outdoor ambience, especially for |
|
|
|
|
| |
close up and when the subject is of one dominant color. |
|
|
|
|
| ||
|
|
|
|
|
| ||
Cloudy | This option should be used when making a recording in cloudy weather. |
|
|
|
|
| |
Fluorescent | This option should be used when making a recording under white fluorescent lights. |
|
|
|
|
| |
|
|
|
|
| |||
Tungsten | This option is for when there is less than 3200K of tungsten light being used. |
|
|
|
|
| |
|
|
|
|
|
|
| |
Custom WB | You can manually adjust white balance to match the light source or situation |
|
|
|
|
| |
|
|
|
|
|
|
| |
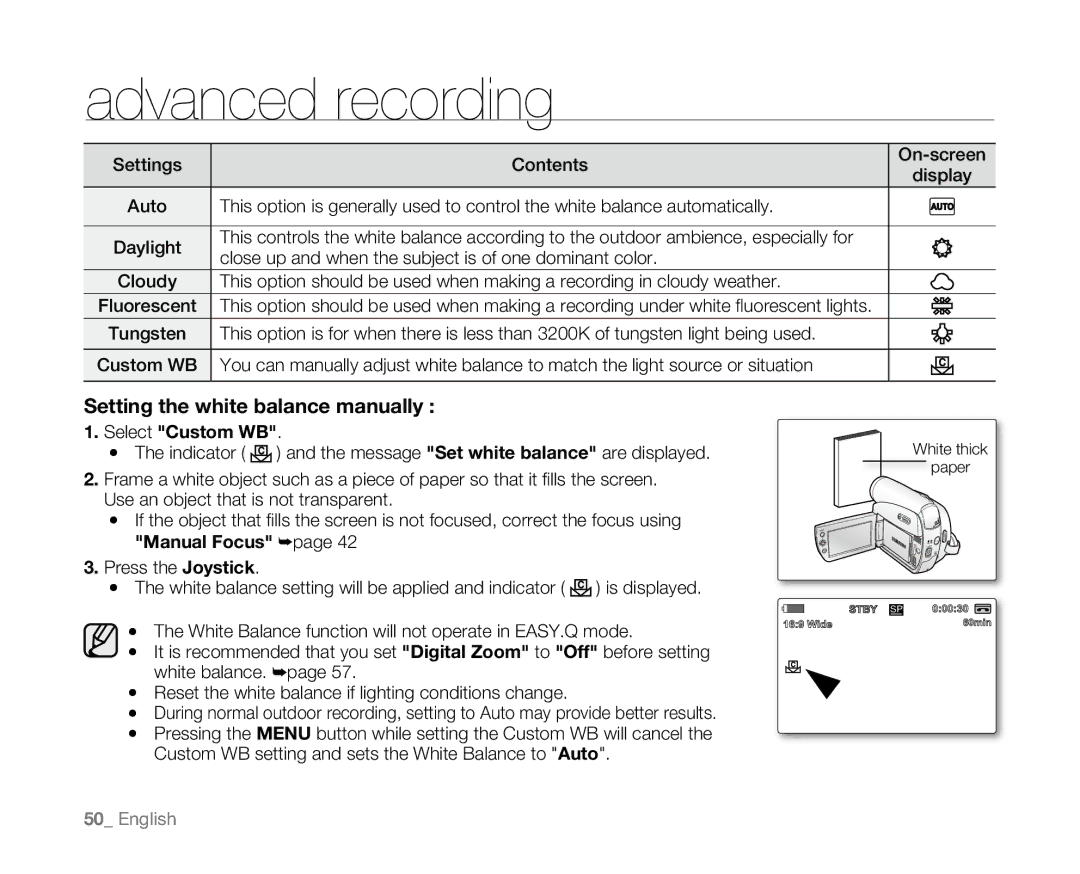
Setting the white balance manually :
1.Select "Custom WB".
•The indicator ( ![]()
![]() ) and the message "Set white balance" are displayed.
) and the message "Set white balance" are displayed.
2.Frame a white object such as a piece of paper so that it fills the screen. Use an object that is not transparent.
•If the object that fills the screen is not focused, correct the focus using "Manual Focus" ➥page 42
3.Press the Joystick.
•The white balance setting will be applied and indicator ( ![]()
![]() ) is displayed.
) is displayed.
•The White Balance function will not operate in EASY.Q mode.
•It is recommended that you set "Digital Zoom" to "Off" before setting white balance. ➥page 57.
•Reset the white balance if lighting conditions change.
•During normal outdoor recording, setting to Auto may provide better results.
•Pressing the MENU button while setting the Custom WB will cancel the Custom WB setting and sets the White Balance to "Auto".
| White thick |
| paper |
MENU |
|
| BATT. |
STBY SP | 0:00:30 |
16:9Art Wide 10Sec | 60min |
| S 16BIt |
| C.Nite 1/30 |
50_ English
