Configuring Picture Options
Activating Picture Options
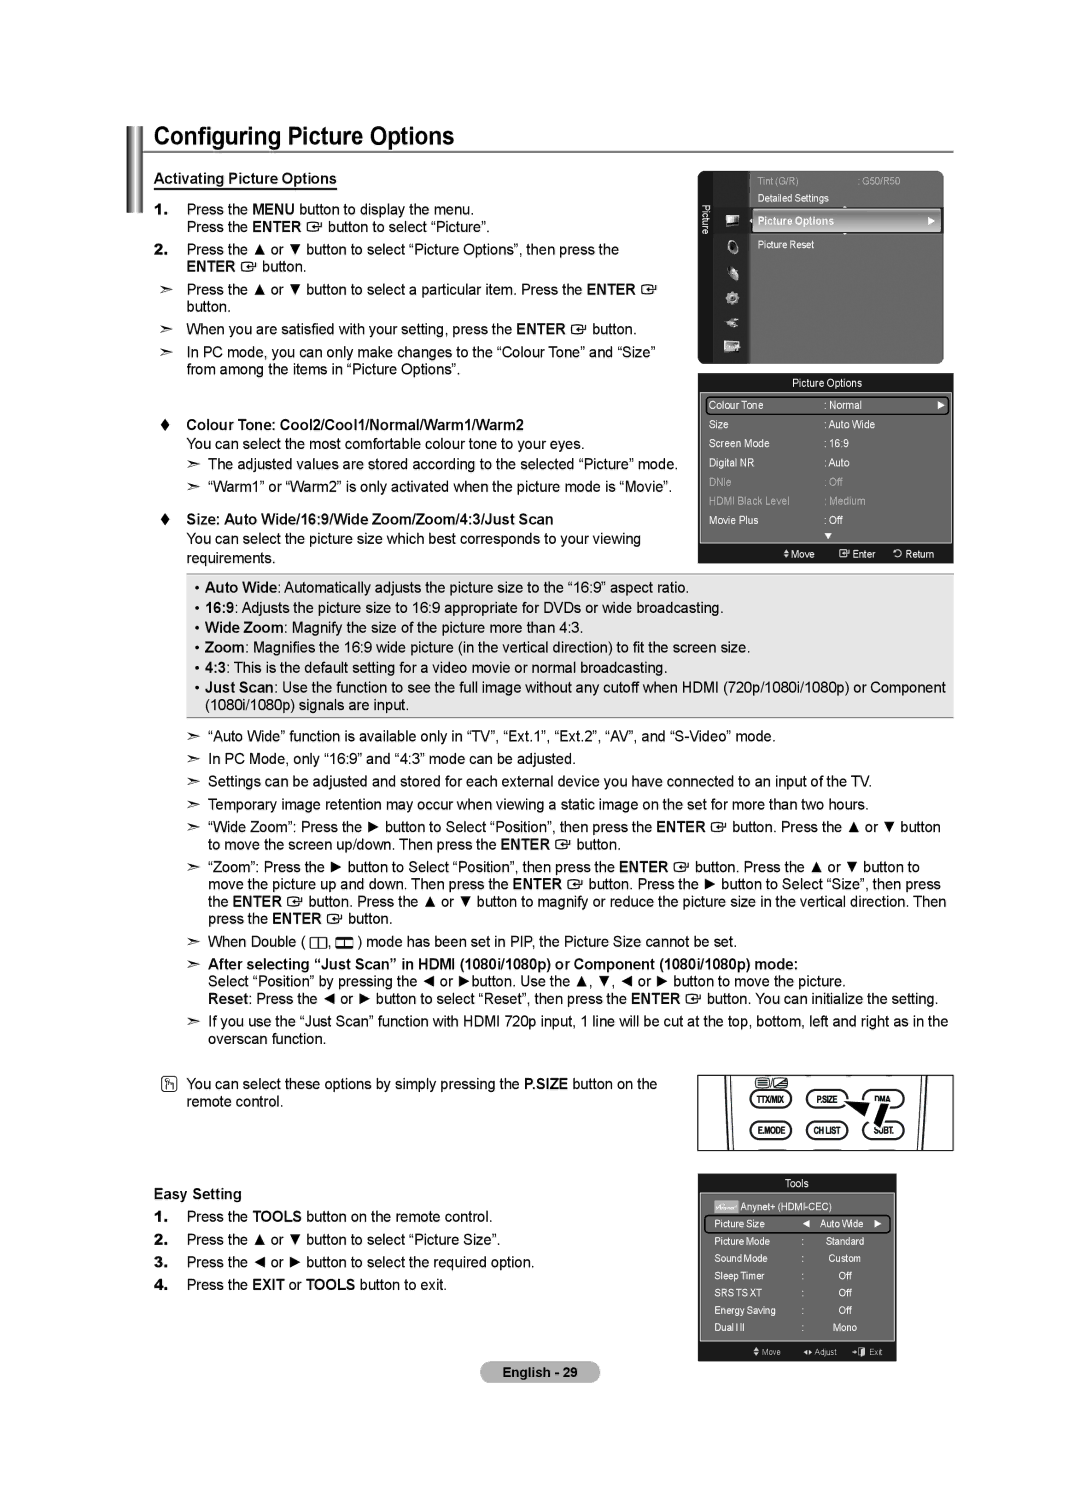
1.Press the MENU button to display the menu. Press the ENTER ![]() button to select “Picture”.
button to select “Picture”.
2.Press the ▲ or ▼ button to select “Picture Options”, then press the
ENTER ![]() button.
button.
➣Press the ▲ or ▼ button to select a particular item. Press the ENTER ![]() button.
button.
➣When you are satisfied with your setting, press the ENTER ![]() button.
button.
➣In PC mode, you can only make changes to the “Colour Tone” and “Size” from among the items in “Picture Options”.
Colour Tone: Cool2/Cool1/Normal/Warm1/Warm2
You can select the most comfortable colour tone to your eyes.
➣The adjusted values are stored according to the selected “Picture” mode.
➣“Warm1” or “Warm2” is only activated when the picture mode is “Movie”.
Size: Auto Wide/16:9/Wide Zoom/Zoom/4:3/Just Scan
You can select the picture size which best corresponds to your viewing requirements.
| Tint (G/R) | : G50/R50 | |
Picture | Detailed Settings |
| |
Picture Options | ► | ||
| |||
| Picture Reset |
|
Picture Options
Colour Tone | : Normal | ► |
Size | : Auto Wide |
|
Screen Mode | : 16:9 |
|
Digital NR | : Auto |
|
DNle | : Off |
|
HDMI Black Level | : Medium |
|
Movie Plus | : Off |
|
| ▼ |
|
Move | Enter | Return |
•Auto Wide: Automatically adjusts the picture size to the “16:9” aspect ratio.
•16:9: Adjusts the picture size to 16:9 appropriate for DVDs or wide broadcasting.
•Wide Zoom: Magnify the size of the picture more than 4:3.
•Zoom: Magnifies the 16:9 wide picture (in the vertical direction) to fit the screen size.
•4:3: This is the default setting for a video movie or normal broadcasting.
•Just Scan: Use the function to see the full image without any cutoff when HDMI (720p/1080i/1080p) or Component (1080i/1080p) signals are input.
➣“Auto Wide” function is available only in “TV”, “Ext.1”, “Ext.2”, “AV”, and
➣In PC Mode, only “16:9” and “4:3” mode can be adjusted.
➣Settings can be adjusted and stored for each external device you have connected to an input of the TV.
➣Temporary image retention may occur when viewing a static image on the set for more than two hours.
➣“Wide Zoom”: Press the ► button to Select “Position”, then press the ENTER ![]() button. Press the ▲ or ▼ button to move the screen up/down. Then press the ENTER
button. Press the ▲ or ▼ button to move the screen up/down. Then press the ENTER ![]() button.
button.
➣“Zoom”: Press the ► button to Select “Position”, then press the ENTER ![]() button. Press the ▲ or ▼ button to move the picture up and down. Then press the ENTER
button. Press the ▲ or ▼ button to move the picture up and down. Then press the ENTER ![]() button. Press the ► button to Select “Size”, then press the ENTER
button. Press the ► button to Select “Size”, then press the ENTER ![]() button. Press the ▲ or ▼ button to magnify or reduce the picture size in the vertical direction. Then press the ENTER
button. Press the ▲ or ▼ button to magnify or reduce the picture size in the vertical direction. Then press the ENTER ![]() button.
button.
➣When Double ( ![]() ,
, ![]() ) mode has been set in PIP, the Picture Size cannot be set.
) mode has been set in PIP, the Picture Size cannot be set.
➣After selecting “Just Scan” in HDMI (1080i/1080p) or Component (1080i/1080p) mode:
Select “Position” by pressing the ◄ or ►button. Use the ▲, ▼, ◄ or ► button to move the picture.
Reset: Press the ◄ or ► button to select “Reset”, then press the ENTER ![]() button. You can initialize the setting.
button. You can initialize the setting.
➣If you use the “Just Scan” function with HDMI 720p input, 1 line will be cut at the top, bottom, left and right as in the overscan function.
O You can select these options by simply pressing the P.SIZE button on the remote control.
Easy Setting
1.Press the TOOLS button on the remote control.
2.Press the ▲ or ▼ button to select “Picture Size”.
3.Press the ◄ or ► button to select the required option.
4.Press the EXIT or TOOLS button to exit.
Tools
![]() Anynet+
Anynet+
Picture Size | ◄ | Auto Wide ► |
Picture Mode | : | Standard |
Sound Mode | : | Custom |
Sleep Timer | : | Off |
SRS TS XT | : | Off |
Energy Saving | : | Off |
Dual l ll | : | Mono |
Move |
| Adjust e Exit |
