00356A
Installing the Camera
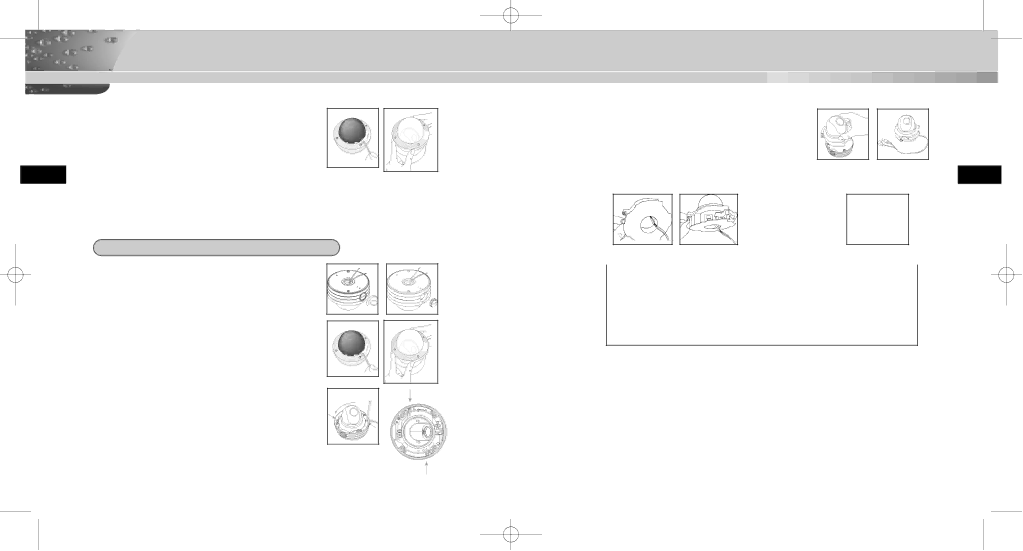
6. Remove the DOME COVER to adjust the LENS | 1) | 2) |
direction. |
| UNG |
1) Use the supplied L WRENCH to unfasten the 4 |
| MS |
| SA | |
|
| |
BOLTS for CASE fixing by turning them counter- |
| ➜ |
clockwise as shown in the illustration. |
|
|
E |
|
|
2) Disassemble the
7.Adjust the LENS direction and assemble the DOME COVER.
(Refer the steps 6 to 8 of the ceiling installation for LENS adjustment and DOME COVER assembly.)
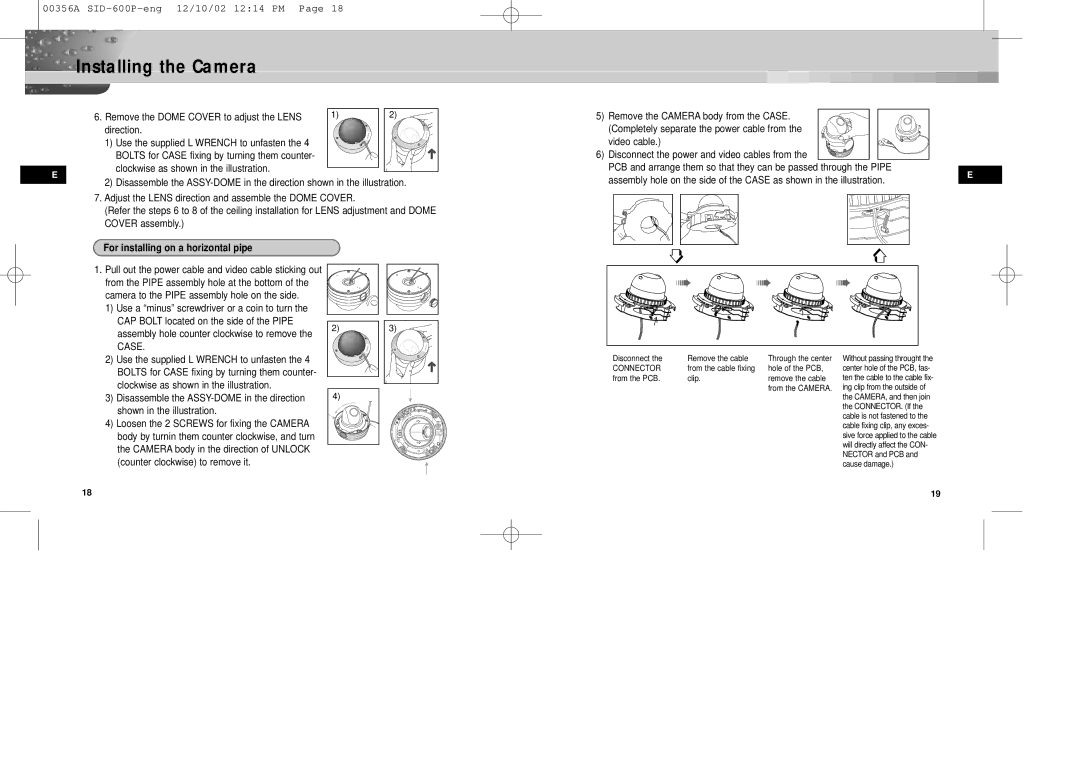
5) | Remove the CAMERA body from the CASE. |
| (Completely separate the power cable from the |
| video cable.) |
6) | Disconnect the power and video cables from the |
| PCB and arrange them so that they can be passed through the PIPE |
assembly hole on the side of the CASE as shown in the illustration. | E |
|
For installing on a horizontal pipe
1. Pull out the power cable and video cable sticking out |
from the PIPE assembly hole at the bottom of the |
camera to the PIPE assembly hole on the side. |
1) Use a “minus” screwdriver or a coin to turn the |
CAP BOLT located on the side of the PIPE |
assembly hole counter clockwise to remove the |
CASE. |
2)
3)
G
N
U
S
M
A
S
➮ | ➮ |
➠ ➠ ➠
2) | Use the supplied L WRENCH to unfasten the 4 |
| BOLTS for CASE fixing by turning them counter- |
| clockwise as shown in the illustration. |
3) | Disassemble the |
| shown in the illustration. |
4) | Loosen the 2 SCREWS for fixing the CAMERA |
| body by turnin them counter clockwise, and turn |
| the CAMERA body in the direction of UNLOCK |
| (counter clockwise) to remove it. |
4)
➜
Disconnect the | Remove the cable | Through the center |
CONNECTOR | from the cable fixing | hole of the PCB, |
from the PCB. | clip. | remove the cable |
|
| from the CAMERA. |
Without passing throught the center hole of the PCB, fas- ten the cable to the cable fix- ing clip from the outside of the CAMERA, and then join the CONNECTOR. (If the cable is not fastened to the cable fixing clip, any exces- sive force applied to the cable will directly affect the CON- NECTOR and PCB and cause damage.)
18
19