Network Camera
Network Camera
Important Safety Instructions
Overview
Explanation of Graphical Symbols
Class construction
Overview
Contents
WEB Viewer
Product Features
Recomended PC Specifications
Description
WHAT’S Included
Item Name Quantity
AT a Glance
Front Side
FBL Lever
Used to connect a PoE or LAN cable
Reset Button
Rear Side
Connect to the network
Mounting the Lens
Mounting the lens onto the C/CS mount camera
Using a lens with hood
Ethernet Connection
Connecting with Other Device
Power Supply
Alarm input Wiring Diagram
Electrical Resistance of Copper Wire at 20C 68F
Port
To connect to the alarm input port
To connect the external sensor
Port
Local Network
Connecting the Camera Directly to Local Area Networking
Connecting to the camera from a local PC in the LAN
Network connection and setup
Modem
Camera Local PC
Cameras with the IPv6 setting will be displayed IPv6
Buttons Used in IP Installer
Alias This function is not currently implemented Mode
Connection status
Ddns registration has failed
Static IP Setup
Manual Network Setup
Auto Set
Port pane, provide necessary information
If not using a Broadband Router
Address pane, provide the necessary information
Http Port 8080 8081 VNP Port 4520 4521
IP related settings
Port related settings
Subnet Mask The Subnet Mask of the Broadband Router will be
Auto Network Setup
Enter the password This is the login password for
Dynamic IP Setup
Dynamic IP Environment Setup
Port Range Forward Port Mapping Setup
Manual Port Range Forwarding
Setting up Port Range Forward for several network cameras
Camera1
Connecting to the Camera from a Remote PC VIA the Internet
Connecting to the Camera from a Shared Local PC
Login dialog should appear
Connecting to the Camera
Using URL
Normally, you would
Login
To check the Ddns address
Installing STW WebViewer Plugin
Move to the monitoring screen
Using the Live Screen
Back to the default resolution
Capture
To capture the snapshot
To fit the full screen
Live screen, click Setup Setup screen appears
Setup
Video Setup
Video profile
Control framerate
Configure the ATC mode settings
Bitrate control / ATC mode
Control compression
To add a video profile
MulticastSVNP Specify the use of the Svnp protocol
What is GOP size?
Video setup
To set the privacy zone
Camera setup
Set it to On When done, click Apply
ATW Corrects the colors of the camera video automatically
English
Setup screen
English
Smart codec setup SNB-7001
Network Setup
Interface
Port
Ddns
Registering with Ddns
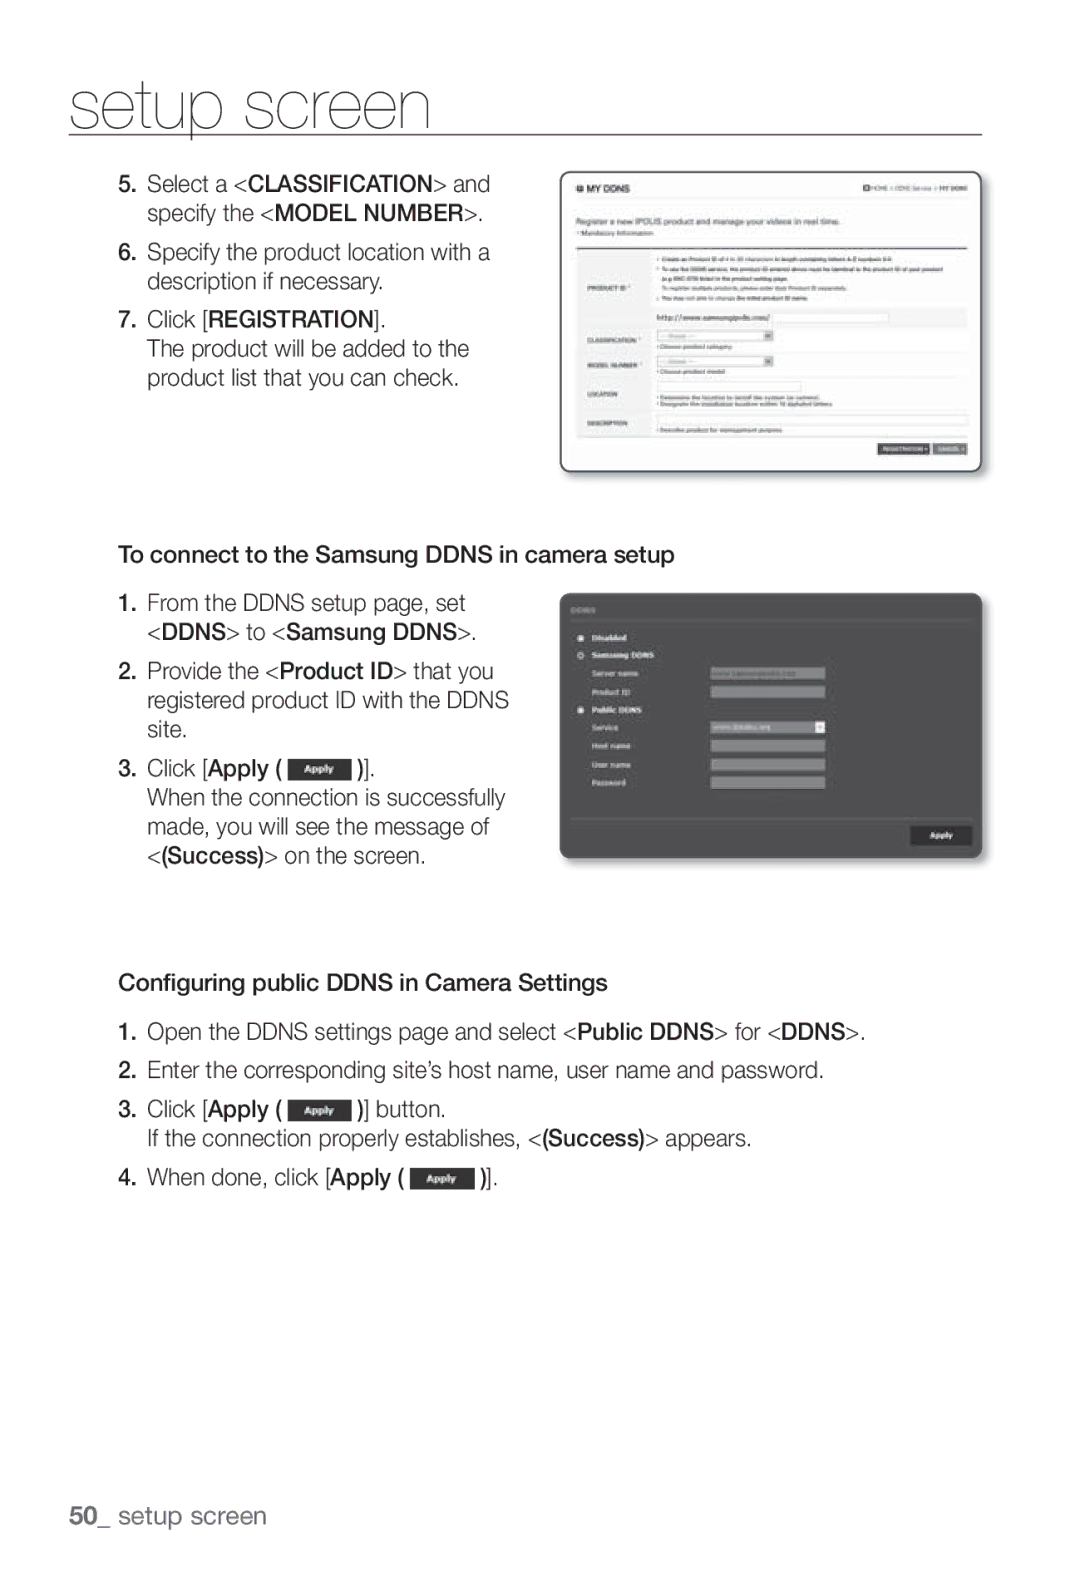
Select a Classification and specify the Model Number
To connect to the Samsung Ddns in camera setup
From the Ddns setup page, set Ddns to Samsung Ddns
IP filtering
SSL
802.1x
QoS
Enter an IP address to which you will apply QoS
Event Setup
FTP / E-mail
Setup screen
Alarm input
Time schedule
Tampering detection
Motion detection
Object color or brightness is similar to the background
Date & Time
System Setup
Product information
User
Manual Specify the time manually
Upgrade / Reboot
It may take a max of 20 minutes for the upgrade process
English
Log
Profile access
Profile Show the information of the newly added codec
Lens Type Manual / DC Auto Iris Mount Type
Specification
50IRE Ratio Video Out
Ssnr Off / On
Alarm I/O Input 1ea
Backlight Compensation Off / BLC
Frame Integration
1024x768 320x240 640x480 2M Mode 1920x1080PFull HD
264, Mjpeg 3M Mode
Resolution
Resolutions
Profiles
QoS On/Off Httpsssl Login Authentication Security
Items Description SNB-5001 SNB-7001 Streaming Capability
Audio I/O
Items Description SNB-5001 SNB-7001
Power Consumption
Weight 170g 0.37lb
10C ~ +55C +14F ~ +131F / ~ 90%RH
74.3 55.3 114.3
Product Overview
Unit mm inch
Troubleshooting
All rights reserved
Copyright C 2004, Kneschke, incremental
Copyright c 1998-2001 University College London
Part 1 CMU/UCD copyright notice BSD like
Part 4 Sun Microsystems, Inc. copyright notice BSD
Part 8 Apple Inc. copyright notice BSD
Part 5 Sparta, Inc copyright notice BSD
Part 6 Cisco/BUPTNIC copyright notice BSD
Copyright c 2003-2009, Sparta, Inc All rights reserved
Part 9 ScienceLogic, LLC copyright notice BSD
Copyright c 2009, ScienceLogic, LLC All rights reserved
Base Kernel, Busybox, Sysvinit, dosfstools
GPL/LGPL Software License
Preamble
GLibc, Inetutils
Page
How to Apply These Terms to Your New Programs
GNU General Public License is a free, copyleft
Terms and Conditions
You can apply it to your programs, too
Conveying Non-Source Forms
Protecting Users’ Legal Rights From Anti- Circumvention Law
Conveying Verbatim Copies
Acceptance Not Required for Having Copies
Additional Terms
Termination
Use with the GNU Affero General Public License
Automatic Licensing of Downstream Recipients
Patents
Revised Versions of this License
Interpretation of Sections 15
Disclaimer of Warranty
Limitation of Liability
Version 2.1, February
Modified work must itself be a software library
Above on a medium customarily used for software interchange
Page
How to Apply These Terms to Your New Libraries
This Software is Provided by the OpenSSL
OpenSSL License
Original SSLeay License
Correct disposal of batteries in this product
Sales Network
Challenger Rd. Suite 700 Ridgefield Park, NJ