Lamp Replacement
Cautions on Lamp Replacement
■The projector lamp is en expandable supply. For best operating performance, replace the lamp according to the usage time. You can view the lamp usage time in the Information Display (INFO button).
■Use the recommended lamp when replacing. Lamp specifications are defined in the user’s manual. Replace with the same model provided with the projector.
-Lamp Model Name :
-Lamp Manufacture : Philips Lighting
- Lamp Life Time | : 2000Hrs |
- Lamp Type | : 250W UHP |
- Lamp Part Number :
■Check that the power cord is unplugged before replacing lamps.
■Even after the power cord has been disconnected, the lamp will be hot. Allow it to cool down for at least 1 hour before changing the lamp.
■The projector lamp is installed at the bottom of the projector.
■Before you turn the projector over to change the lamp, cover the projector with a soft cloth on a flat surface.
■Do not leave the old lamp near inflammables or in reach of children. There is a danger of burn or injury.
■Remove dirts or foreign materials around or inside the lamp unit using a proper vacuum device.
■Be careful not to touch the lamp itself when handling the lamp unit.
■If the lamp is poorly handled, it may result in poor picture quality or shorter life time of lamp.
■The projector is will not operate normally if the cover is not locked completely after lamp replacement. Refer to LED information in the user’s manual if the projector does not operate normally.
Lamp Replacement Procedure
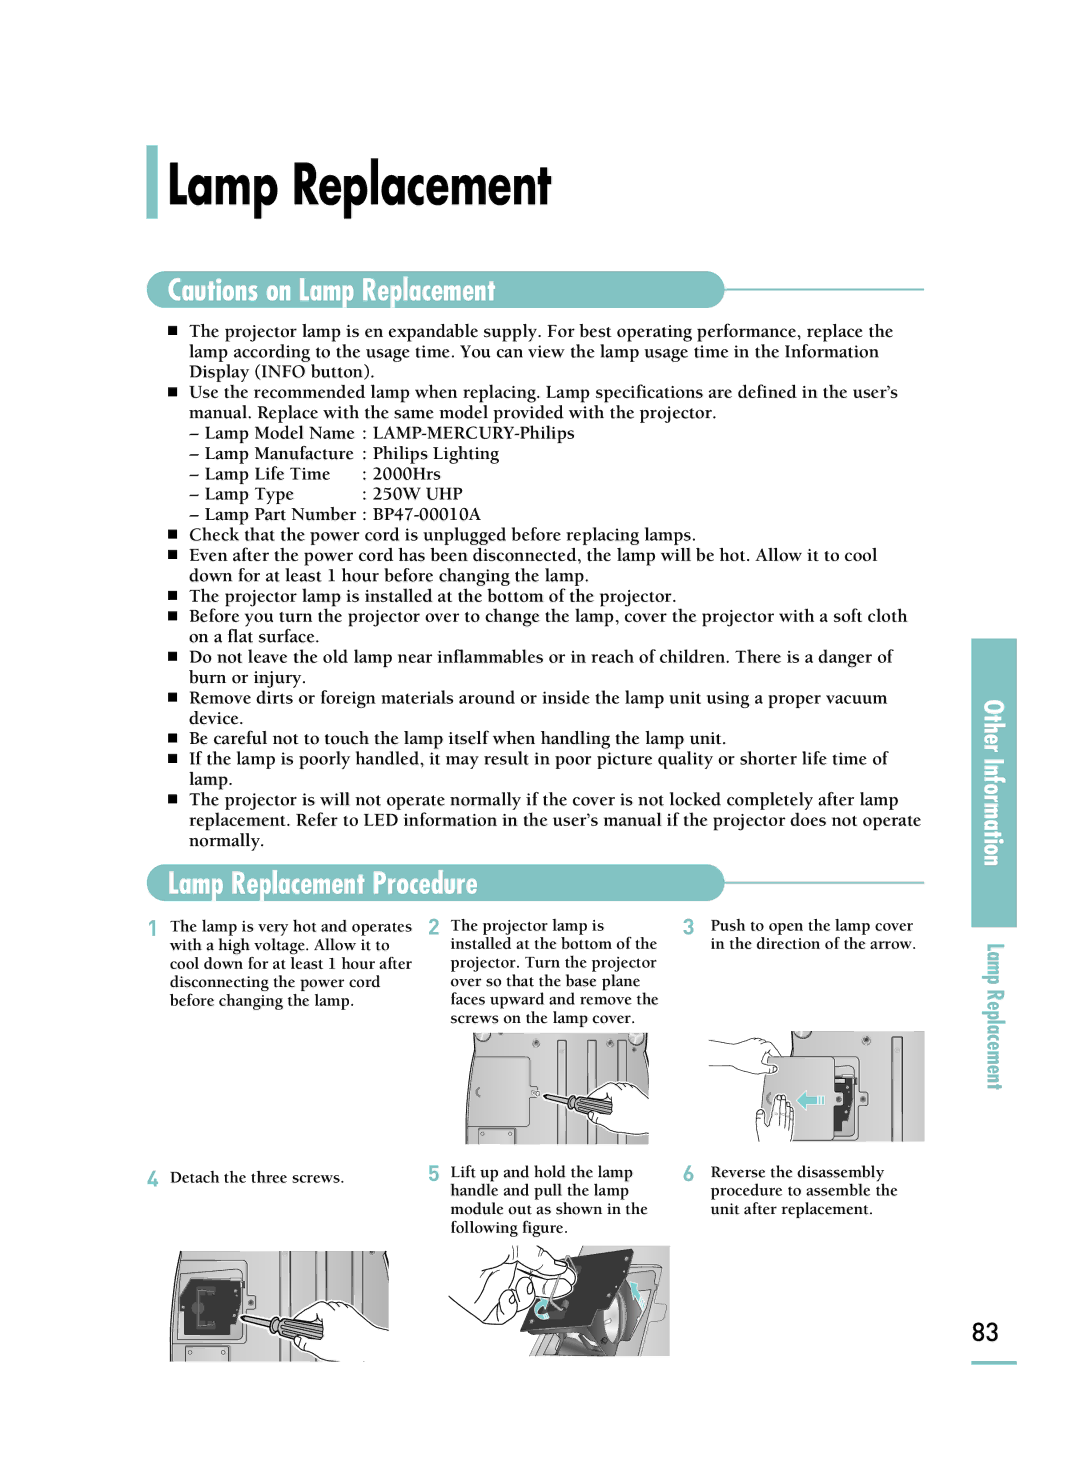
1 The lamp is very hot and operates | 2 The projector lamp is | 3 Push to open the lamp cover | ||||||||||||||
with a high voltage. Allow it to | installed at the bottom of the | in the direction of the arrow. | ||||||||||||||
cool down for at least 1 hour after | projector. Turn the projector |
|
|
|
|
|
|
|
|
|
|
|
|
|
|
|
disconnecting the power cord | over so that the base plane |
|
|
|
|
|
|
|
|
|
|
|
|
|
|
|
before changing the lamp. | faces upward and remove the |
|
|
|
|
|
|
|
|
|
|
|
|
|
|
|
| screws on the lamp cover. |
|
|
|
|
|
|
|
|
|
|
|
|
|
|
|
|
|
|
|
|
|
|
|
|
|
|
|
|
|
|
|
|
|
|
|
|
|
|
|
|
|
|
|
|
|
|
|
|
|
|
|
|
|
|
|
|
|
|
|
|
|
|
|
|
|
|
|
|
|
|
|
|
|
|
|
|
|
|
|
|
|
|
|
|
|
|
|
|
|
|
|
|
|
|
|
|
|
|
|
|
|
|
|
|
|
|
|
|
|
|
|
|
|
|
|
|
|
|
|
|
|
|
|
|
|
|
|
|
|
|
|
|
|
|
|
|
|
|
|
|
|
|
|
|
|
|
|
|
|
|
|
|
|
|
|
|
|
|
|
|
|
|
|
|
|
|
|
|
|
|
|
|
|
|
|
|
|
|
|
|
|
|
|
|
|
4 Detach the three screws. | 5 Lift up and hold the lamp | 6 Reverse the disassembly |
| handle and pull the lamp | procedure to assemble the |
| module out as shown in the | unit after replacement. |
| following figure. |
|
Other Information
Lamp Replacement
83