Setting up the PC Environment
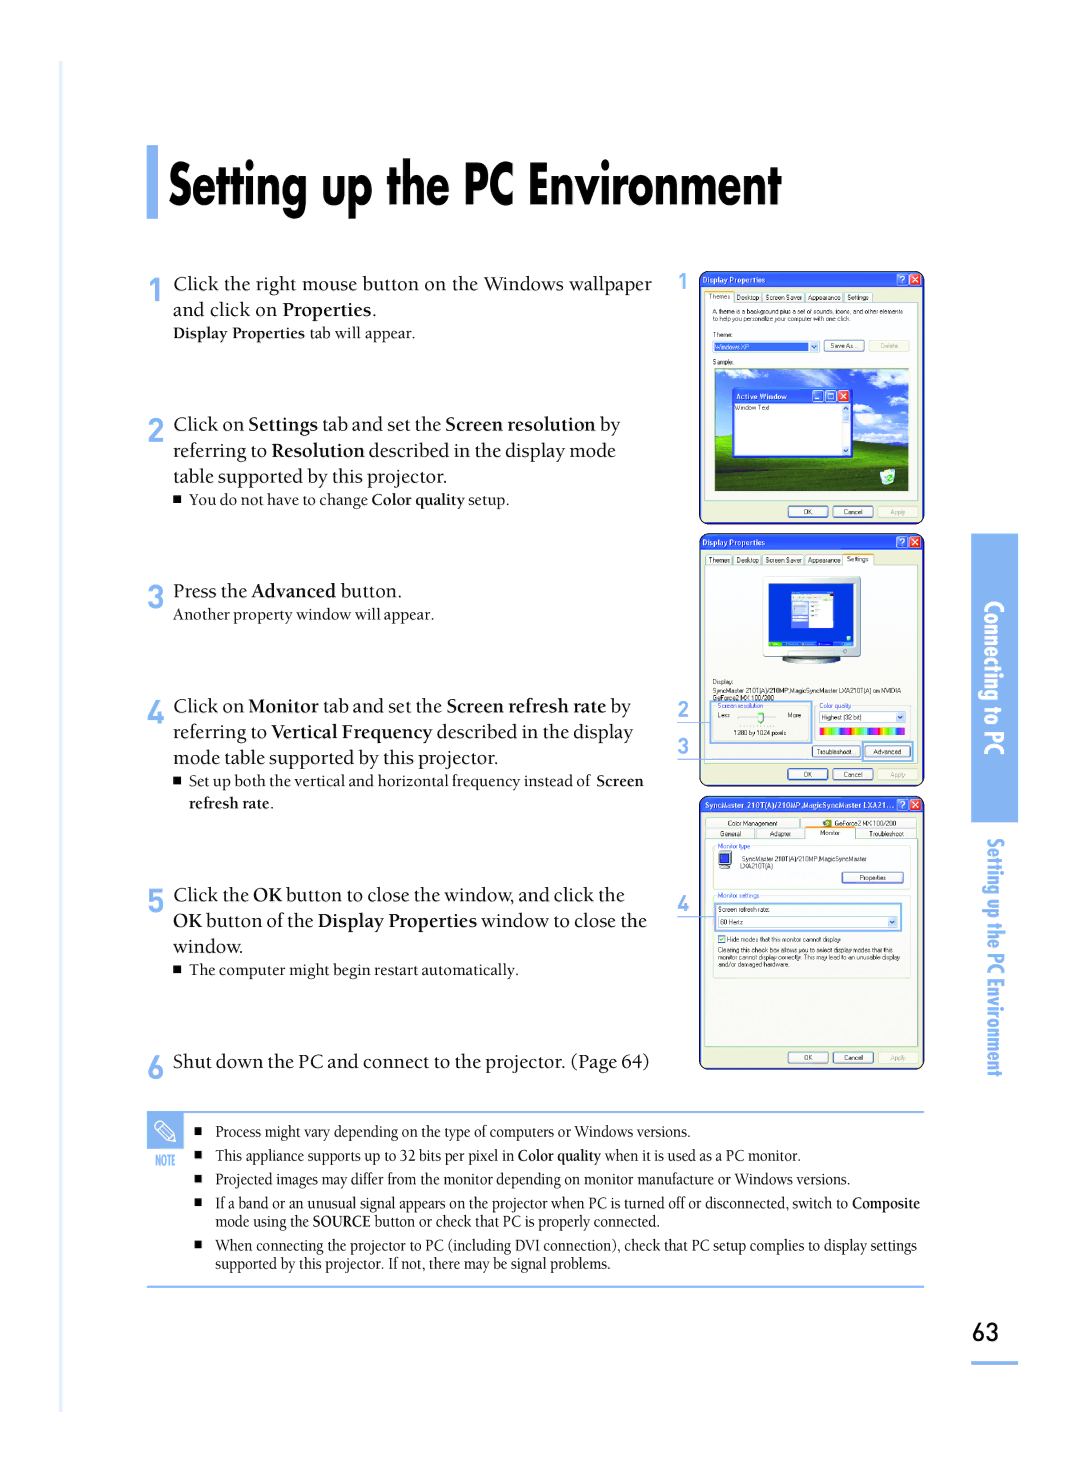
1 Click the right mouse button on the Windows wallpaper 1 and click on Properties.
Display Properties tab will appear.
2Click on Settings tab and set the Screen resolution by referring to Resolution described in the display mode
table supported by this projector.
■ You do not have to change Color quality setup.
3 Press the Advanced button. Another property window will appear.
4 Click on Monitor tab and set the Screen refresh rate by | 2 |
referring to Vertical Frequency described in the display | 3 | |
mode table supported by this projector. | ||
|
■Set up both the vertical and horizontal frequency instead of Screen refresh rate.
5 Click the OK button to close the window, and click the | 4 |
OK button of the Display Properties window to close the window.
■The computer might begin restart automatically.
6Shut down the PC and connect to the projector. (Page 64)
| ■ | Process might vary depending on the type of computers or Windows versions. |
|
| This appliance supports up to 32 bits per pixel in Color quality when it is used as a PC monitor. |
NOTE ■ | ||
■Projected images may differ from the monitor depending on monitor manufacture or Windows versions.
■If a band or an unusual signal appears on the projector when PC is turned off or disconnected, switch to Composite mode using the SOURCE button or check that PC is properly connected.
■When connecting the projector to PC (including DVI connection), check that PC setup complies to display settings supported by this projector. If not, there may be signal problems.
Connecting to PC
Setting up the PC Environment
63