2-19 Connecting to a Network
![]() This product can use network functions. Refer to the following Network connection method.
This product can use network functions. Refer to the following Network connection method.
2-19-1. Connecting to a Dynamic IP (DHCP) Network
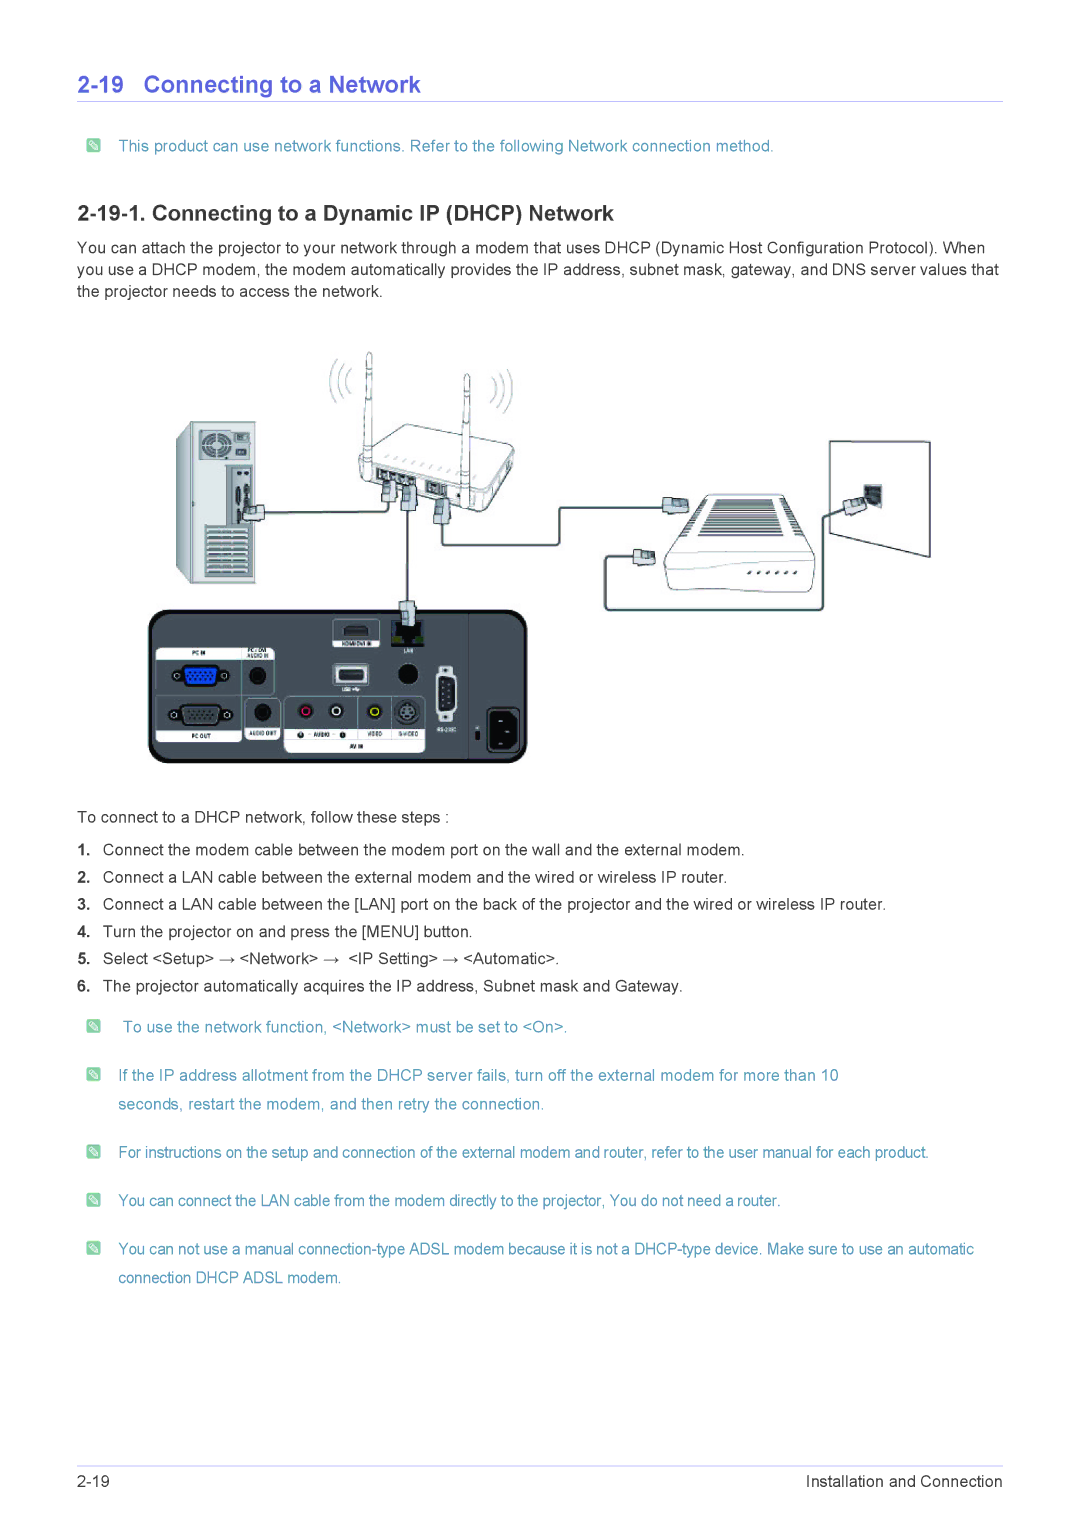
You can attach the projector to your network through a modem that uses DHCP (Dynamic Host Configuration Protocol). When you use a DHCP modem, the modem automatically provides the IP address, subnet mask, gateway, and DNS server values that the projector needs to access the network.
To connect to a DHCP network, follow these steps :
1.Connect the modem cable between the modem port on the wall and the external modem.
2.Connect a LAN cable between the external modem and the wired or wireless IP router.
3.Connect a LAN cable between the [LAN] port on the back of the projector and the wired or wireless IP router.
4.Turn the projector on and press the [MENU] button.
5.Select <Setup> → <Network> → <IP Setting> → <Automatic>.
6.The projector automatically acquires the IP address, Subnet mask and Gateway.
To use the network function, <Network> must be set to <On>.
![]() If the IP address allotment from the DHCP server fails, turn off the external modem for more than 10 seconds, restart the modem, and then retry the connection.
If the IP address allotment from the DHCP server fails, turn off the external modem for more than 10 seconds, restart the modem, and then retry the connection.
![]() For instructions on the setup and connection of the external modem and router, refer to the user manual for each product.
For instructions on the setup and connection of the external modem and router, refer to the user manual for each product.
![]() You can connect the LAN cable from the modem directly to the projector, You do not need a router.
You can connect the LAN cable from the modem directly to the projector, You do not need a router.
![]() You can not use a manual
You can not use a manual
Installation and Connection |
