2-17-2. Connecting to a Static IP Network
You can attach the projector to a network that uses a Static IP address, which corresponds to using a dedicated lease line. If your network uses Static IP addresses, you must get the IP address, subnet mask, and gateway values from your Internet Service Provider (ISP), turn on the Network function in the projector's Menu, and then enter the values into the Network function manually.
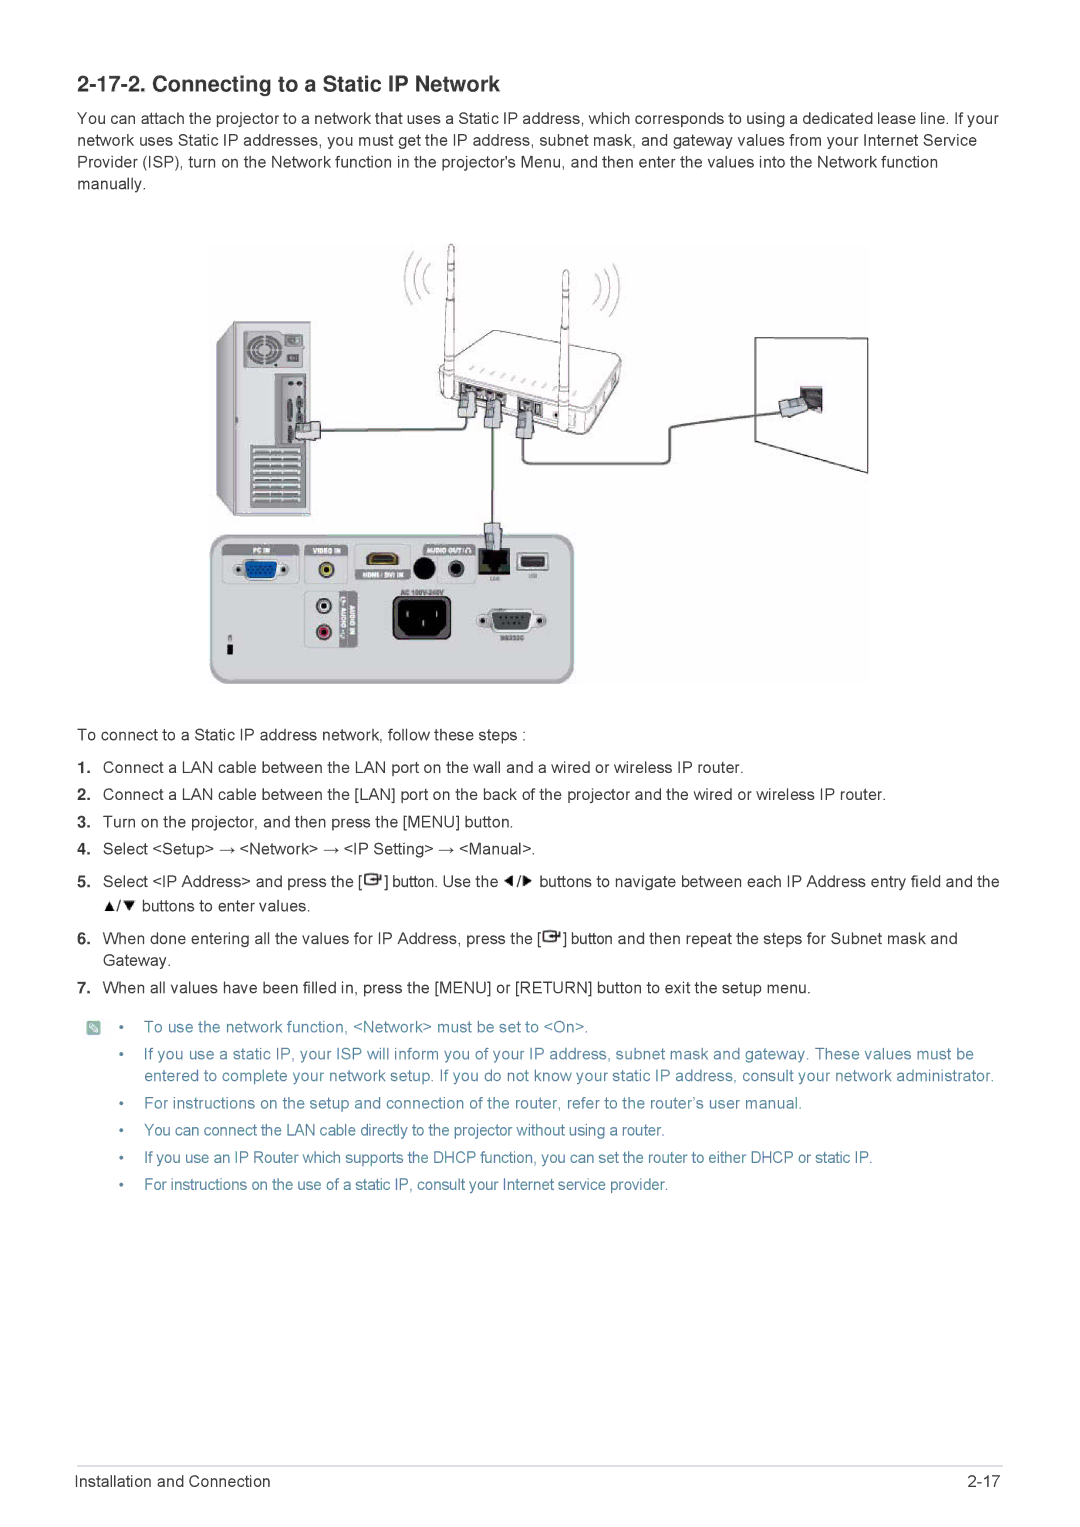
To connect to a Static IP address network, follow these steps :
1.Connect a LAN cable between the LAN port on the wall and a wired or wireless IP router.
2.Connect a LAN cable between the [LAN] port on the back of the projector and the wired or wireless IP router.
3.Turn on the projector, and then press the [MENU] button.
4.Select <Setup> → <Network> → <IP Setting> → <Manual>.
5.Select <IP Address> and press the [![]() ] button. Use the
] button. Use the ![]() /
/![]() buttons to navigate between each IP Address entry field and the
buttons to navigate between each IP Address entry field and the
![]() /
/![]() buttons to enter values.
buttons to enter values.
6.When done entering all the values for IP Address, press the [![]() ] button and then repeat the steps for Subnet mask and Gateway.
] button and then repeat the steps for Subnet mask and Gateway.
7.When all values have been filled in, press the [MENU] or [RETURN] button to exit the setup menu.
 • To use the network function, <Network> must be set to <On>.
•If you use a static IP, your ISP will inform you of your IP address, subnet mask and gateway. These values must be entered to complete your network setup. If you do not know your static IP address, consult your network administrator.
•For instructions on the setup and connection of the router, refer to the router’s user manual.
•You can connect the LAN cable directly to the projector without using a router.
•If you use an IP Router which supports the DHCP function, you can set the router to either DHCP or static IP.
•For instructions on the use of a static IP, consult your Internet service provider.
Installation and Connection |
