Storing Channels Automatically
TV | Channel |
Auto Store | √ |
Manual Store | √ |
Add/Delete | √ |
Sort | √ |
Child Lock | √ |
Fine Tune | √ |
▼ More |
|
Move | Enter | Return |
|
| |
|
| |
TV | Auto Store | |
Area | : Off | |
|
| Asia W/Europe |
Search |
| CIS E/Europe |
|
| |
|
| China |
|
| Hongkong/UK |
|
| Australia |
|
| NZL/Indonesia |
|
| ▼ |
Move | Enter | Return |
|
| |
|
| |
TV | Auto Store | |
Area | : Asia W/Europe √ | |
Search√
Move | Enter | Return |
|
|
|
|
|
|
| Search |
|
| Start |
|
| Enter | Return |
|
|
|
|
|
|
| Search |
|
|
| P 1 |
|
| C |
| Stop | 65 MHz |
| Enter | Return |
|
|
|
TVSort
Prog. Channel
1 C - -
2C - -
3C - -
4C - -
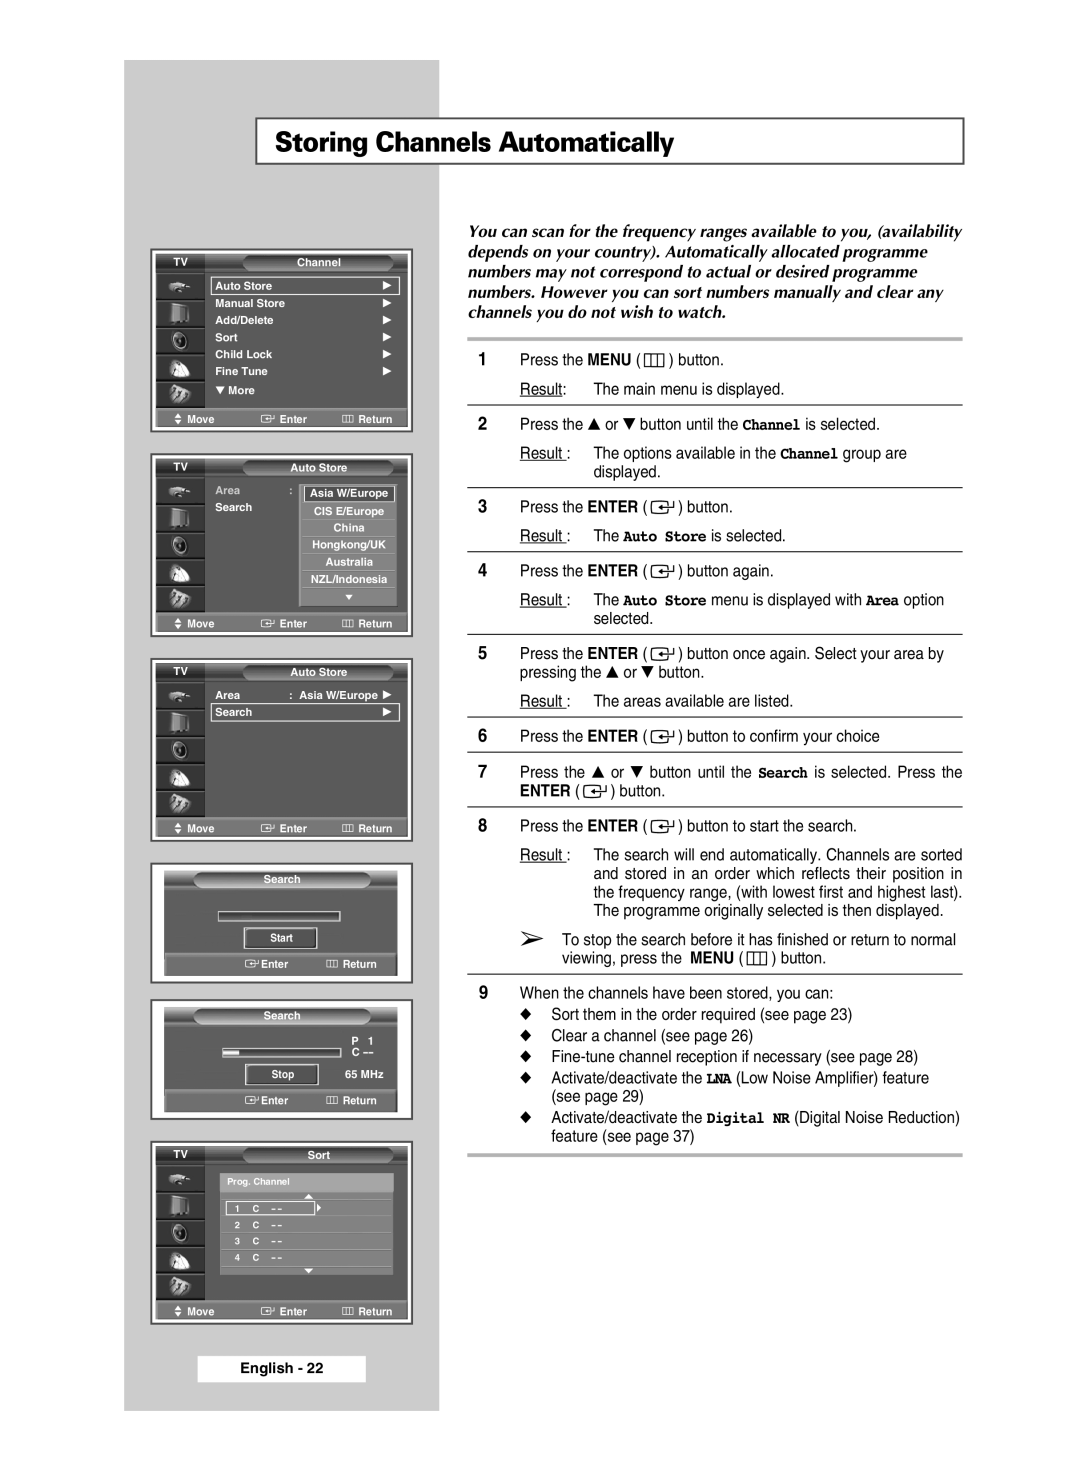
You can scan for the frequency ranges available to you, (availability depends on your country). Automatically allocated programme numbers may not correspond to actual or desired programme numbers. However you can sort numbers manually and clear any channels you do not wish to watch.
1Press the MENU ( ![]() ) button.
) button.
Result: The main menu is displayed.
2Press the ▲ or ▼ button until the Channel is selected.
Result : The options available in the Channel group are displayed.
3Press the ENTER ( ![]()
![]() ) button.
) button.
Result : The Auto Store is selected.
4Press the ENTER ( ![]()
![]() ) button again.
) button again.
Result : The Auto Store menu is displayed with Area option selected.
5Press the ENTER ( ![]()
![]() ) button once again. Select your area by pressing the ▲ or ▼ button.
) button once again. Select your area by pressing the ▲ or ▼ button.
Result : The areas available are listed.
6Press the ENTER ( ![]()
![]() ) button to confirm your choice
) button to confirm your choice
7Press the ▲ or ▼ button until the Search is selected. Press the ENTER ( ![]()
![]() ) button.
) button.
8Press the ENTER ( ![]()
![]() ) button to start the search.
) button to start the search.
Result : The search will end automatically. Channels are sorted and stored in an order which reflects their position in the frequency range, (with lowest first and highest last). The programme originally selected is then displayed.
➢To stop the search before it has finished or return to normal viewing, press the MENU ( ![]() ) button.
) button.
9When the channels have been stored, you can: ◆ Sort them in the order required (see page 23) ◆ Clear a channel (see page 26)
◆
(see page 29)
◆ Activate/deactivate the Digital NR (Digital Noise Reduction) feature (see page 37)
Move ![]()
![]() Enter
Enter ![]() Return
Return
