 MAINTENANCE
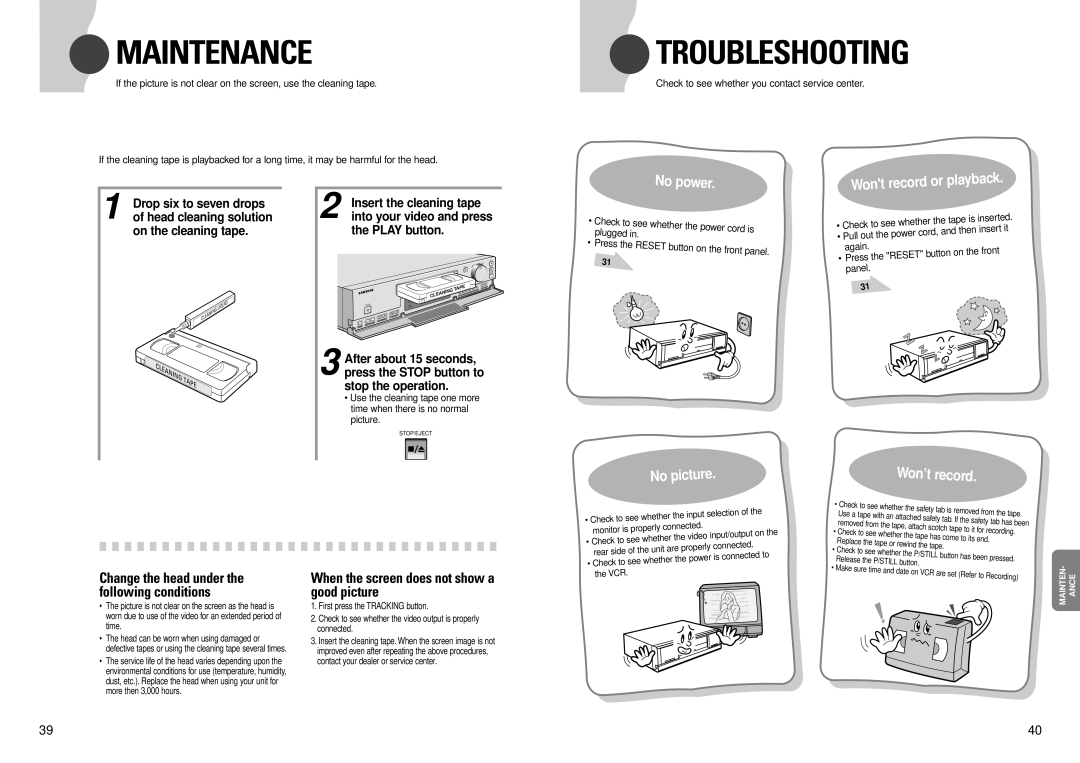
If the picture is not clear on the screen, use the cleaning tape.
If the cleaning tape is playbacked for a long time, it may be harmful for the head.
 TROUBLESHOOTING
Check to see whether you contact service center.
No power.
| . |
Won't record | or playback |
|
1 Drop six to seven drops of head cleaning solution on the cleaning tape.
LIQUID
CLEANING
CLEANING | TAPE |
|
Insert the cleaning tape |
| |||||
2 into your video and press | ||||||
the PLAY button. |
|
|
|
|
| |
|
|
|
|
|
| REC |
|
|
|
|
| F.F |
|
|
|
|
| PLAY | REW | P/STILL |
|
|
|
|
|
| REC CHECK |
|
|
| STOP/EJECT |
|
| |
|
| TAPE | CLEAR | RECLOCK | ||
|
|
|
|
| HIGHPICTURE |
|
| CLEANING |
|
|
| RESET |
|
|
|
| ON COUNT | CNT.MEMO |
| |
|
|
| AUDIO |
|
| |
|
| REV |
|
|
| |
| REC LOCK |
|
|
|
|
|
POWER | HIGH |
|
|
|
|
|
| PICTURE |
|
|
|
|
|
| TIME MODE |
|
|
|
|
|
| TRACKING/SET |
|
|
|
|
|
MENU |
|
|
|
|
|
|
3 After about 15 seconds, press the STOP button to stop the operation.
•Use the cleaning tape one more time when there is no normal picture.
STOP/EJECT
•Check to see whether the power cord is plugged in.
•Press the RESET button on the front panel.
31
•Check to see whether the tape is inserted.
•Pull out the power cord, and then insert it
. |
| |
again | button on the front | |
• Press the "RESET" | ||
| ||
. |
| |
panel |
| |
31 |
|
Change the head under the following conditions
•The picture is not clear on the screen as the head is worn due to use of the video for an extended period of time.
•The head can be worn when using damaged or defective tapes or using the cleaning tape several times.
•The service life of the head varies depending upon the environmental conditions for use (temperature, humidity, dust, etc.). Replace the head when using your unit for more then 3,000 hours.
When the screen does not show a good picture
1.First press the TRACKING button.
2.Check to see whether the video output is properly connected.
3.Insert the cleaning tape. When the screen image is not improved even after repeating the above procedures, contact your dealer or service center.
|
|
|
|
| . |
|
|
| |
No picture |
|
|
| ||||||
• Check to see whether | the input selection | of the | |||||||
|
|
| |||||||
|
| . |
|
|
|
| |||
|
|
|
|
|
|
|
| ||
monitor is properly | connected |
|
| on the | |||||
|
| the video input/output | |||||||
• Check to see whether |
| ||||||||
|
|
| |||||||
|
|
|
| . |
|
| |||
rear side of the unit are | properly | connected |
| to | |||||
|
|
| |||||||
• Check to see whether | the power is connected | ||||||||
| |||||||||
|
|
|
|
|
| ||||
. |
|
|
|
|
|
|
|
| |
the VCR |
|
|
|
|
|
|
|
| |
|
|
| Won’t record. |
| ||||
• |
|
|
|
|
|
|
|
|
Check to see whether the |
|
|
|
| ||||
Use a tape with an |
| safety tab is removed | from the tape. | |||||
attached safety tab. If the |
| |||||||
removed from |
| safety tab has been | ||||||
the tape, attach |
|
| ||||||
|
| scotch tape to it for recording. | ||||||
• Check to see whether the |
| |||||||
|
|
|
| tape has |
|
|
| |
Replace the |
|
|
| come to its end. | ||||
• | tape or rewind the tape. |
|
|
| ||||
Check to see whether the | P/STILL button | has been pressed. | ||||||
Release the |
|
|
| |||||
P/STILL button. |
| |||||||
• Make |
|
|
|
| ||||
|
|
|
|
|
|
|
| |
sure time and date on VCR |
|
|
| |||||
|
|
|
|
| are set (Refer to Recording) | |||
MAINTEN- ANCE
39 | 40 |
