Installing the CD-R/RW Drive
To install your CD-R/RW drive in the PC, proceed as follows.
1 Make sure that the PC is powered off and disconnected from any power source.
2 If necessary, attach a horizontal bracket to both sides of the drive.
●Use of the brackets depends on your computer
model; you can purchase these accessories separately from your computer dealer.
3 Remove the cover from a free expansion slot and install the
● If you have no free expansion slot, install the drive in place of the diskette drive.
Connecting the Cables
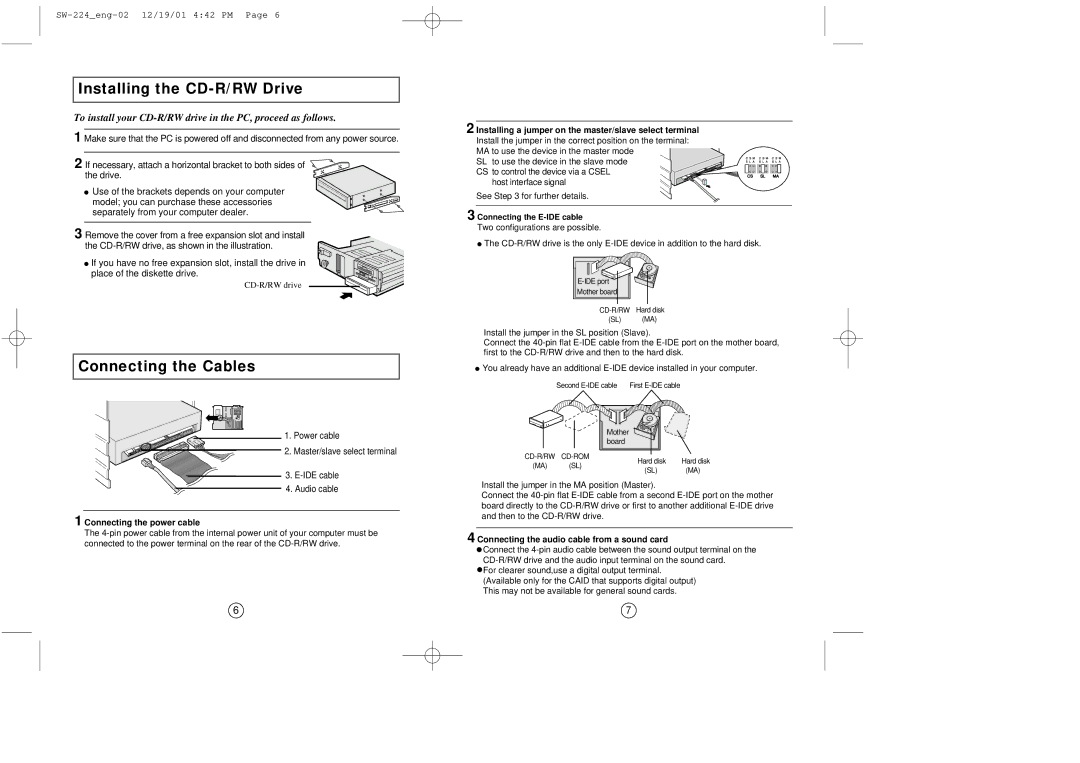
2 Installing a jumper on the master/slave select terminal
Install the jumper in the correct position on the terminal:
MA to use the device in the master mode
SL to use the device in the slave mode CS to control the device via a CSEL
host interface signal
See Step 3 for further details.
3 Connecting the E-IDE cable Two configurations are possible.
●The
Mother board |
(SL) (MA)
Install the jumper in the SL position (Slave).
Connect the
●You already have an additional
Second | First |
1. Power cable
2. Master/slave select terminal
3.
(MA) (SL)
Mother |
board |
Hard disk | Hard disk |
(SL) | (MA) |
4. Audio cable
1 Connecting the power cable
The
Install the jumper in the MA position (Master).
Connect the
4 Connecting the audio cable from a sound card
![]() Connect the
Connect the
![]() For clearer sound,use a digital output terminal. (Available only for the CAID that supports digital output) This may not be available for general sound cards.
For clearer sound,use a digital output terminal. (Available only for the CAID that supports digital output) This may not be available for general sound cards.
6 | 7 |