DR300 Quick Guide | Pg 18 |
|
|
Power Supply
Setting power supply
Power Cable Outlet
Plug in power cable to the main body socket then the outlet socket.
Connect Touch Screen To Printer Unit
Touch Screen comes with a cable to connect to printer main body. Plug in this connecting cable to the connector (KB) at the back of printer main body as shown below. Hold printer main body with one hand when plugging in the connecting cable.
DR300 Quick Guide | Pg 15 |
|
|
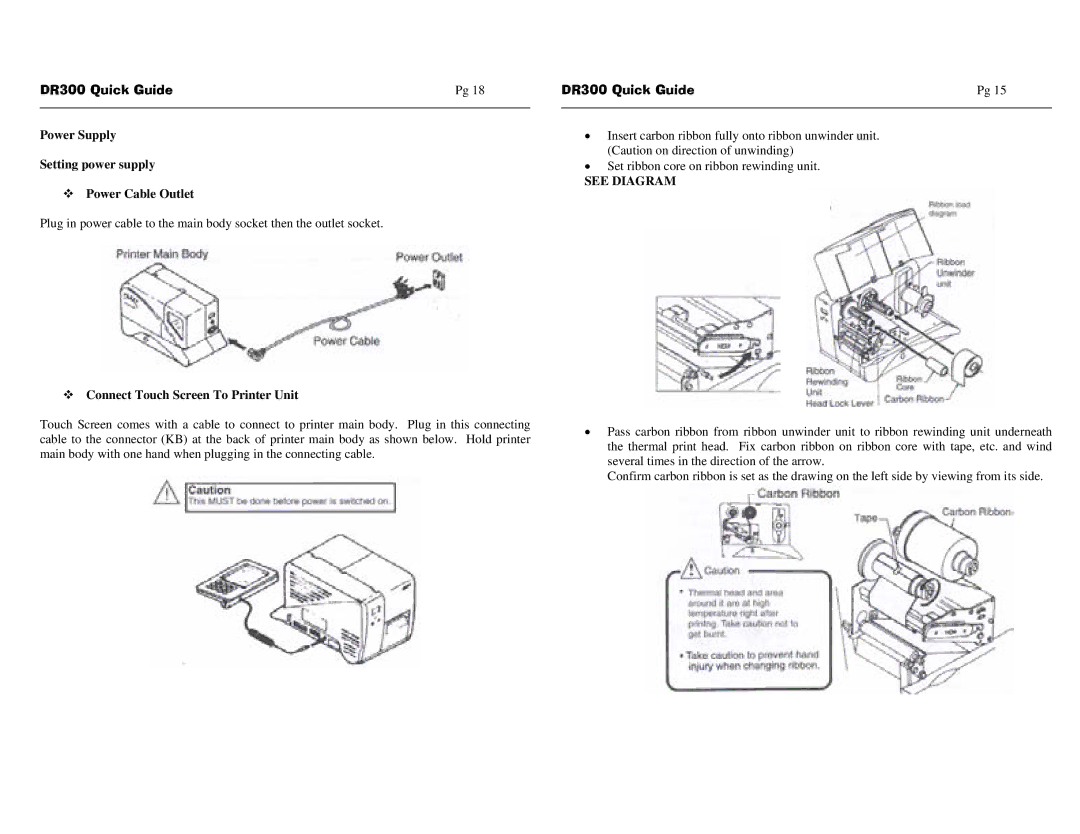
•Insert carbon ribbon fully onto ribbon unwinder unit. (Caution on direction of unwinding)
•Set ribbon core on ribbon rewinding unit.
SEE DIAGRAM
•Pass carbon ribbon from ribbon unwinder unit to ribbon rewinding unit underneath the thermal print head. Fix carbon ribbon on ribbon core with tape, etc. and wind several times in the direction of the arrow.
Confirm carbon ribbon is set as the drawing on the left side by viewing from its side.