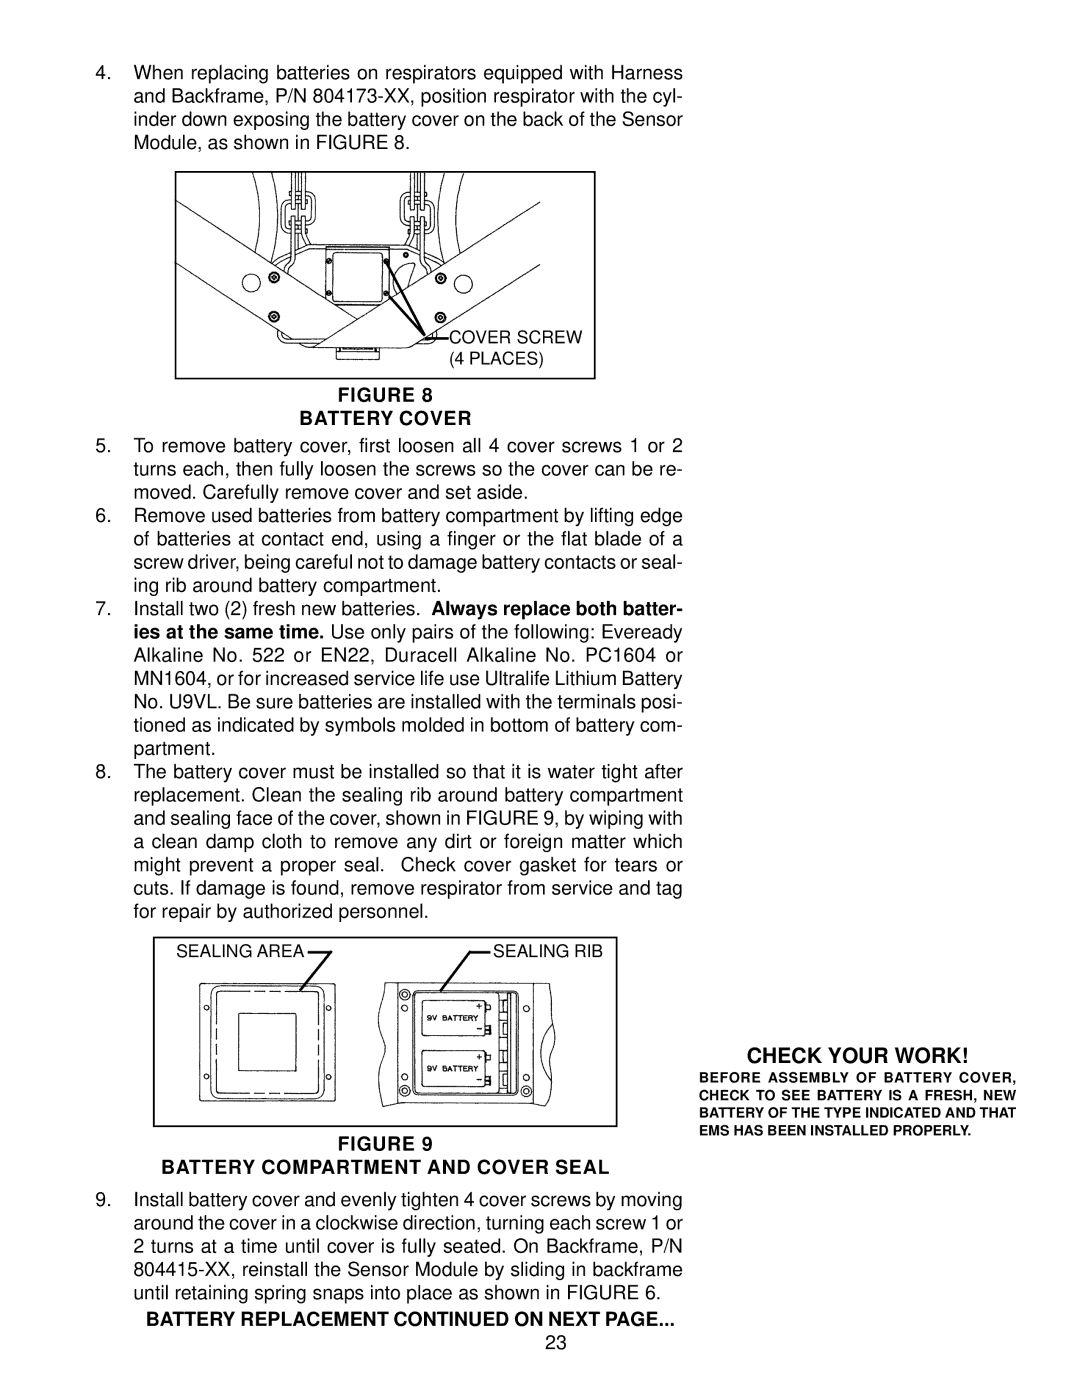
4.When replacing batteries on respirators equipped with Harness and Backframe, P/N
COVER SCREW (4 PLACES)
FIGURE 8
BATTERY COVER
5.To remove battery cover, first loosen all 4 cover screws 1 or 2 turns each, then fully loosen the screws so the cover can be re- moved. Carefully remove cover and set aside.
6.Remove used batteries from battery compartment by lifting edge of batteries at contact end, using a finger or the flat blade of a screw driver, being careful not to damage battery contacts or seal- ing rib around battery compartment.
7.Install two (2) fresh new batteries. Always replace both batter- ies at the same time. Use only pairs of the following: Eveready Alkaline No. 522 or EN22, Duracell Alkaline No. PC1604 or MN1604, or for increased service life use Ultralife Lithium Battery No. U9VL. Be sure batteries are installed with the terminals posi- tioned as indicated by symbols molded in bottom of battery com- partment.
8.The battery cover must be installed so that it is water tight after replacement. Clean the sealing rib around battery compartment and sealing face of the cover, shown in FIGURE 9, by wiping with a clean damp cloth to remove any dirt or foreign matter which might prevent a proper seal. Check cover gasket for tears or cuts. If damage is found, remove respirator from service and tag for repair by authorized personnel.
SEALING AREA | SEALING RIB |
FIGURE 9
BATTERY COMPARTMENT AND COVER SEAL
9.Install battery cover and evenly tighten 4 cover screws by moving around the cover in a clockwise direction, turning each screw 1 or 2 turns at a time until cover is fully seated. On Backframe, P/N
BATTERY REPLACEMENT CONTINUED ON NEXT PAGE...
CHECK YOUR WORK!
BEFORE ASSEMBLY OF BATTERY COVER, CHECK TO SEE BATTERY IS A FRESH, NEW BATTERY OF THE TYPE INDICATED AND THAT EMS HAS BEEN INSTALLED PROPERLY.
23