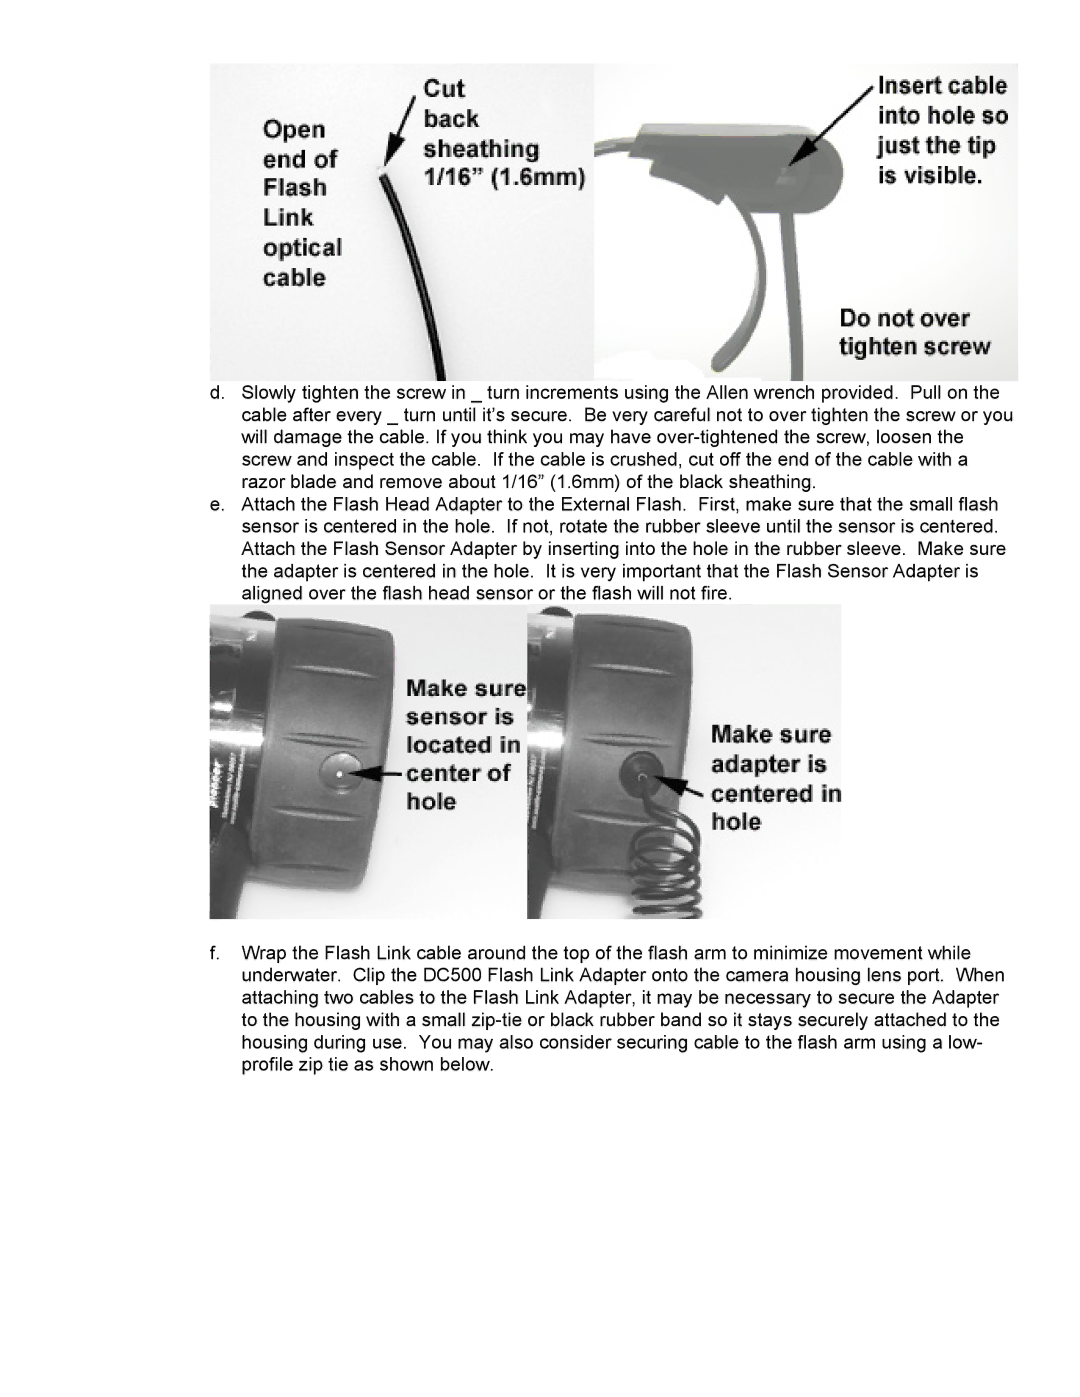
d.Slowly tighten the screw in _ turn increments using the Allen wrench provided. Pull on the cable after every _ turn until it’s secure. Be very careful not to over tighten the screw or you will damage the cable. If you think you may have
e.Attach the Flash Head Adapter to the External Flash. First, make sure that the small flash sensor is centered in the hole. If not, rotate the rubber sleeve until the sensor is centered. Attach the Flash Sensor Adapter by inserting into the hole in the rubber sleeve. Make sure the adapter is centered in the hole. It is very important that the Flash Sensor Adapter is aligned over the flash head sensor or the flash will not fire.
f.Wrap the Flash Link cable around the top of the flash arm to minimize movement while underwater. Clip the DC500 Flash Link Adapter onto the camera housing lens port. When attaching two cables to the Flash Link Adapter, it may be necessary to secure the Adapter to the housing with a small
