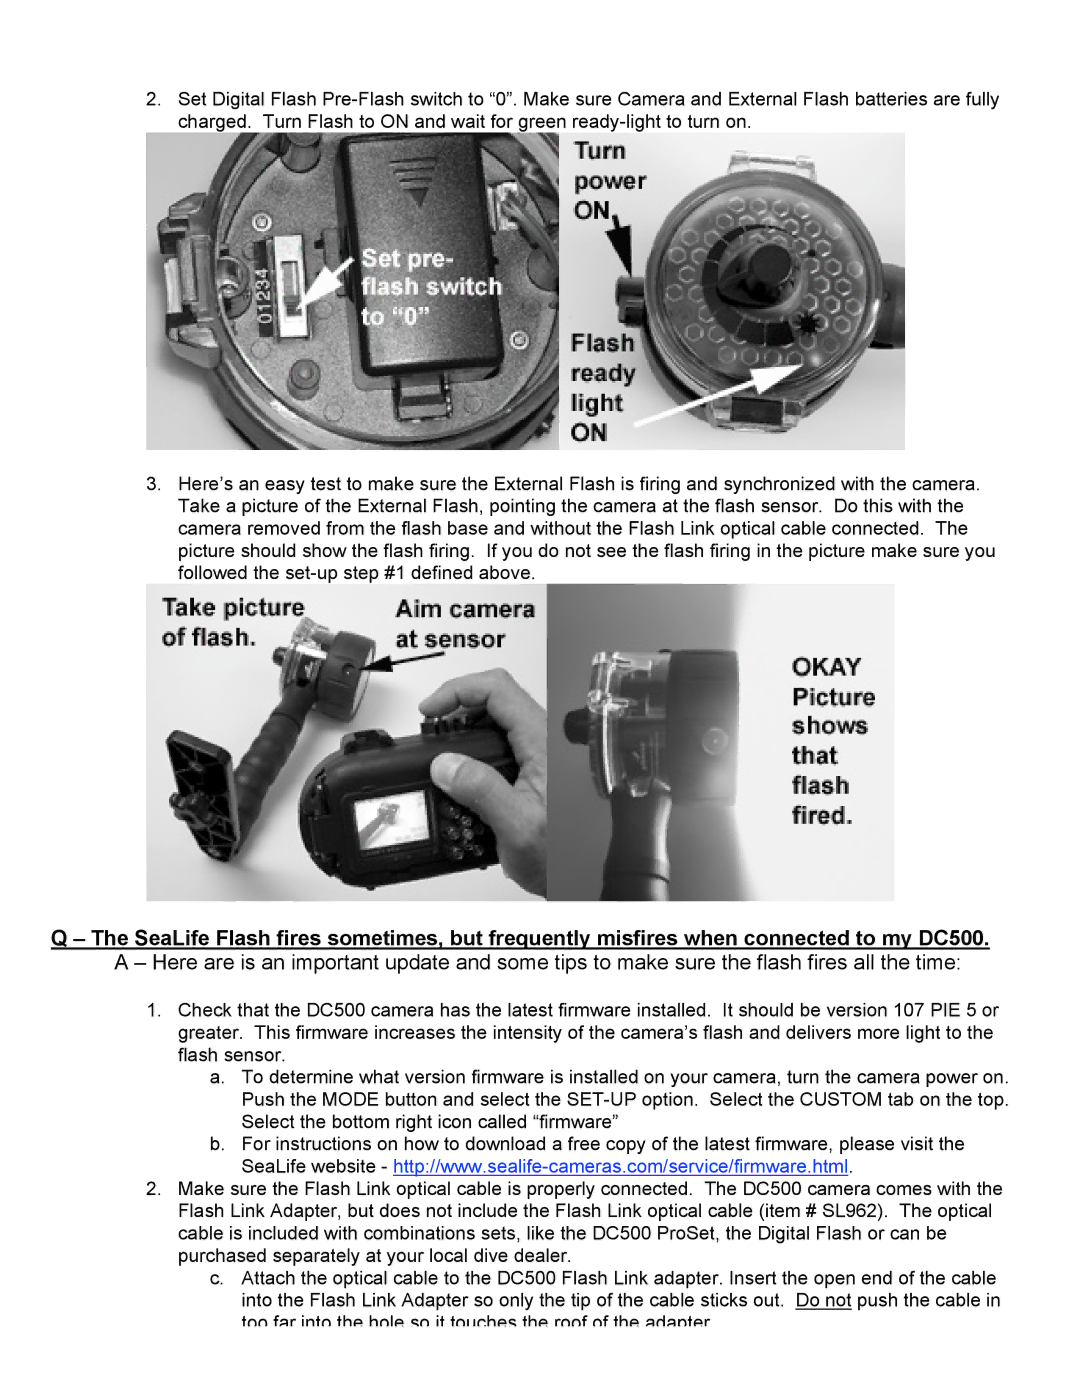
2.Set Digital Flash
3.Here’s an easy test to make sure the External Flash is firing and synchronized with the camera. Take a picture of the External Flash, pointing the camera at the flash sensor. Do this with the camera removed from the flash base and without the Flash Link optical cable connected. The picture should show the flash firing. If you do not see the flash firing in the picture make sure you followed the
Q – The SeaLife Flash fires sometimes, but frequently misfires when connected to my DC500.
A – Here are is an important update and some tips to make sure the flash fires all the time:
1.Check that the DC500 camera has the latest firmware installed. It should be version 107 PIE 5 or greater. This firmware increases the intensity of the camera’s flash and delivers more light to the flash sensor.
a.To determine what version firmware is installed on your camera, turn the camera power on. Push the MODE button and select the
b.For instructions on how to download a free copy of the latest firmware, please visit the SeaLife website -
2.Make sure the Flash Link optical cable is properly connected. The DC500 camera comes with the Flash Link Adapter, but does not include the Flash Link optical cable (item # SL962). The optical cable is included with combinations sets, like the DC500 ProSet, the Digital Flash or can be purchased separately at your local dive dealer.
c.Attach the optical cable to the DC500 Flash Link adapter. Insert the open end of the cable into the Flash Link Adapter so only the tip of the cable sticks out. Do not push the cable in too far into the hole so it touches the roof of the adapter.
