Installing Pin End Blades
NOTE: The saw come s from the factory already set up for pin end blades.
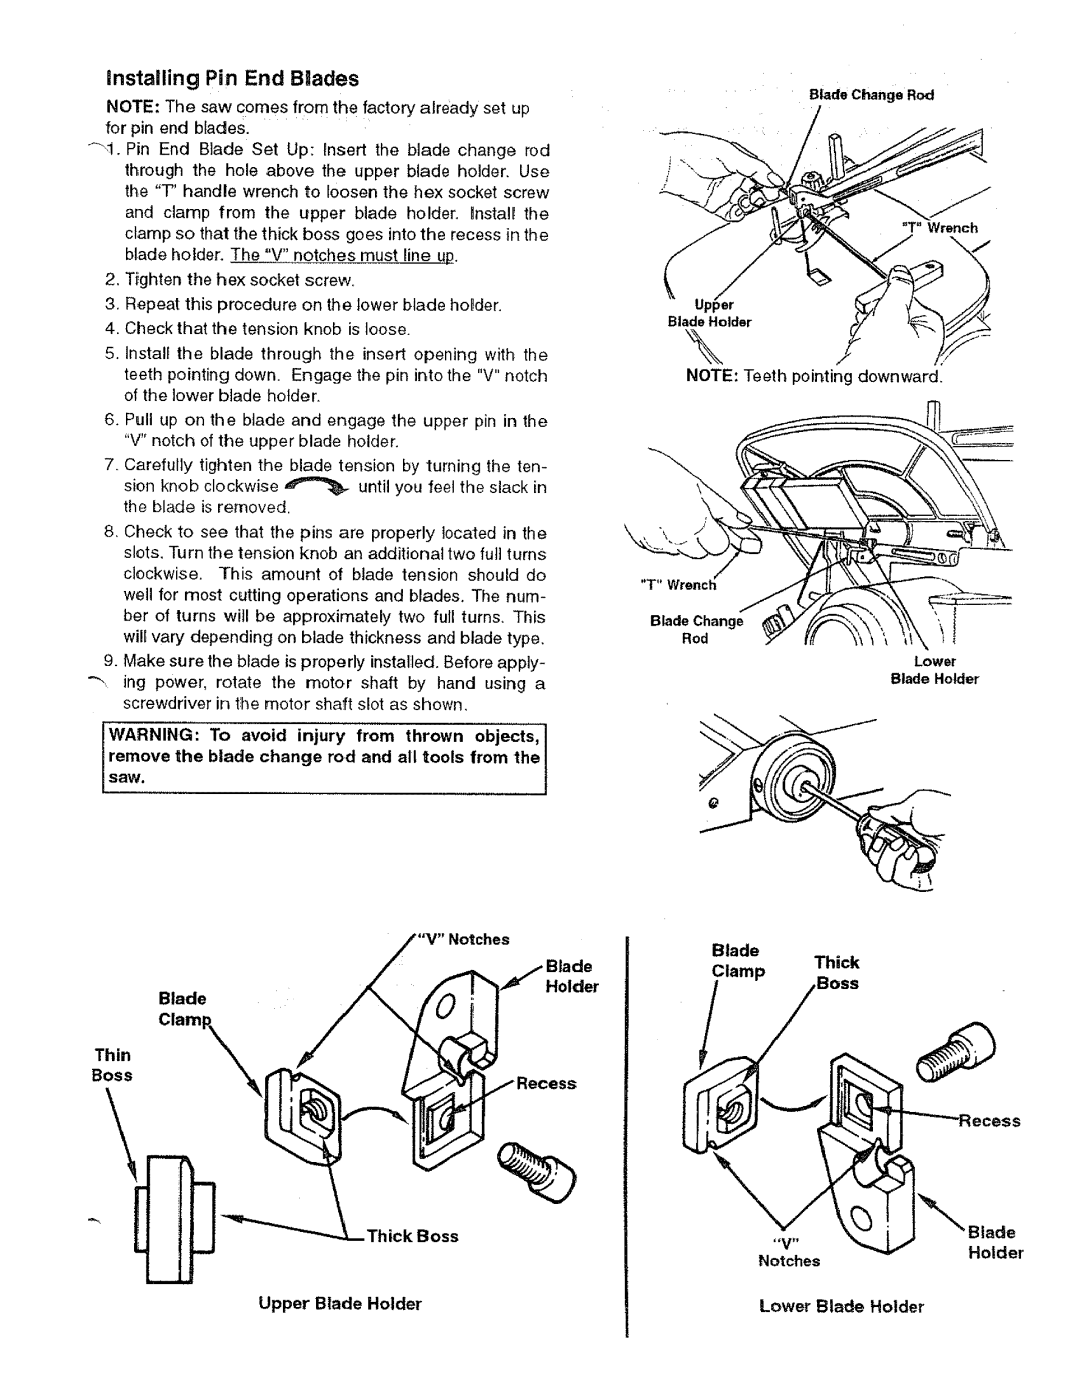
4i, Pin End Blade Set Up: Insert the blade change rod through the hole above the upper blade holder, Use the "T" handle wrench to loosen the hex socket screw and clamp from the upper blade holder, Install the clamp so that the thick boss goes into the recess in the blade holder. The "V" notches must line up.
2.Tighten the hex socket screw,
3.Repeat: this procedure on the lower blade holder.
4.Check that the tension knob is loose.
5.Install the blade through the insert opening with the
teeth pointing down. Engage the pin ir_to the "V" notch of the lower blade holder.
6.Pull up on the blade and engage the upper pin in the "V" notch of the upper blade holder.
7.Carefully tighten the blade tension by turning the ten-
sion knob clockwise _ | until you feel the slack in |
the blade is removed. |
|
8, Check to see that the pins are properly located in the slots, Turn the tension knob an additional two full turns clockwise. This amount of blade tension should do well for most cutting operations and blades. The num- ber of turns will be approximately two full turns. This will vary depending on blade thickness and blade type.
9.Make sure the blade is properly installed, Before apply-
screwdriver in t:he motor shaft slot as shown,
WARNING: | To avoid injury from thrown | objects,[ |
remove the | blade change rod and all toots | from the[ |
saw. |
| t |
|
|
Notches
Blade
Holder
Blade
BossThin Clamp_
thick Boss
Blade Change Rod
Upper
Blade Holder
\
NOTE: Teeth pointing downward.
"T" Wrenct
Blade Change
Rod
Lower
Blade Holder
Blade
Clamp Thick
,Boss
Notches
Holder
Upper Blade Holder | Lower Blade Holder |